
Oven Baked Chicken Breasts
I know that many people struggle to cook perfectly juicy chicken breast; I was once one of them. But today, after mastering the method, I’ll help you learn how to make oven-baked chicken breasts that turn out great every time. This is a simple recipe with basic ingredients, ready in just 30 minutes, and that delivers every time!

Since they’re so easy to make, I always cook a few on Sunday to have for the week. This is such a simple yet wholesome hack that will help you eat more nutritious meals. I use roasted chicken breasts in many different meals. I add them to rice bowls, sandwiches, and wraps; they are great in my Mexican salad and this crack chicken casserole. Just think of all the meal planning you can do with them. Also, since chicken breasts are so inexpensive, this will save a ton of money.
Table of contents
The combination of tender, juicy chicken with a perfectly seasoned crust never gets old. I add moisture to the meat by quickly brining it; after that, I season it and bake it to perfection. The result is succulent meat that can be served with a variety of side dishes. This is a great, fuss-free, and cost-effective recipe to add to your meal plan. So, if you are looking for a reliable recipe that yields incredibly delicious results, this one is a must-try.

Why you will love this recipe
- Perfectly juicy chicken breasts: No worries about dry chicken with this recipe! I’m sharing all my tips and tricks to get the most succulent meat every time.
- Less than 30 minutes: Have dinner on the table in 30 minutes from start to finish. This recipe is ideal for busy weeknights.
- One-pan meal: There’s only one pan to clean from this delicious dish.
- Save some money: It costs less than $20 to make a whole meal for six people. Also, the recipe is so versatile that you can season the meat as you please and use the leftovers in a variety of dishes.
What you will need

- Poultry: I go with boneless, skinless chicken breasts.
- Butter or olive oil: Both work well, but butter will give this dish the best flavor, as well as some juiciness and richness. Since chicken breasts are generally lean, butter works well because it adds tenderness.
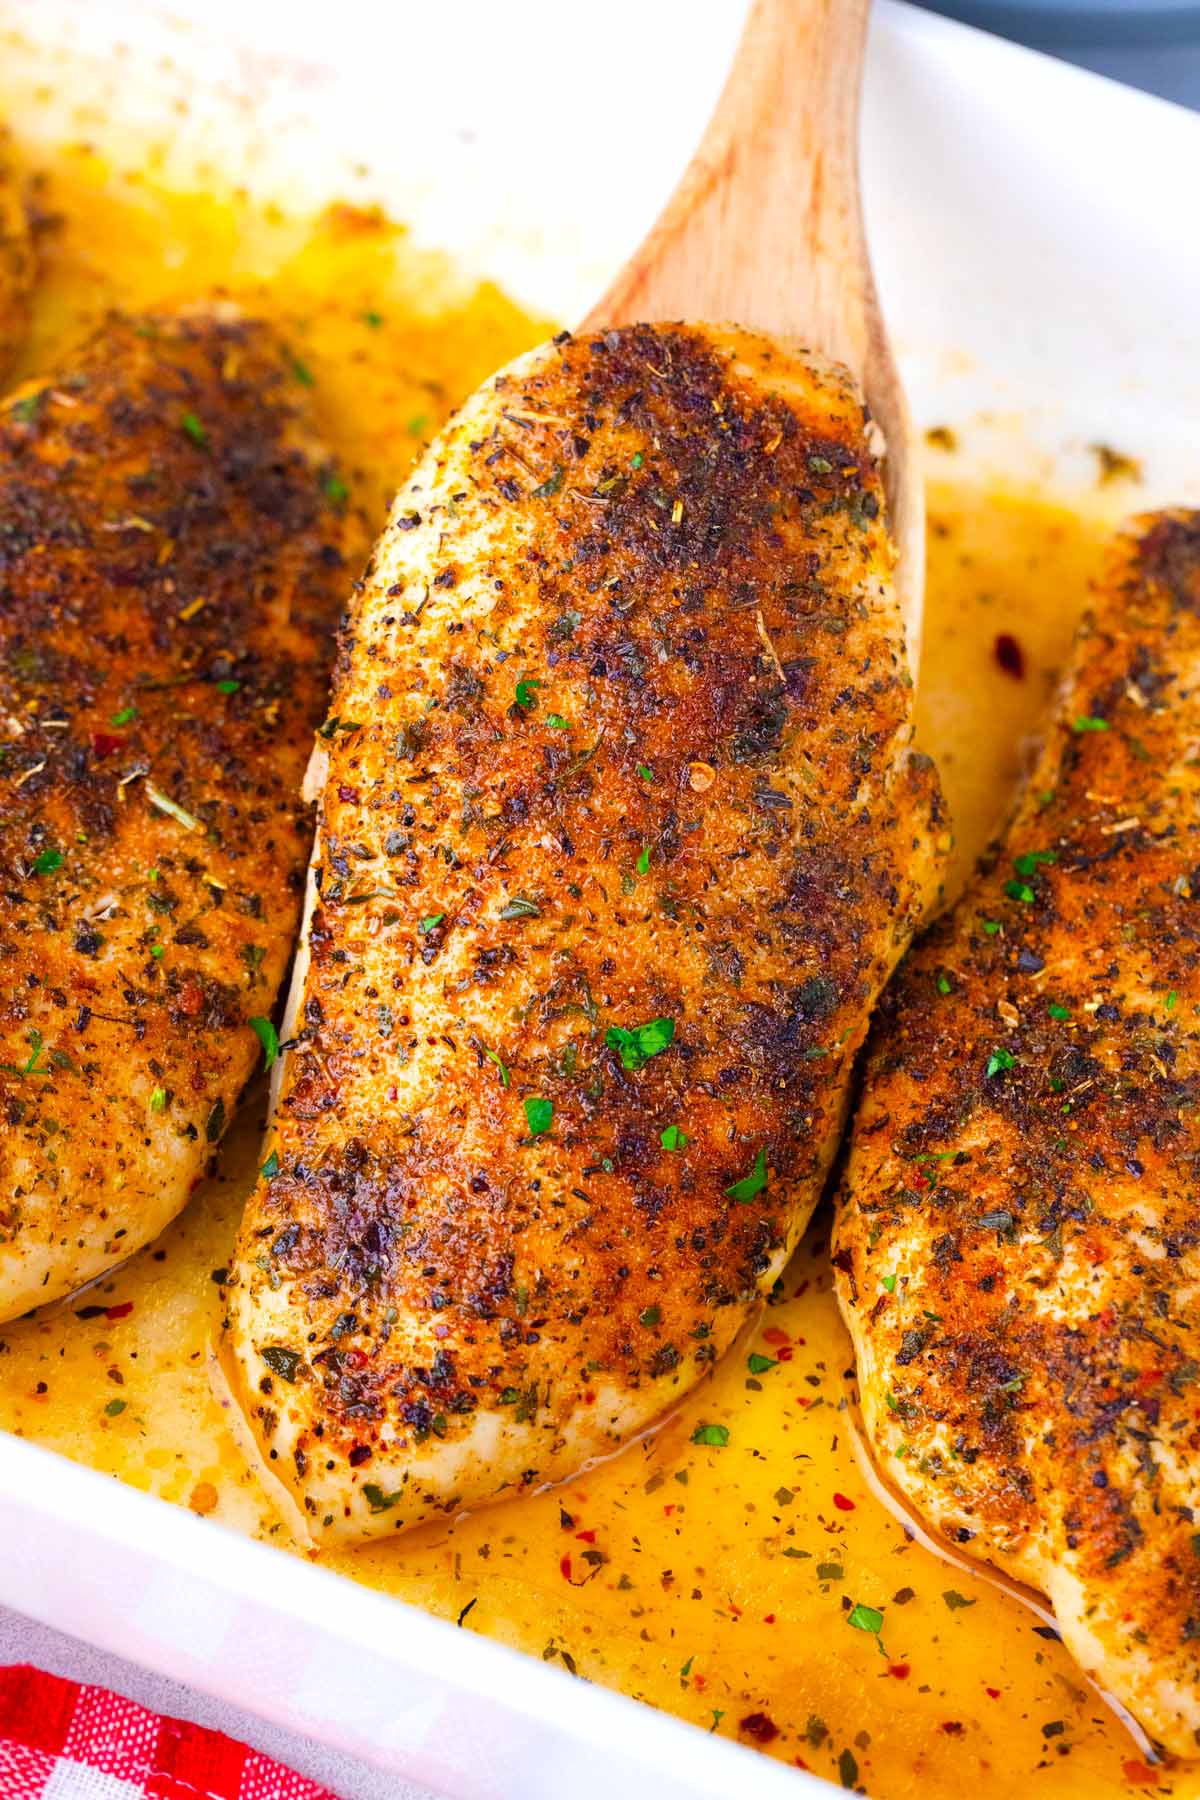
- Seasoning: I use a mixture of garlic powder, Italian seasoning, paprika, salt, and black pepper. However, this is very preferential, and you can mix it up with your favorite seasonings. For example, you could add rosemary, thyme, dried basil, and red chili peppers if you prefer.
- Salt and Water: To make the meat tender and juicy, I soak it for at least 30 minutes or a few hours in a simple brine. For this, I mix lukewarm water and kosher salt. This step is optional, but I strongly recommend it.
- Meat Thermometer: This is optional, but it is a handy tool to have in the kitchen. It is the best way to ensure that the meat is neither overcooked nor undercooked. Also, it is not expensive, so I highly recommend getting one.
How to brine chicken breasts
I highly recommend not skipping this step, as brining will result in the most tender and juicy meat. This can effectively be done in as little as 15 to 25 minutes. Although everything over 30 minutes is a plus. To brine the meat, follow the below steps:
Pour 4 cups of lukewarm water (about 90°F to 100°F) into a large bowl. Then, add 1/4 cup of salt and stir until the mixture is combined.

Add 3-4 chicken breasts to the brine and let them sit for at least 15-30 minutes. If you’re doing this in advance, cover the meat and refrigerate the bowl of chicken and brine for 4 to 6 hours.

When ready, discard the brine. Then, rinse each chicken piece under cold water. Then, pat dry with paper towels. It’s that easy, yet it makes a massive difference in the texture and juiciness of the meat.
How to bake chicken breasts
- Brine: First, I brine the chicken according to the steps above.
- Season it: I like rubbing the poultry with seasoning before baking. This adds a layer of flavors. Also, feel free to use your favorite seasoning.
- Brush it: I highly recommend brushing the breasts with melted butter. This will add great flavor. In addition, it will give it a nice golden crust and color on the outside.
- Roast: I preheat the oven to 400°F. Transfer the meat to a baking dish and pop it in the oven. Then, let it bake for 25-30, depending on the size of your chicken breasts.
- Rest: Lastly, I let the chicken rest for a few minutes before slicing and serving it. I recommend letting it rest for about 5-10 minutes. This way, the flavors and all the juices will come together.

Expert tips
Cooking juicy chicken breasts
I believe that brining the chicken first, using a thermometer, and letting the meat rest before serving it will help you avoid a dry chicken breast. Using uniform pieces of chicken is essential, too. If you have a larger chicken breast than the others, slice it in half to make two thinner steaks or pound it down to a thinner breast.
Also, the chicken should be at room temperature so it cooks evenly. Searing the chicken is also a good idea to keep the juices in. I do not always do that. It depends on the recipe. If I brine it and roast it at a high heat, I skip the searing step. Try using a piece of buttered parchment paper on top, buttered side down. This will steam the chicken, making it less likely to dry out.
The best baking temperature for chicken breasts
Over the years, I have tried cooking the breast meat at various temperatures and concluded that cooking it at 400°F yields the perfect result. Chicken breasts are naturally lean, so it’s essential to set the right temperature when cooking. Therefore, for best results, cook them at a high temperature to lock in the juices and flavor while keeping the top crisp.
With an average-sized chicken breast, I find that cooking at 400°F usually takes about 25 minutes. Of course, this depends on the thickness of the meat and whether it is boneless or not. Anything with bones and skin should take an extra 10-15 minutes.
I recommend checking on it around the 20-minute mark to ensure it’s not overcooked. Insert an instant-read thermometer into the thickest part of the meat. When the internal temperature reaches about 160°F, please remove it from the oven. Then, let it rest for 5-10 minutes more.
More tips to consider
- Let the chicken breasts come to room temperature before cooking so they cook more evenly.
- Do not slice or serve the chicken until it has rested for 10-15 minutes, allowing it to reach the proper temperature. Letting it rest also allows the juices to be reabsorbed into the meat, making it juicier.
- If salt is not part of your diet plan, use a marinade instead of brine, made with vinegar, wine, lemon juice, or another type of citrus.
- To ensure the chicken breasts cook evenly cut them thinner or pound them with a meat mallet to achieve an even thickness.
- Rely more on the temperature of the meat than the clock when baking chicken.

Recipe variations and add-ins:
- Hot chicken: Add some cayenne pepper to the chicken seasoning for extra spicy chicken.
- Make it Cajun: If you like spicy food, try this with my Cajun seasoning instead of Italian seasoning.
- Greek-style: Top the chicken with poultry seasoning, feta cheese, kalamata olives, marjoram, and dill for a Greek-style chicken.
- Sweet chicken: To add some sweetness, sprinkle white or brown sugar in the brine on the chicken.
- Crack chicken: Substitute this homemade ranch mix for Italian seasoning and add crumbled bacon and shredded cheddar.
- Asian twist: Brush the meat before baking with Hoisin sauce, General Tso sauce, or Orange sauce.

Serving suggestions:
The best part is that oven-roasted chicken breasts don’t have to be boring; they can help elevate and add to so many dishes. Chop these into strips and use them for my incredible Mexican street corn chicken tacos. They would also be perfect for this chicken bacon ranch casserole with potatoes or cheesy chicken casserole.
Or serve them with some roasted potatoes, steamed broccoli, and strawberry arugula salad. Top them with barbecue sauce and serve with potato salad and coleslaw for a delicious family BBQ. Use them to make chicken salad and Caesar sandwiches, or add them to breakfast burritos. Chop it and add it to egg scrambles, stir-fries, or on top of salads.
How to store:
- Refrigerate: Store in an airtight container for up to 4 days.
- Freezing: Wrap each item in plastic and store it in a freezer bag for up to three months. Then, they can be used as needed.
- Defrost: Thaw overnight in the fridge for the best texture and taste.
- Reheating: You can reheat it in the microwave for 30-60 seconds. Add a bit of water or broth to it before heating to keep it from drying out.

Frequently asked questions
Over the years, I have tried cooking chicken breasts at various temperatures and found that cooking them at 400°F gives the best results. Because they are naturally lean, it’s essential to set the right temperature when cooking them. To have a crunchy outside and juicy inside, the temperature has to be hot enough but not too hot. The length of time may vary depending on the thickness of the meat and whether it is boneless, but I would still stick with 400 degrees F.
It is most likely due to overcooking. It helps to use a meat thermometer or to keep a very close eye on the chicken. It cooks quickly, especially boneless, skinless chicken breasts. If you do not have a thermometer, check them after 15 minutes. Once they are no longer pink inside, remove them. Another way to keep them moist is by using brine. Soaking them in saltwater allows them to soak up as much moisture as possible before cooking.
I use a digital thermometer that has Bluetooth, so it connects to my phone. It stays inserted into the meat, so it lets me know whenever the chicken is nearly done. It’s very convenient if I happen to be making side dishes or a dessert at the same time, so I don’t have to worry about the chicken burning. When the chicken reaches 155°-160°F, I remove it from the oven and let it rest, covered, for 15 minutes, allowing it to reach a final temperature of 165°F. It also allows the juices to be absorbed back into the meat.

More chicken dinners:


Loved this recipe? I’d love to hear from you! 💛 Leave a 5-star rating ⭐️ in the recipe card below and share your thoughts in the comments – I read and appreciate every single one!
Let’s stay connected! Follow me on Facebook, Instagram, Pinterest, and YouTube for more delicious, sweet and savory recipes. Have a question? Ask in the comments, and I’ll be happy to help! 😊 with love Catalina!
Baked Chicken Breasts
Ingredients
Brine:
- 1/4 cup salt
- water
Chicken & Seasoning:
- 4 chicken breasts boneless skinless, about 3-4 pounds
- 3 tablespoons olive oil or melted butter
- 1/2 teaspoon salt
- 1/4 teaspoon black pepper
- 1 teaspoon Italian seasoning
- 1 teaspoon garlic powder
- 1/2 teaspoon onion powder
- 1 teaspoon paprika regular or smoked
- 1/2 teaspoon dried thyme
- 1/2 teaspoon dried basil
- 1/2 teaspoon dried parsley
- 1/4 teaspoon pepper flakes optional
Garnish:
- chopped parsley
Instructions
Brine:
- To brine chicken breasts, fill a large bowl with 1 quart of lukewarm water and 1/4 cup salt. Then, stir to combine until the salt is dissolved. Next, add the meat to the brine mixture and let it sit for 30 minutes.
- Also, you could cover the bowl and refrigerate for up to 6 hours. When ready to cook, remove them from the brine and rinse them under cold water. Lastly, pat them dry with some paper towels.
Chicken and Seasoning:
- First, preheat the oven to 400°F. Then, lightly grease a 9×13-inch baking dish with a few tablespoons of olive oil.
- In a small bowl, mix salt, pepper, Italian seasoning, garlic powder, onion powder, paprika, dried thyme, dried basil, dried parsley, and pepper flakes.
- Rub the chicken breasts with olive oil or melted butter and seasoning on both sides. Rub well so it absorbs properly.
- Add the chicken to the prepared baking dish and bake for 25-30 minutes or until the internal temperature reaches 165°F.
- Before slicing, let rest for 5-10 minutes for optimal tenderness.