
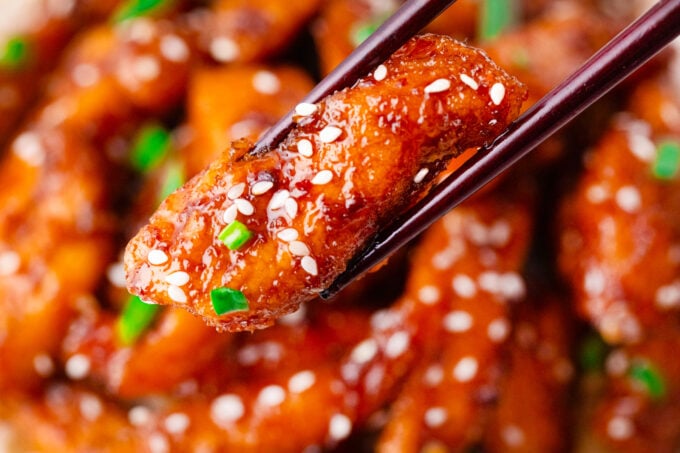
Crispy Mongolian Chicken – 30 Minute Meal
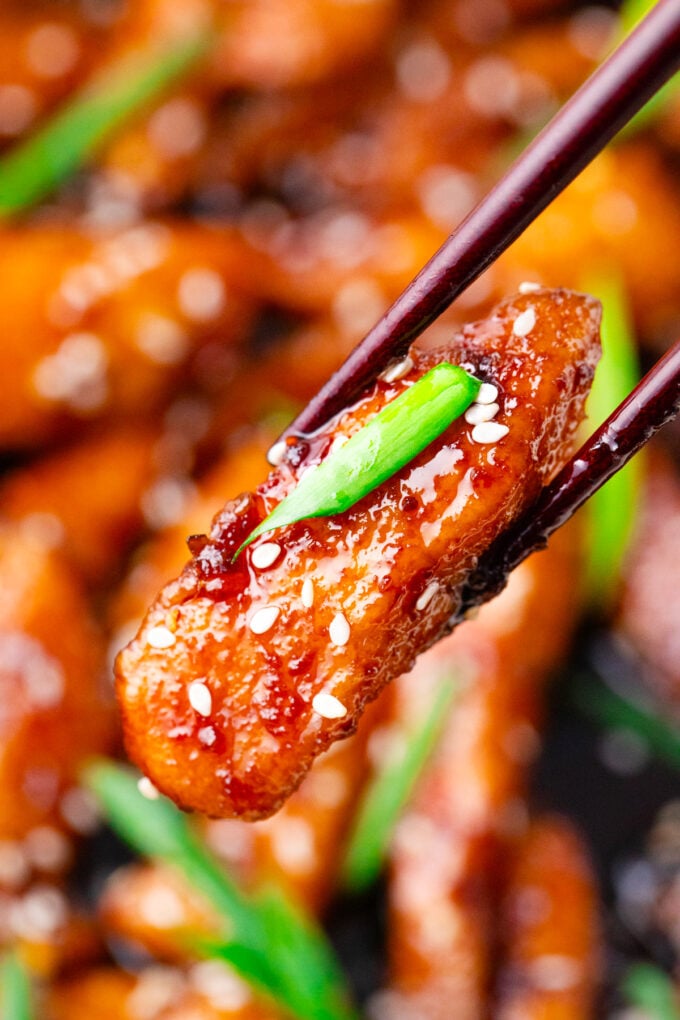
Mongolian chicken is probably one of the most famous American Chinese dishes, and it was the first one I tried when I moved to the US and went to PF Chang’s. Making it at home takes me just 30 minutes, it’s budget-friendly, and I get the same great restaurant-quality taste. Unbelievably crispy and coated in a sweet-and-savory sauce flavored with ginger and garlic, every bite is absolute bliss.

This meal is very similar to my go-to Mongolian Beef, but made with chicken instead of beef. I have many quick and easy Asian recipes under my belt, and making them at home is so much easier. Others I love and can make even on a busy weeknight are Hunan beef and Szechuan chicken.
Table of contents
The combination of crispy meat and the sweet-and-savory, glossy sauce is divine! The interplay of all these flavors is unforgettable and makes it quite interesting. While this is not an authentic Chinese recipe, it has long been an American favorite dish precisely because we love sweet sauces in savory dishes. With this recipe, you will no longer have to line up at P.F. Chang’s, but make it in just 30 minutes from the comfort of your own kitchen.
Why you will love this recipe
- Save a trip: Skip the takeout and make this stir-fry favorite at home. I can make this in minutes, and it tastes even better than the restaurant version.
- Mine is less expensive: The least expensive restaurant near me charges $15 per person. I can make this whole recipe for 4 people for less than $10!
- Make it healthier: I feel better about serving this to my family since I know everything that goes into it. There are no MSG or other additives like sodium nitrite, artificial colors, sweeteners, or extra salt.
- Just a few ingredients: chicken, some oil, and a few basic items to make the sauce for this sweet and tangy dish. I usually have everything I need without going shopping.
What you will need
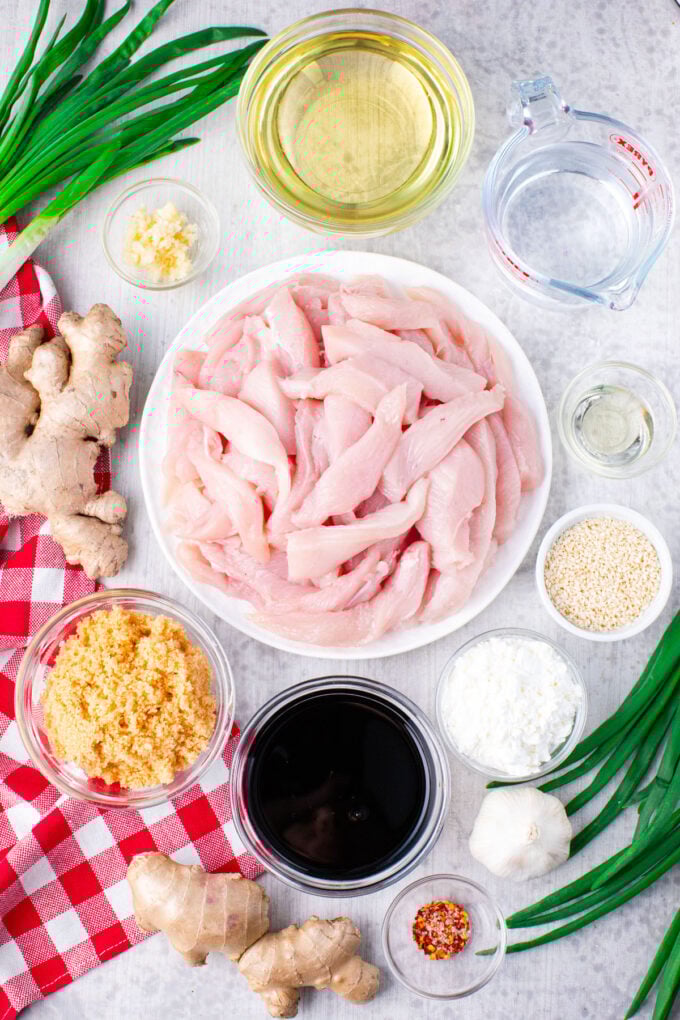
- Meat: I use about 2 pounds of thinly sliced organic chicken.
- Vegetables: I add sliced green onions at the end of the cooking process, so they stay crispy and provide a mild onion taste and vibrant color.
- Wet ingredients: I use vegetable oil for stir-frying because it has a high smoke point and will not burn like some other oils. It also has a mild, neutral flavor to keep it from interfering with the taste.
- Dry ingredients: I toss the chicken pieces in cornstarch (velveting) to give them a light, crispy crust while keeping the meat tender. It also helps the sauce stick to the chicken.
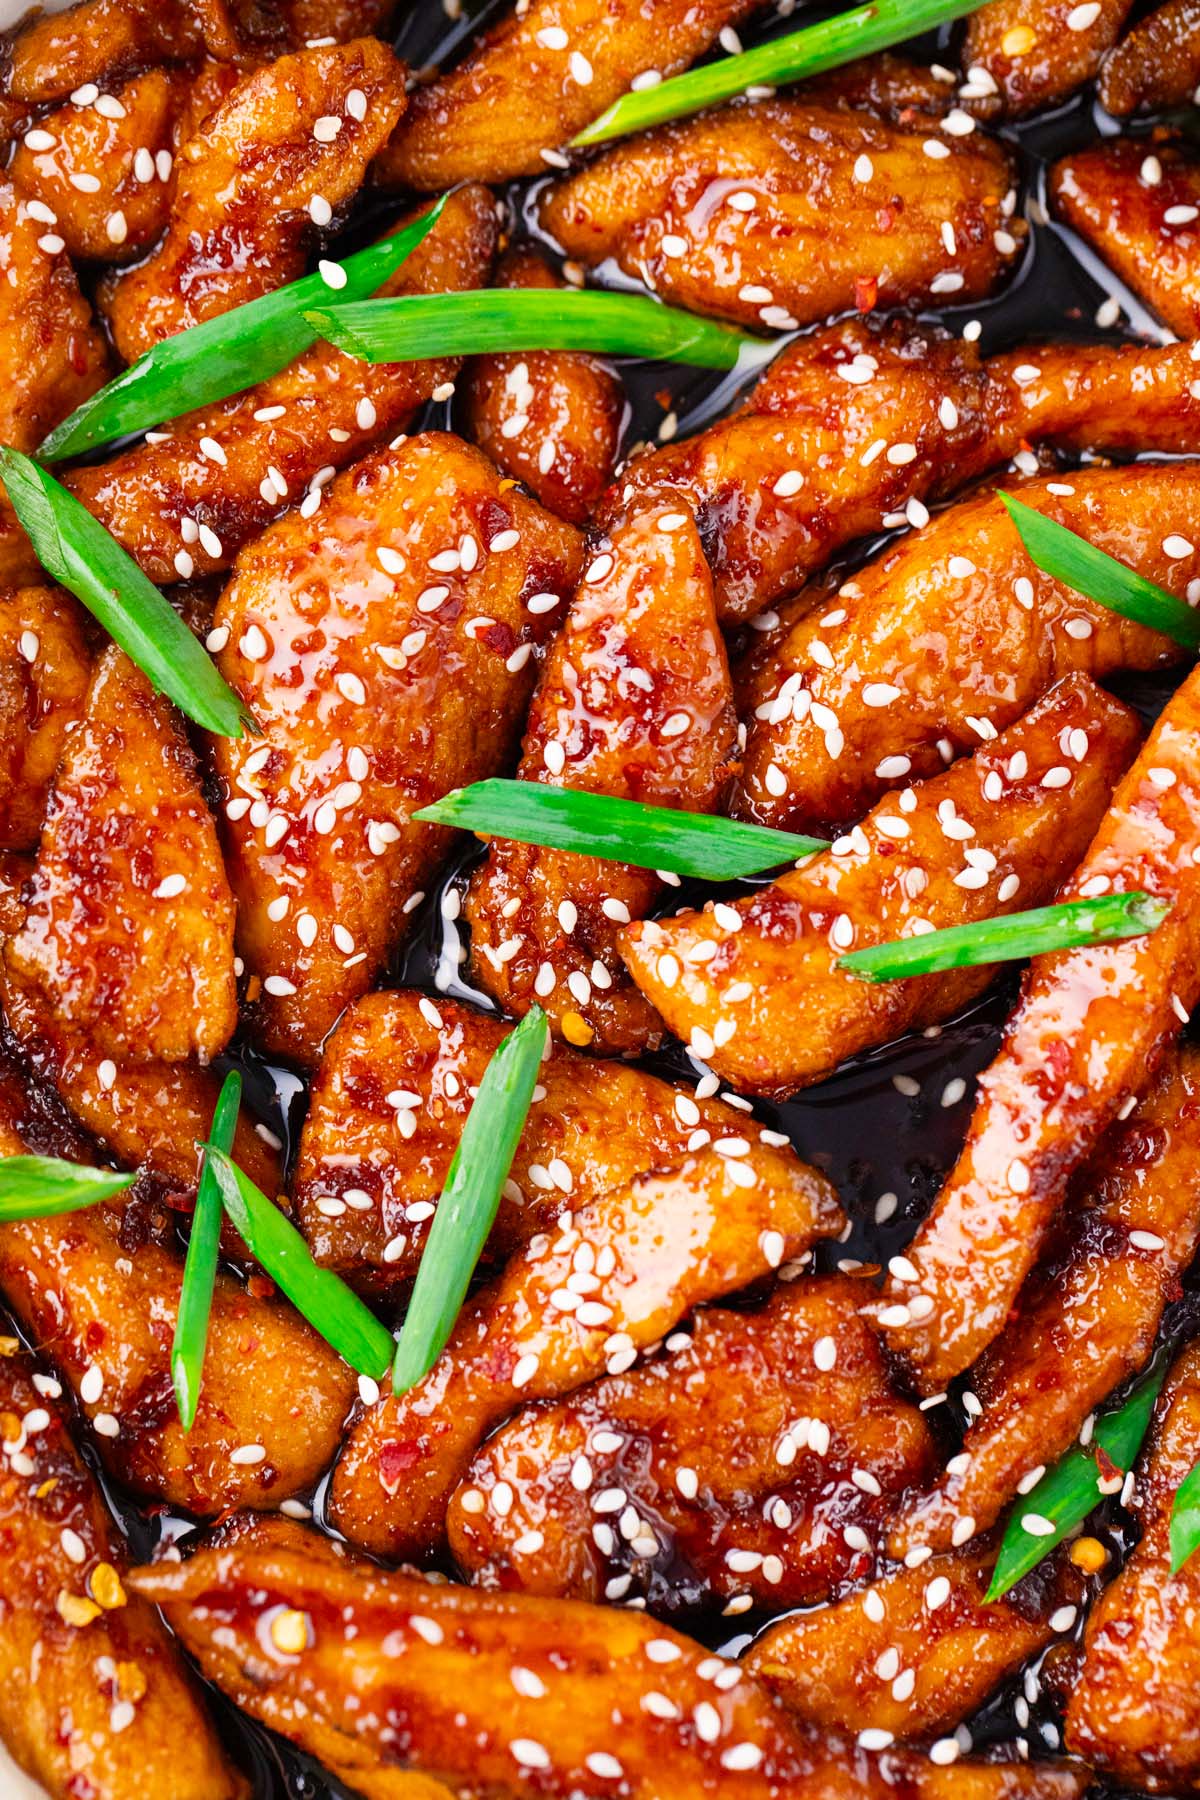
- Topping: Optionally, I top my Mongolian chicken with sesame seeds for a nutty crunch.
For the Mongolian sauce
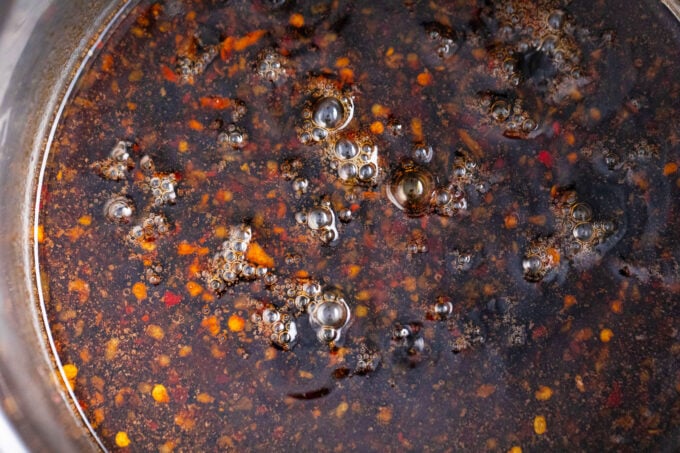
- Wet ingredients: I use low-sodium soy sauce to give this a rich, salty flavor without too much salt. Rice vinegar provides a mild acidity that balances the sweet and savory flavors while adding depth. It also tenderizes the meat. I also add some vegetable oil to the sauce to keep the ginger and garlic from burning. Water helps mellow the strong flavors while providing enough volume to cover each piece of chicken evenly.
- Seasonings: For a deeply savory flavor and aromatic base, I saute the freshly minced ginger and garlic in oil before mixing them with the other ingredients. A pinch of red pepper flakes adds just a tiny bit of heat. Dark brown sugar coats the chicken in a thick, sticky glaze with a caramel-like flavor that is richer than that of other sugars.
How to make
Make the sauce: First, I sauté the ginger and garlic in 2 tablespoons of vegetable oil for about 30 seconds, then whisk in the water, rice vinegar, soy sauce, red pepper flakes, and dark brown sugar. I cook this, stirring frequently, until it is partially thickened, about 5 to 10 minutes.
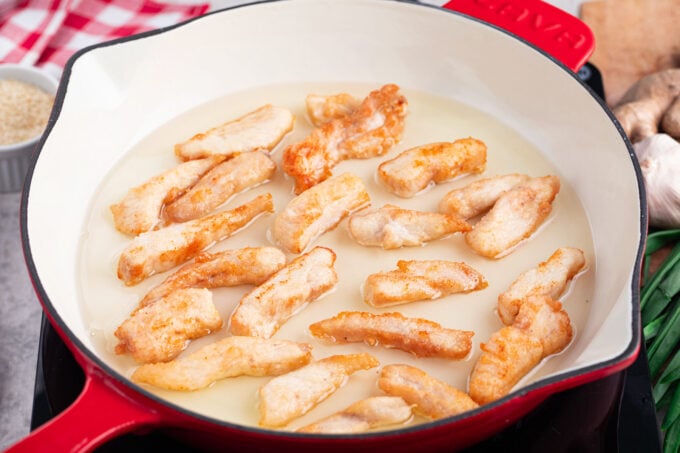
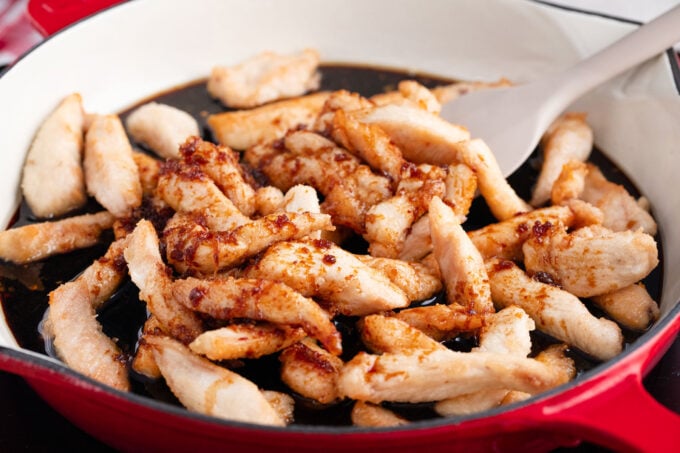
Coat the chicken: I mix the sliced chicken with the cornstarch until it is fully coated, while heating 1 cup of vegetable oil in a large saucepan or wok.

Cook the chicken: When the pan is hot, I cook the chicken until browned, about 1 to 2 minutes, stirring the meat as you go so it cooks evenly. Then, I place it all on a paper towel and discard the oil.
Mix it all together: I return the chicken to the skillet, add the sauce, and cook over medium heat until the sauce thickens, about 2 to 3 minutes.
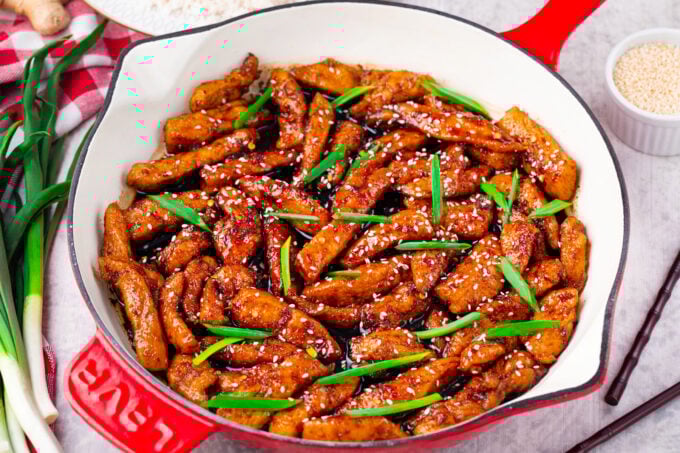
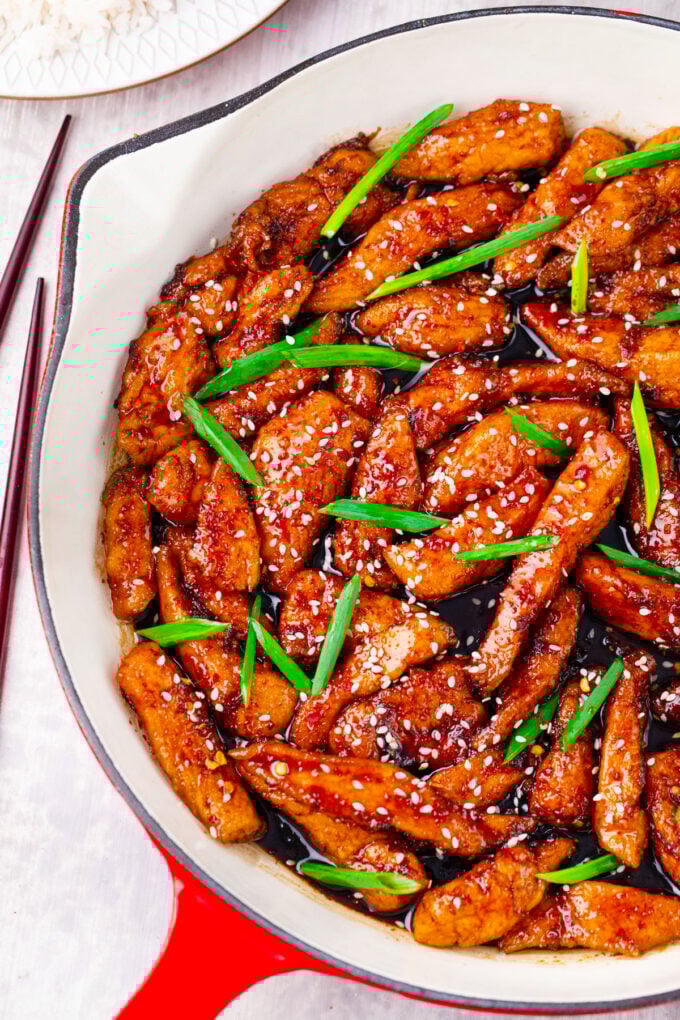
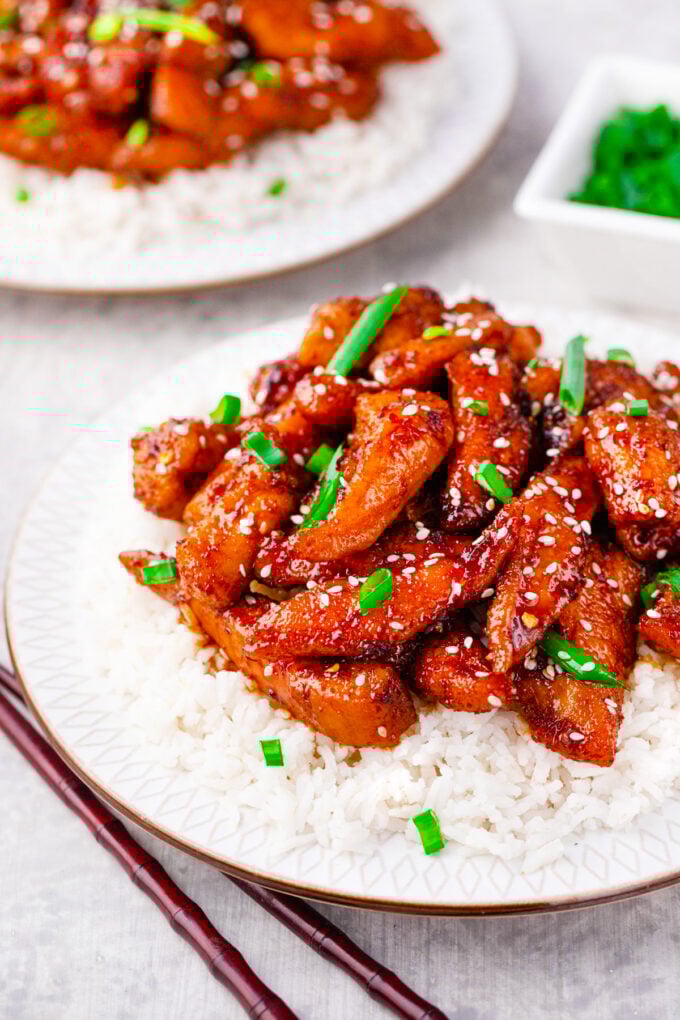
Garnish and serve: Finally, I stir in the green onions, garnish it with sesame seeds, and serve.
Expert tip
Using cornstarch for crispiness
Also known as velveting, coating chicken in cornstarch is an old Chinese cooking method used for centuries to create silky, tender meat that locks in moisture. It is typically used for stir-frying but can also be used to fry chicken wings or regular chicken pieces. The more in-depth way to properly velvet chicken is to slice it ¼ inch thick, marinate it in a mixture of cornstarch, rice wine, oil, and egg white, and then let it chill for 30 minutes. After, it is cooked for 1 to 2 minutes on low before stir-frying.
More tips to consider:
- I like organic chicken because it has fewer additives and preservatives and no growth hormones, antibiotics, or harsh pesticides. It is also healthier because it contains higher levels of vitamins, omega-3 fatty acids, and potassium than regular chicken.
- Use fresh ginger and garlic for the most intense flavors. Powders don’t have the same effect.
- Make sure the oil is hot before adding the chicken. Use a thermometer to confirm it is 350°F. Without a thermometer, just flick water at it. If it sizzles, it is ready.
- For juicier, richer meat, use sliced chicken thighs.
- The sauce can also be made the day before and then combined before serving. However, let it come to room temperature first.
Recipe variations and add-ins:
- Switch meat: I sometimes use thinly-sliced turkey or pork for this dish, and it is delicious either way.
- Vegan version: On the other hand, I can make this vegan by switching the chicken for diced tofu. Make sure it is extra firm, though.
- Add vegetables: I also like to add vegetables like chopped bell peppers, pearl onions, sliced carrots, mushrooms, zucchini, and broccoli florets.
- Different herbs and spices: Another way to ramp up the taste a bit is to add your favorite herbs and spices, such as turmeric, paprika, cumin, parsley, thyme, and rosemary.
- Healthier chicken: To make this dish healthier, fry the chicken in the air fryer for 1 to 2 minutes at 400°F. Just spray them lightly with oil after coating them in cornstarch.
- Extra-spicy Mongolian chicken: When I crave spicy chicken, I add cayenne pepper to my sauce for a fiery kick.
Serving suggestions:
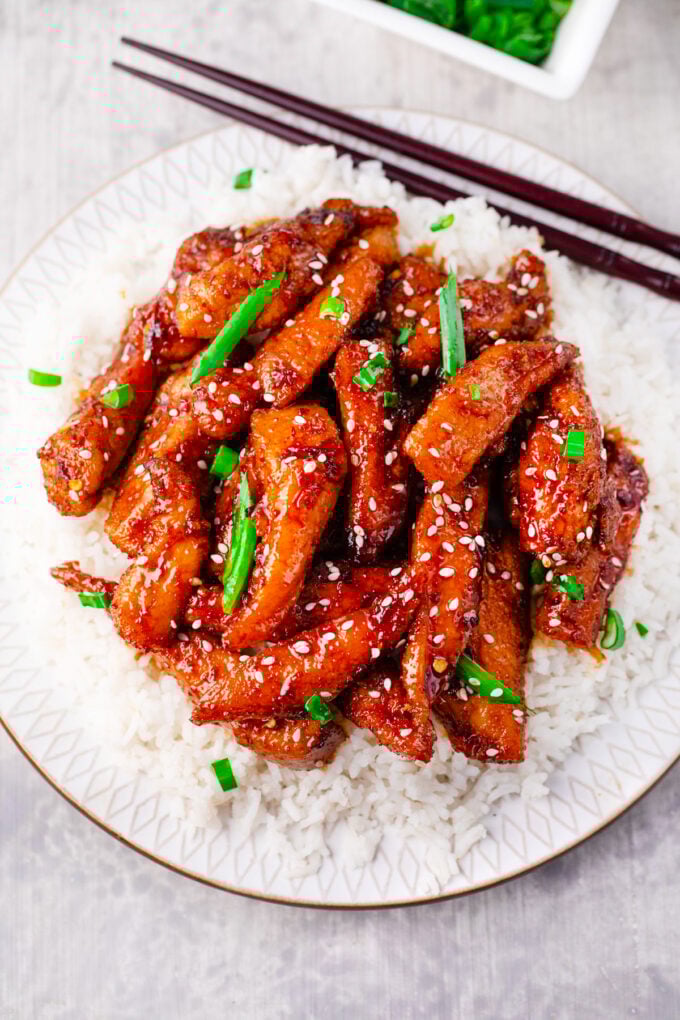
I usually serve this slightly spicy chicken paired with some kind of rice. My Instant Pot rice is a foolproof recipe that I perfected over the years, so it is impossible to mess up, no matter what kind of rice I am cooking. It only takes water, oil, and a bit of salt for fluffy rice in 15 minutes every time. Sometimes, I pour it over lo Mein or soba noodles with sauce for a hearty one-plate meal.
If I want some side dishes to go with my Mongolian chicken, spring rolls, or egg rolls are always a good choice. My kids love cheeseburger egg rolls, even if they aren’t really part of a “typical” Asian meal. And they’re so easy to make with just some ground beef and a few basic ingredients. These Panda Express mixed veggies are another way to round off this meal with a hearty side of nutrients, so tasty that even the kids make them disappear.
How to store leftovers:
- Refrigerate: Leftover Mongolian chicken tastes best eaten right away, but it can be stored in an airtight container in the fridge for 3 to 4 days.
- Freezing: It can also be frozen in freezer bags for up to 3 months. I store mine in small freezer bags so I can take out just what I need as I need it.
- Defrost: Before serving, I thaw out frozen leftovers in the fridge overnight.
- Reheating: For crispy reheating, I lightly spray the skillet with oil and heat it over medium heat for several minutes. It can also be reheated in the air fryer for 3 to 4 minutes at 375°F. The microwave will heat it in 1 to 2 minutes, but it will not be crispy.
Frequently asked questions
If the chicken is overcooked, the juices get squeezed out, leaving the meat dry and rubbery. Since the chicken is cut so thin, it only needs to cook for a minute or two. Also, be sure to use cornstarch, not flour, because flour does not have the same properties. Cornstarch provides a protective barrier against heat and absorbs less oil than flour.
First, make sure each piece is sliced evenly and coated with cornstarch. Then, fry the chicken for just 2 to 3 minutes before stir-frying it with the sauce. Don’t put the chicken in the pan until it is at least 350°F (no higher than 360°F), and be sure not to overcrowd the pan. Let the chicken drain on paper towels while you clean the pan, then heat the pan over medium heat with the sauce for just a minute.
If the sauce is too thin, it may just need some cornstarch slurry. I usually mix one tablespoon of cornstarch with 2 tablespoons of cold water until the cornstarch dissolves. Once it dissolves, it can be added to the sauce and whisked in until the sauce thickens. Also, be sure to get all the grease from the chicken after frying it before adding it back to the pan, or it will make the sauce more liquid.
Boneless, skinless chicken breasts are very lean, so they tend to dry out if cooked for too long or at too high a temperature. The best way to cook this recipe is to use the velveting technique with cornstarch. Another way to prevent it is to use sliced chicken thigh meat instead, as it retains moisture better. And always be sure to cook them for only a short time, as they cook quickly.
More delicious Asian dishes:


Loved this recipe? I’d love to hear from you! 💛 Leave a 5-star rating ⭐️ in the recipe card below and share your thoughts in the comments – I read and appreciate every single one!
Let’s stay connected! Follow me on Facebook, Instagram, Pinterest, and YouTube for more delicious, sweet and savory recipes. Have a question? Ask in the comments, and I’ll be happy to help! 😊 with love Catalina!
Crispy Mongolian Chicken – 30 Minute Meal
Ingredients
- 2 pounds chicken thinly sliced into 1-2 inch strips
- 1/3 cup cornstarch
- 1 cup vegetable oil
- 2 green onions thinly sliced on diagonal into 1-inch pieces
Sauce:
- 2 teaspoons vegetable oil
- 1 tablespoon fresh ginger minced
- 1 tablespoon garlic minced
- 1/2 cup dark brown sugar
- 1/4 teaspoon red pepper flakes
- 1/2 cup soy sauce low-sodium
- 1 tablespoon rice vinegar
- 1/2 cup water or chicken broth
Optional:
- 1 teaspoon sesame seeds
Instructions
- In a medium saucepan over low to medium heat, add two tablespoons of vegetable oil. Next, add the minced garlic and ginger and cook, stirring, for 30 seconds. Then, whisk in the brown sugar, red pepper flakes, soy sauce, rice vinegar, and water.
- Cook until slightly thickened, about 5-10 minutes, and set aside.
- Place the sliced chicken in a large bowl and coat with cornstarch until evenly distributed.
- Heat 1 cup of vegetable oil in a large saucepan. Once hot, add the chicken and fry until browned and cooked through, about 1-2 minutes. Stir the meat occasionally to ensure even cooking.
- Transfer chicken to a paper towel-lined plate and discard the oil from the skillet.
- Add the chicken back to the skillet, pour in the sauce mixture, and cook over medium heat until the sauce thickens, about 2-3 minutes.
- Stir in green onions. Garnish with sesame seeds (optional).
- Serve immediately over rice.
Notes
Using cornstarch for crispiness
Also known as velveting, coating chicken in cornstarch is an old Chinese cooking method used for centuries to create silky, tender meat that locks in moisture. It is typically used for stir-frying but can also be used to fry chicken wings or regular chicken pieces. The more in-depth way to properly velvet chicken is to slice it ¼ inch thick, marinate it in a mixture of cornstarch, rice wine, oil, and egg white, and then let it chill for 30 minutes. After, it is cooked for 1 to 2 minutes on low before stir-frying.More tips to consider:
- I like organic chicken because it has fewer additives and preservatives and no growth hormones, antibiotics, or harsh pesticides. It is also healthier because it contains higher levels of vitamins, omega-3 fatty acids, and potassium than regular chicken.
- Use fresh ginger and garlic for the most intense flavors. Powders don’t have the same effect.
- Make sure the oil is hot before adding the chicken. Use a thermometer to confirm it is 350°F. Without a thermometer, just flick water at it. If it sizzles, it is ready.
- For juicier, richer meat, use sliced chicken thighs.
- The sauce can also be made the day before and then combined before serving. However, let it come to room temperature first.
One of my absolute favorites to order when we’re out for dinner. Can’t wait to make it at home!
Love ordering this recipe from our favorite Chinese restaurant! Looking forward to now being able to make this from home, instead! Yum!
SO much flavor! Love the brown sugar sauce!
I absolutely love Mongolian Chicken but have never tried making it at home! I will give this recipe a try!
Yum!!! This is such a great dinner idea. Love it.
Looks like we have a new favorite for weeknights!
This was SO good! Better than takeout!
Recipe is good and easy to make. Please instruct to cook the chicken first before the sauce. Got confused with instructions thought I needed to put chicken after the sauce was cooking, not that I needed to cook the chicken first (sigh). Other than that, mine would have tasted better if I understood to cook the chicken first.
Very flavorful. Directions spot on. Definitely will be making this again, thank you!!
Hi Chera, so happy that you love it.
I was looking for the drumstick Mongolian recipe.
just search for “drumsticks” on the blog
I love the flavor combination of brown sugar, garlic, ginger and soy sauce!! Thanks for this delicious homemade version of Mongolian Chicken. We feel lucky have such a yummy homemade Chinese meal!
The sauce on this is so savory and sticky. It’s way better than what I usually get for takeout. It came together really fast, too, so it’s perfect for those nights when I’m in a rush but still want a real meal.
Taste-TEE! Man, this is good. I love the flavors and textures. It’s nice to get take-out without actually GOING out.
Just the right amount of crunch under that delicious sauce. This hits the spot everytime! One of my favorite meals at the moment ^_^