Best Instant Pot Chili
There is nothing more comforting than a big bowl of homemade chili, especially when it takes only 30 minutes to make! I love my Instant Pot Chili recipe—it’s effortless but delivers bold and rich flavors. Thanks to the pressure cooker, it tastes like it has been simmering all day long, but it’s actually ready in a fraction of the time.

Instant pot recipes are ideal for busy nights, when I still want to serve a hearty homemade meal. This recipe is truly incredibly easy to make. I sear the beef, combine it with the rest of the ingredients, and pressure cook. The chili has the perfect balance of spices and a deeply satisfying texture. This is one of those classic meals that brings the family together. I serve it along with my creamy corn casserole and cheesy green beans.
Table of contents
I like that it’s all done in one pot, making cleanup a breeze. In addition, this is the perfect make-ahead meal; it tastes even better the next day. Also, I like to cook a batch and freeze it into individual portions. This trick is such a time saver that we later use the chili on hot dogs or baked potatoes, making dinner stress-free and a guaranteed success with the whole family.

Why you will love this recipe
- Fast homemade chili: It’s fantastic to make chili from scratch in minutes. I usually spend hours making my classic chili, but this is so good and rich in a fraction of the time.
- It’s so easy: This recipe requires little prep work. I just brown the beef and toss it all in the pot to cook.
- Brown in a hurry: My sear and reserve method makes it quick and easy to brown and crisp the beef for extra flavor. Just follow my Expert Tip to make it happen.
- My spice mixture: I also offer my spice mixture that makes this chili taste perfect, with just the right amount of spicy, sweet, and savory hints.
What you will need
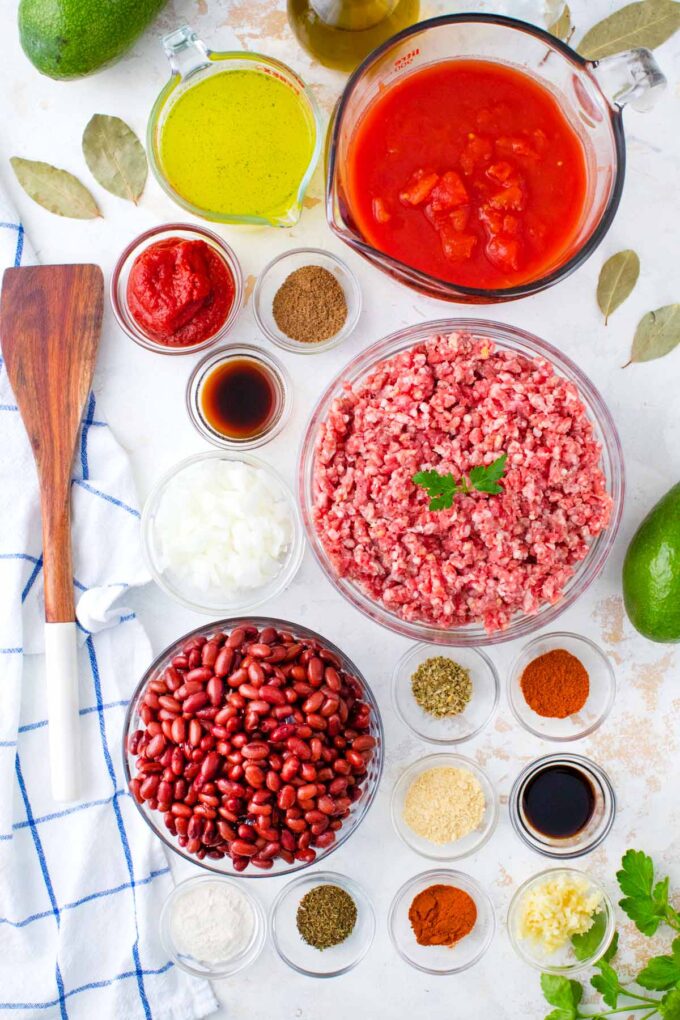
- The meat: I use 85/15 organic lean ground beef for the best flavor without all the extra grease, antibiotics, and pesticides.
- The beans: I prefer red kidney beans. I use three 15-ounce cans of beans, drained and rinsed.
- Aromatics: For the rich garlic flavor and tangy onion taste, I dice fresh onions and mince my own garlic.
- Liquids: I use low-sodium beef broth for rich flavor without the extra salt, tomato paste, and crushed tomatoes for tangy zing, and some low-sodium soy sauce and Worcestershire sauce for added flavor.
- Herbs and spices: I use a mixture of dried oregano, thyme, smoked paprika, bay leaves, ground cumin seeds, chili powder, garlic powder, and onion powder.
- Other ingredients: For added thickness, I sometimes use cornstarch slurry.
How to make
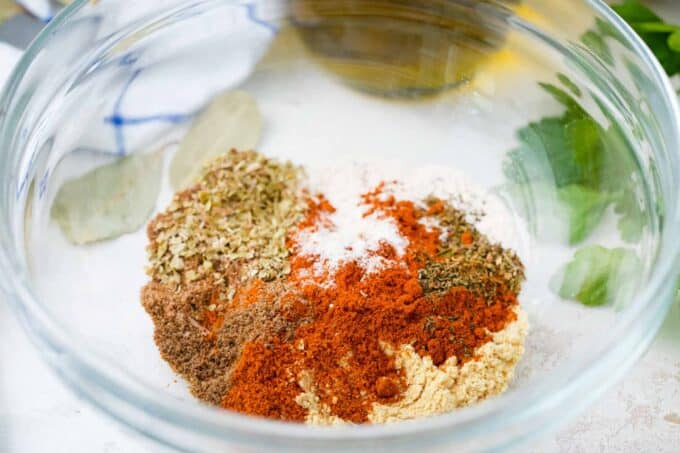
Mix the spices: First, I mix the paprika, thyme, oregano, cumin, chili powder, garlic powder, and onion powder in a small bowl and set them aside.
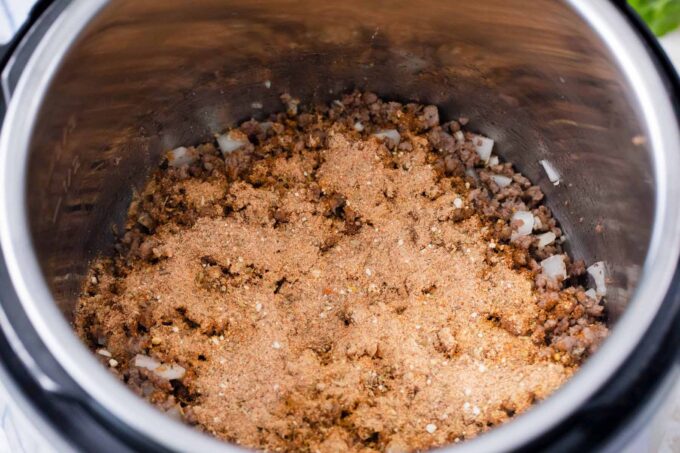
Brown the beef: Now, I heat a tablespoon of olive oil in the pot until it is hot. Then, I place the meat in the pot and do not stir it for five minutes. Then, I remove the pot, pour the beef juices into a small bowl, and put the pot back on the heat. I cook the meat for another five to seven minutes, stirring constantly until it is browned. I add the onions and garlic, cooking and stirring for two more minutes before stirring in the spices to cook for another two minutes.
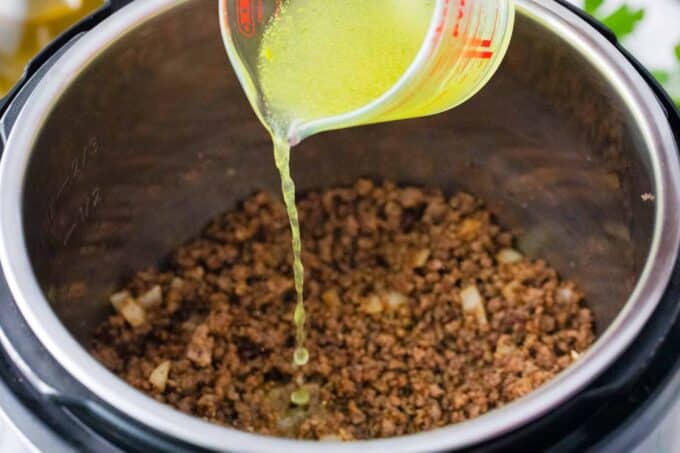
Deglaze the pot: Afterward, I deglaze the pot by pouring 1/3 cup of beef broth and using a wooden spoon to scrape the bottom of the pot. This removes bits of beef that can prevent the pot from pressurizing later. Now, I continue to cook the beef broth for about five minutes or until the juice has reduced.
Add the rest and cook: Next, I add the tomato paste and the beef juices that I poured into the bowl before adding the beans and stirring them all to combine well.
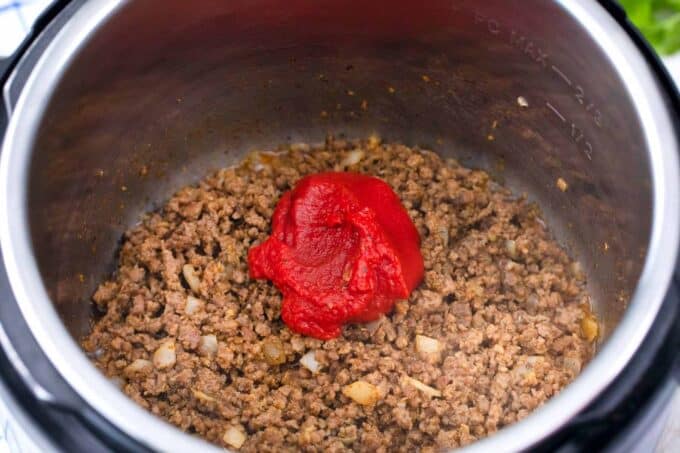
Add the beans and everything else: I add the rest of the broth, Worcestershire sauce, and soy sauce to the pot with everything else. The tomatoes go on top, but I do not stir them because I want them to stay on top. I toss in the bay leaves, close the lid, and set the vent to sealing, cooking it on high for 12 minutes.
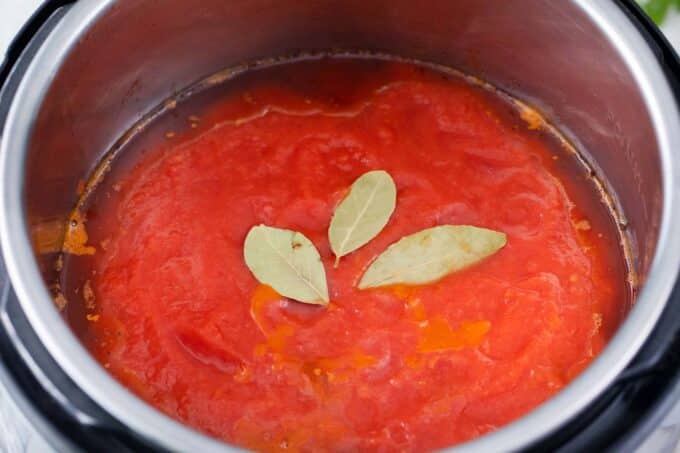
Release pressure and serve: After the time is up, I let the pressure release on its own for 15 minutes before opening the vent to let the rest out. I remove and discard the bay leaves, stir the chili, and check for thickness and taste. If it is not thick enough, I set it to sauté, add a cornstarch slurry, stir, and let it simmer for five minutes before serving.
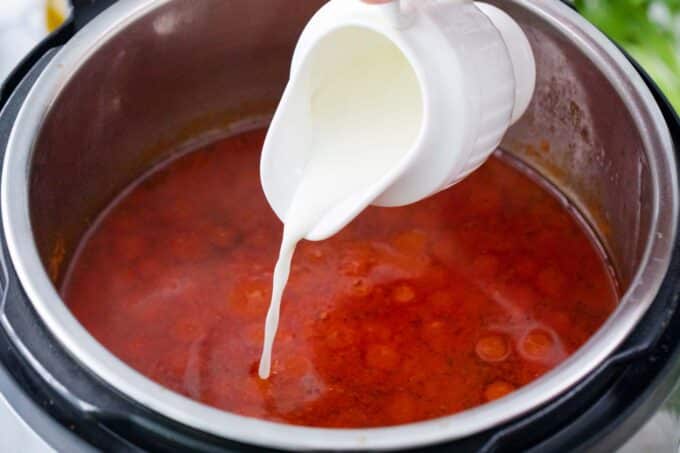
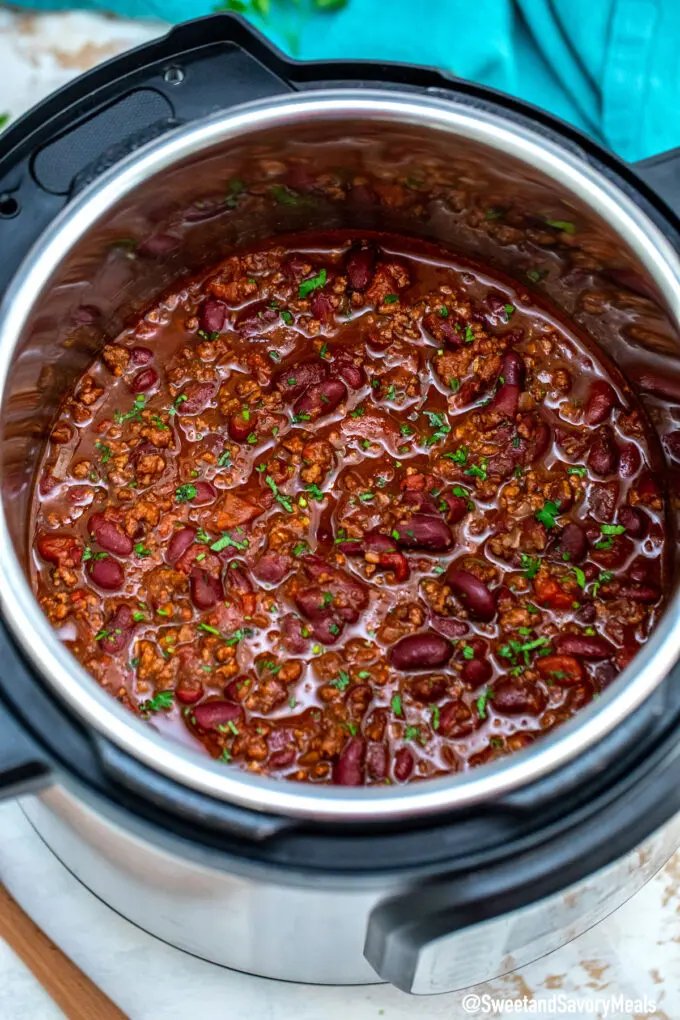
Serve: I let it cool for 10 minutes and then serve it with an array of toppings.
Expert tip
How to brown the beef
- The baking soda method: Mix 1/2 teaspoon of baking soda with one tablespoon of water until it’s dissolved. Add the mixture to the ground beef and using your hands to mix it in. After that, let the beef rest for 20-30 minutes. My mom (and obviously many other cooks) use this trick in many recipes that ask for ground beef. First, it helps the meat retain the moisture, which makes searing and browning, especially in the IP, much easier. Second, it tenderizes the meat, for the same reason, since the beef retains more moisture, it’s fluffier and more tender once cooked. I also love to use this trick when cooking Salisbury Steaks!
- The sear and reserve method – once your Instant Pot is hot and ready to sear the beef, add it to the pot and DO NOT stir for 4-5 minutes. This way, the meat gets a chance to get golden brown on the bottom layer. At this point, the beef releases moisture. Carefully remove the pot from the IP and drain the excess fat into a small bowl, which will be added back to the pot later. Add the pot back to the IP and break down the meat using a wooden spoon, and continue cooking.
- Quick sear method: If you don’t care how browned the beef is, follow the instructions on #2 and use the easy way out. This means breaking apart the meat after the 5-minute mark and continuing to cook it in the moisture that is being released. This is a quick and easy method.
More tips to consider
- Don’t forget to add salt and pepper after cooking.
- Be sure to use lean ground beef so the juices added to the chili are not all grease. I recommend 85/15.
- Ensure the tomatoes are on top of everything and do not stir after adding them. They can cause a burn notice.
- Also, take the time to deglaze the pot. Burnt bits on the bottom can also cause a burn notice.
- Let your guests add their toppings. The chili is delicious. Let them taste it first.
- Use low-sodium broth and soy sauce so the chili is not too salty.
Recipe variations and add-ins:
- Make it lighter: To shave some calories and fat, substitute ground beef with ground chicken or turkey.
- Other meat: If you’re not worried about fat and calories, replace half the ground beef with ground sausage to add some extra flavor.
- Red hot chili: Some people like their chili hot, so I sometimes add chopped red chiles and cayenne pepper.
- Tangier: If you would prefer a more tangy taste to your chili, adding one tablespoon of apple cider vinegar or even balsamic vinegar at the end, once it’s cooked, will enhance the tomato flavor and make it tangier.
- Add some caffeine: A tablespoon of espresso in your pot of chili will add a whole other dimension of rich flavor without the coffee taste.
- How about some chocolate? Similarly, adding unsweetened cocoa powder to the chili enhances the flavor by giving it more depth and richness.
- Crockpot: No pressure cooker? Making this recipe in the crockpot is similarly easy and amazingly delicious. I have this Slow Cooker Chili recipe on my blog—check it out!

Serving suggestions:
I love to serve this chili with my buttery Southern cornbread. This crumbly, slightly sweet bread is perfect for dipping, or you can crumble it on top and spoon it out with the chili. The kids like it when I serve it with tortilla or corn chips, too. I always have an array of toppings and garnishes, like homemade guacamole, sour cream, shredded cheeses, and my tangy and crispy pickled radishes.
For an extra filling meal, serve the chili in homemade bread bowls or have this easy-to-make beer bread on the side. I usually make a classic for dessert, like my strawberry poke cake or this creamy pineapple dream lasagna.
How to store leftovers:
- Refrigerate: This chili will last a week in a sealed container.
- Freezing: To freeze, I pack this in small single-serve freezer bags for easy serving, and they will last for several months.
- Defrost: Thaw overnight in the refrigerator for the best flavor.
- Reheating: To reheat, cook in a saucepan over medium heat for several minutes until hot. It can also be reheated in the microwave for 60 to 90 seconds.
Frequently asked questions
It is best to use lean ground beef. I usually use 85/15 ground beef or even 90/10, which has less fat than other fatty cuts. Using a fattier choice like 75/25 may be cheaper, but in the end, there is just more grease. The instant pot can bring out more fat than a frying pan, so drain the juice in the first step, as I explain in my Expert Tip. If too much fat is in the juices, discard the excess grease and just save the juice.
There may not have been enough liquid, or maybe some of the bits of meat did not get scraped off the bottom, causing a burn notice, which will make the Instant Pot stop creating pressure. It is essential to have enough liquid and ensure the pot is deglazed properly before closing it up. Also, ensure the tomatoes and other thick ingredients are on top so they do not stick to the bottom.
Bitter chili can result from burnt ingredients that get stuck to the sides or bottom of the pot. This can happen because the lid is sealed, and the chili is cooking under pressure, so it is impossible to know it is happening until it is too late. By then, the whole pot of chili has that bitter taste. But it can also happen if chiles are not deveined or deseeded properly, so be careful if adding them.
To tone down a spicy chili, add some more non-spicy ingredients. Some extra beans, grains, or vegetables like tomatoes, corn, zucchini, or potatoes are good choices. Dairy products such as sour cream, Greek yogurt, or cream cheese are a great way to cool hot chili down. Just be careful not to add too much liquid.
After you cook the Chili and realize you want it thicker, you can cook it on Sauté with the lid off for another 30 minutes, stirring occasionally, until the liquid reduces. Another option is to add a cornstarch slurry, which works instantly. Mix one tablespoon of cornstarch with two tablespoons of water in a small bowl, and add the slurry to the pot. Stir for a few minutes, until thickened, and repeat if needed.
Also, after you prepare this dish, it is recommended that you leave it overnight in the fridge. This way, the beef will absorb even more liquid, become thicker, and the flavors will have a chance to develop more. The moral of the story is to make more so you have delicious leftovers the next day.
More Instant Pot recipes to try
Loved this recipe? I’d love to hear from you! 💛 Leave a 5-star rating ⭐️ in the recipe card below and share your thoughts in the comments – I read and appreciate every single one!
Let’s stay connected! Follow me on Facebook, Instagram, Pinterest, and YouTube for more delicious, sweet and savory recipes. Have a question? Ask in the comments, and I’ll be happy to help! 😊 with love Catalina!
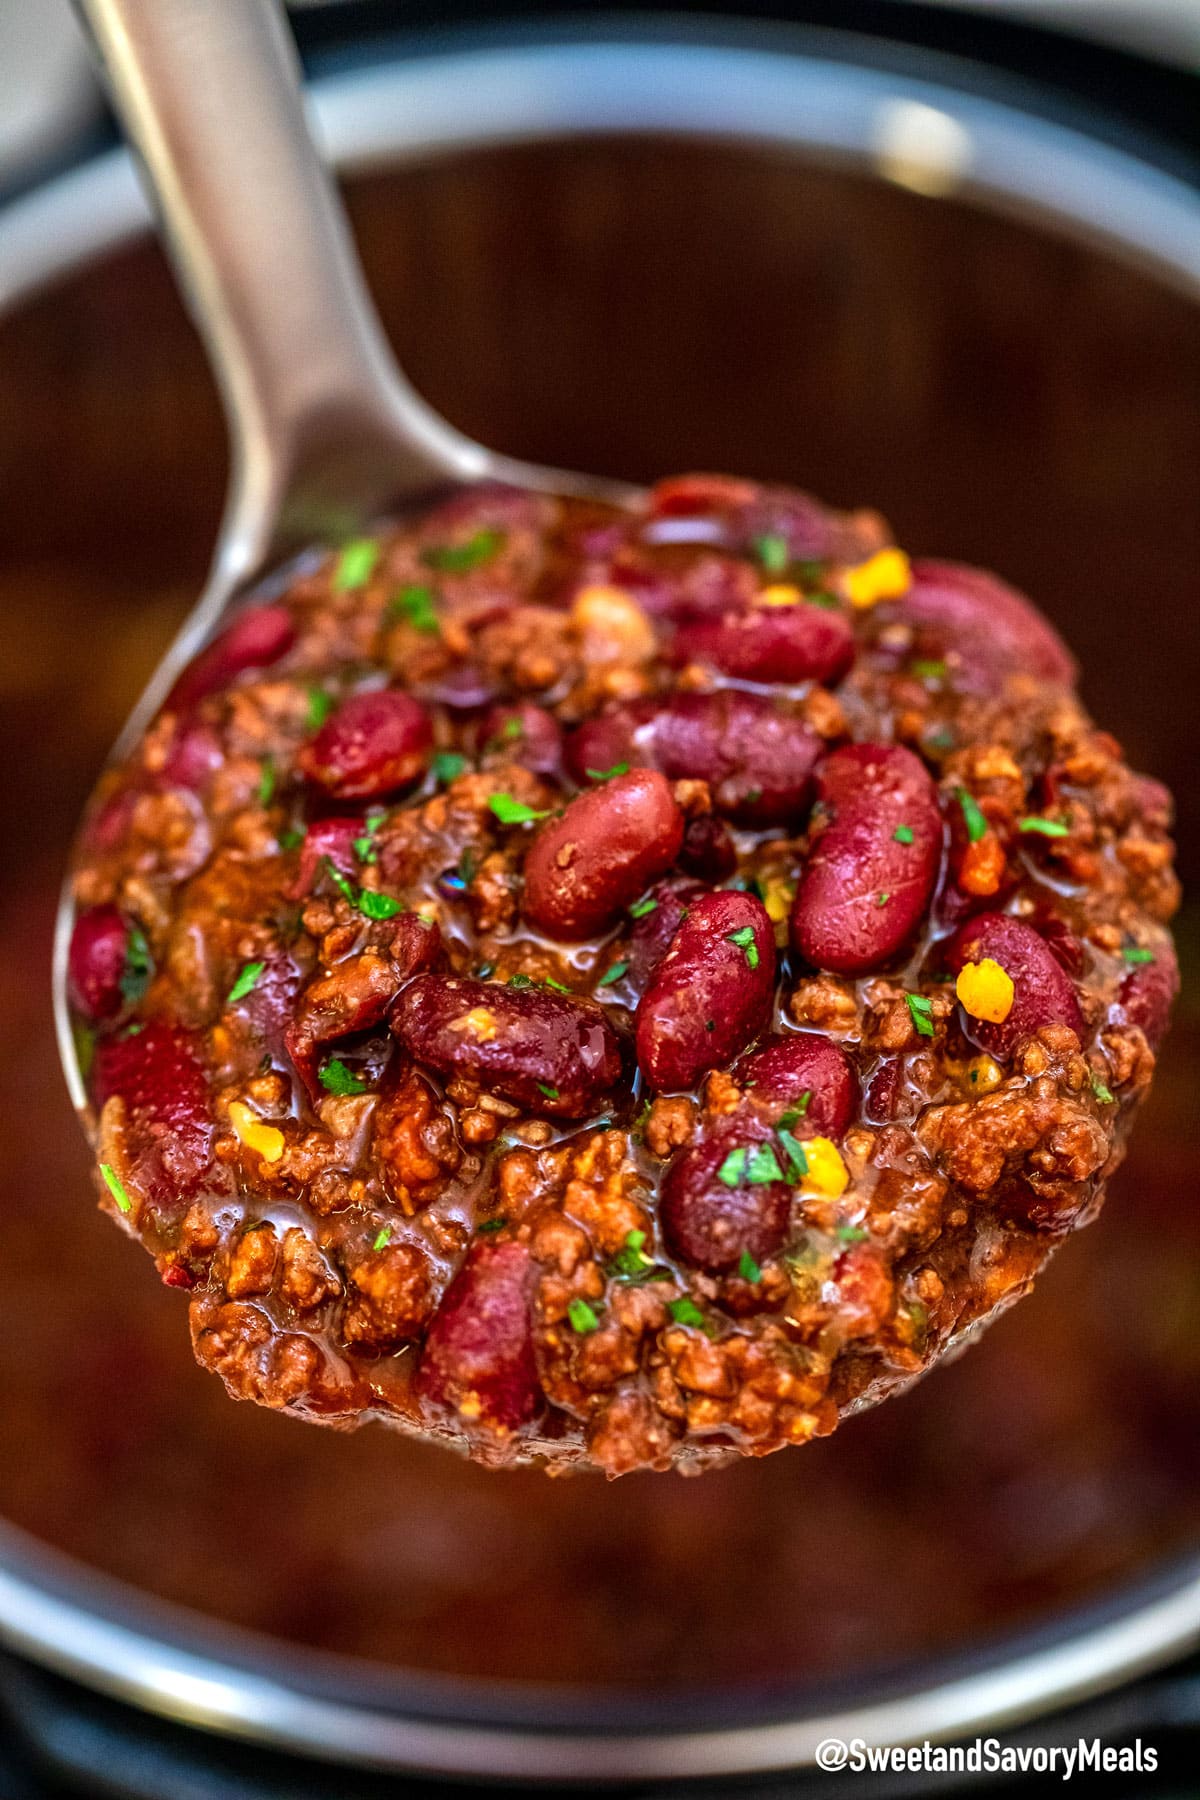
Best Instant Pot Chili
Ingredients
- 1 1/2 pounds ground beef
- 1 tablespoon olive oil
Spices:
- 1 tablespoon onion powder
- 1 tablespoon garlic powder
- 1-2 tablespoons chili powder depending on how spicy you prefer it
- 1 tablespoon ground cumin seeds
- 1 teaspoon dried oregano
- 1 teaspoon dried thyme
- 1 teaspoon smoked paprika optional
Rest of Ingredients:
- 1 medium onion diced
- 6 cloves garlic minced
- 2 tablespoons tomato paste
- 3 cans of 15oz each red kidney beans drained & rinsed
- 1 1/3 cups beef broth or chicken broth low sodium
- 1 tablespoon Worcestershire sauce
- 1 tablespoon soy sauce
- 1 can of 28oz crushed tomatoes
- 3 bay leaves
Garnish:
- Sour cream
- Jalapeno pepper diced and seeded
- Cheddar cheese
- Avocado
- Parsley chopped
Cornstarch Slurry:
- 2 tablespoons cornstarch
- 2 tablespoons water
Instructions
- Add all the spices and dried herbs listed under this recipe's "Spices" section to a medium bowl and whisk together. Set aside.
- Read the NOTES and decide what method you prefer for browning the beef. I used #2 this time. Select Sauté, and once your IP reads Hot, add the oil. Make sure you tilt the pot so the oil covers the whole surface.
- Once the oil is hot, add the beef to the pot and DO NOT stir for 4-5 minutes. Gently remove the pot from the IP and pour the excess fat into a small bowl. Return the pot to the IP, using a wooden spoon to break down the beef, and continue cooking for another 5-7 minutes, stirring constantly until the beef is browned well.
- Add the diced onion and minced garlic and cook for another 2 minutes, stirring often.
- Add the mixed Spices to the beef, stir, and cook for 1-2 minutes.
- Now, you need to deglaze the pot. When you sear the beef, lots of bits and pieces stick to the bottom of the pot, which can later contribute to burning, and your pressure cooker won't pressurize.
- Add 1/3 cup of beef broth to the pot and scrape the bottom of the pot using a wooden spoon until it is clean. Cook the beef in the broth for 5 minutes to reduce the moisture.
- Add the tomato paste and reserved beef juices, stir to combine.
- Add the washed and drained beans and gently stir to combine.
- Add the remaining 1 cup of broth, Worcestershire sauce, and soy sauce. Gently stir to combine.
- Add the crushed tomatoes to the meat, and DO NOT stir. The tomatoes can stick to the bottom of the pot and prevent it from coming to pressure. Add the bay leaves on top.
- Close the IP with the lid. Turn the steam release vent to 'sealing' and set it to cook for 12 minutes at High Pressure using the manual setting.
- When the cook time is up, allow the pressure to reduce on its own without opening the steam release vent for 15 minutes. This is called Natural Pressure Release. After 15 minutes, gently release the rest of the pressure by opening the vent.
- Open the lid and discard bay leaves. Gently stir the chili.
- If you prefer the chili thicker, turn on the Sauté function and use the 'adjust' button to set it to medium heat.
- In a small bowl, mix cornstarch with water until dissolved, then add it to the pot. Gently stir to combine, and let it simmer for 5 minutes until it thickens.
- Season with salt and pepper to taste.
- Serve hot with cornbread, sliced avocado, sour cream, and parsley.
Video
Notes
How to brown the beef
- The baking soda method: Mix 1/2 teaspoon of baking soda with one tablespoon of water until it’s dissolved. Add the mixture to the ground beef and using your hands to mix it in. After that, let the beef rest for 20-30 minutes. My mom (and obviously many other cooks) use this trick in many recipes that ask for ground beef. First, it helps the meat retain the moisture, which makes searing and browning, especially in the IP, much easier. Second, it tenderizes the meat, for the same reason, since the beef retains more moisture, it’s fluffier and more tender once cooked. I also love to use this trick when cooking Salisbury Steaks!
- The sear and reserve method – once your Instant Pot is hot and ready to sear the beef, add it to the pot and DO NOT stir for 4-5 minutes. This way, the meat gets a chance to get golden brown on the bottom layer. At this point, the beef releases moisture. Carefully remove the pot from the IP and drain the excess fat into a small bowl, which will be added back to the pot later. Add the pot back to the IP and break down the meat using a wooden spoon, and continue cooking.
- Quick sear method: If you don’t care how browned the beef is, follow the instructions on #2 and use the easy way out. This means breaking apart the meat after the 5-minute mark and continuing to cook it in the moisture that is being released. This is a quick and easy method.
More tips to consider
- Don’t forget to add salt and pepper after cooking.
- Be sure to use lean ground beef so the juices added to the chili are not all grease. I recommend 85/15.
- Ensure the tomatoes are on top of everything and do not stir after adding them. They can cause a burn notice.
- Also, take the time to deglaze the pot. Burnt bits on the bottom can also cause a burn notice.
- Let your guests add their toppings. The chili is delicious. Let them taste it first.
- Use low-sodium broth and soy sauce so the chili is not too salty.




Looks amazing! Have to make this for my husband!
I wish I could reach right in and grab the spoon in your photo! I have a weakness for chili, it’s one of my favorite comfort foods. Yours looks delicious!
This chili looks so comforting!
I love my instant pot. This is one of the recipes we get to make the most. So easy and filling.
I love the instant pot!! My family would love this chili!! Looks incredible!!
You have the best tips for everyone to customize this to their liking! So awesome!
This looks so good ! I know my hubby would love this chili, will get the ingredients I don’t have tomorrow on our weekly grocery shopping trip !
My husband loves chili and the instant pot, so this would be the perfect dish for him to make 😉 and I can just sit back and enjoy!
Can you believe I’ve never had chili made from the Instant Pot? I’ve made it in a slow cooker and it turned out great. I’ve only heard good things about the Instant Pot and what it produces so your recipe must be delicious!
It is so good!
I love the instant pot. It’s my fave kitchen gadget. This chili sounds amazingly delicious. PErfect comfort food for the cold weather.
This is definitely packed with flavor and perfect for the cold weather! I also appreciate all the tips that you shared! It looks amazing and it’s easy to make!
I would love an Instant Pot! This recipe sounds so delicious and hearty. I would like to make a big batch of this so we can save the leftovers.
This looks and sounds incredibly yummy! We are huge chili fans. I love the avocado topping!
I keep seeing all these yummy Instant Pot recipes and now I think I need one! That chili looks AMAZING!!
I really want to add an instant pot to my appliance collection. There are so many great recipes and the meals cook without constant watching. I haven’t had chili in a very long time.
I’ve only used my InstaPot twice. I still have a slight fear of it. LOL. But, this does look amazing, and I love a good chili. I’ll have to try it.
This looks so delicious! I only have a crockpot, but now I am hoping to get an instant pot soon so things will be a little quicker for a moms busy schedule!
I love making things in my InstantPot. It’s so easy and it always turns out really good.
Love it, I tried it its delicious, thank you !
Can I just brown the beef in a separate pan?
Yes, sure.
Followed the recipe almost exactly last week. Only made two additions: added 1 shot of short espresso and 1/2 a ghost pepper I grew last summer. Very tasty chili with a nice combination of spices. I’m making it again tomorrow. =)
Delicious! This was easy and the flavour is devine! A few modifications I found successful: only used one can of kidney beans- it was enough for me! Also added a can of corn- yum! Lastly, once the pressure released I added diced mushroom and yellow pepper and let them simmer to cook while the chilli reduced a little. YUM, thank you!
Oh my!!!!!!! I’m new to Instant Pot and I love it!!!!! This recipe was easy to follow and the result is phenomenal. Delicious!!!!! Thank you so much for sharing ?
I am so glad that you liked it! Thank you for letting me know!
I am very impressed with the way you explain your process – very complete. I like the enhancements you suggest, I use the coco, cinnamon, and vinegar – all ingredients (sparingly) – thanks
What size was your Instant Pot?
6qt
Hi there! I was wondering if I could make this with dried beans instead of canned and how that might change the cooking process in my instant pot?
Thanks 🙂
No, as they require way more water to cook. I recommend you cook the dry beans first, 1 lb of dry beans plus 8 cups of water, salt and pepper. Pressure cook for 25 mins and NPR 20 mins. Drain and rinse the beans under cold water. Clean the pot and make the chili.
so easy to make and so delicious! Can eat it every day all day! 🙂
Fun dish, and loaded with flavors. My husband really loved it, especially in the Instant Pot it was quicker and faster. Nice recipe, will def. repeat it!
Happy that you liked it!
This turned out fantastic, not too spicy but full of flavor. My new favorite chili recipe. The only changes I made were less fresh garlic and only one can of cannellini beans. I was worried about the large amount of spices but it was just right. Thanks for this great recipe.
Hi Sherry, I am so excited that you loved the recipe 🙂 thank you for the feedback!
I made this for our annual chili cookoff at work on Halloween. I followed your recipe, though used a variety of beans and meat, cooked in my InstatPot then heated the next day in a slow cooker. Out of the 16 chilis submitted, I won first place (bragging rights!), by quite a large margin. Thanks for sharing your recipe! It is a keeper!
Hi Dawn, I am so excited that YOU and EVERYONE else loved this recipe. For sure its a keeper, thank you very much for taking the time to share your feedback!
I have an 8qt. Can I dubl recipe, if so, do meat in 2 batches? Will it fit?
You should be able to double it, yes, do the meat in batches.
I just bought a instant pot mini (3 quart) and I really want to try your recipe to break it in! Do I just reduce your recipe in half?
yes, just reduce by half, you might have to taste and adjust for the spices.
Kinda felt like I could have cooked it in the stove there were so many steps
Hi April, you can cook on the stove almost any recipe that is made in the Instant Pot. However, for great flavor, a chili is cooked for a long period in the slow cooker, or on the stove. This recipe cuts the time by a lot. Also, it doesn’t have many steps.
Made this in my IP and didn’t have any fat from browning (chose #2) probably because I used 90/10 sirloin. I had to add a little extra beef broth for the deglazing which worked out just fine. I sautéed at the end to thicken. I also didn’t use any beans. The spices were perfect and the chili came out quite tasty. I topped with shredded cheddar, sour cream, and sliced avocado. My husband added crushed tortilla chips into his bowl. Thanks for the recipe, we’ll make this again.
Instead of corn starch, I use a slurry made with masa harina for more flavor.
Could i use dry beans instead of canned? And if so do I cook the beans first or can I just cook them all together at once in the instant pot?
No, you can’t. You will have to cook the beans first and after that use in this recipe.
Loved this! I seared the beef in a separate cast iron skillet, then added to InstaPot, and followed remaining steps. I included cinnamon and cocoa. And I stirred in about 1 TBS brown sugar, post pressure release. Topped with sliced avocado, diced onion, Cheddar cheese. Crushed red pepper. AMAZING. THIS IS A KEEPER.
Hi should I increase the broth for an 8 qt? Can you make it ahead and leave on keep warm?
sure, it can stay on warm for a few hours!
This is my go to chili recipe… or favorite!
It was right there in your amazing instructions…don’t use meat that is too lean. I missed that part and sure enough I got the burn error. I think I was able to salvage it though. Still I am mad myself for missing that critical part of this recipe.
Thank you for the detailed instructions. The flavor is certainly there!
Hi Kelly, and thanks for the notice. Yes usually using a bit fattier meat is better. Hope you liked it and had a great dinner! Thanks
I’m making this beauty tonight for my family. There were lots of steps , but I hope it is all worth it…we’ll see. It looked delicious. So I’ll know in 30 minutes 🤔……
Well, I made this chilli, I have some good news and I have some bad news.
The good news is that it was delicious, but then you and everyone that has attempted to make this chilli knows.
The Bad news is that after supper, and as I was waiting for the chilli to cool down. And if finally did I attempted to carry my invert of my instant pot, and put it on my kitchen table.
Turned around to get a cover fir my invert and the next thing I heard a very Large CRASH💥.
Let’s just say I had this wonderful chilli from literally from wall to wall.
Ps. Have you ever saw a grown man cry😱🥺?
Wow, sorry to hear that :(. I guess you can give it one more try, and hope it will not happen again:))).
My family loved this recipe! I used 1 1/2 teaspoon chili powder, chicken bullion, and added a small can of tomatoe sauce. But otherwise followed the recipe exactly, without using any recommended enhancements. My picker eater children even liked it with cheeses on top.
Glad you loved it! Thanks for your feedback!
What is the serving size?
About 2 1/2 cups
Amazing recipe! Best I have found. I can’t stop sharing it with family and friends.
This is the second time I have made it and it’s just as good as the first time.
The only adjustments I made were adding 1 can of black beans, 1 can of red kidney beans and 1 can of peaches and cream corn (I like the sweet flavour it adds) instead of using just red kidney beans.
I also use ground turkey instead of beef (due to a beef allergy) it works so well with ground turkey.
I love that the spices can be pre-mixed ahead of time. Quick and easy meal! The tips are fantastic!
Thanks Ann for your feedback. Glad you loved it!
This is our favorite chili recipe. So easy and quick in the instant pot. We make a big batch on Sunday and eat it all week. Yum!
This Instant Pot Chili needs to happen at my house very soon!!
This is a really amazing chili! Thank you so much for the tips!
Instant Pot Chili is one of the best meals year round! I can’t wait to make this next week, as I just added it to my menu.
Tried this for dinner last night and it was the perfect comfort food; so much flavor in one bowl! Looking forward to left overs again this evening!
This chili is finger-licking delicious and I love that I can make it in my IP!
Great recipe!! Easy to follow and delicious. A family favorite.
Can this recipe be doubled??? I have an 8 quart pot
Yes, sure!
I followed this recipe to the letter. My husband loved the smells and taste of this recipe. I got a kiss the cook with this one. Thank you. A++++++++++.
Thank you Karen!
Super delicious! 2nd time making this recipe. Can you please let me know, is the nutrition breakdown based on dividing the pot into 6 servings or is it a one cup serving? I am counting macros so this is important. Thank you!!
Happy that you loved it! Thanks for the feedback 🙂 The nutrition is by dividing the pot into 6 servings.
Excellent! We don’t like a lot of cumin, so since there’s cumin in our chili powder, I omitted the seeds.
When doubling this recipe, is there any additional cook time? Thanks.this recipe is delicious.
Definitely my go-to recipe for a great chili! Yum
Very good chili
thank you very much for the feedback, I am happy you loved the recipe.
I made this chili recipe last night, and it was a huge hit with the family! The flavors came together beautifully in the Instant Pot, and it was so easy to follow the video instructions. Can’t wait to make it again! Thank you for sharing!
This chili recipe is a game changer! I tried it last night, and it turned out so flavorful and hearty. The video instructions made it super easy to follow. I love how versatile it is – I added some beans and corn, and it was perfect for a cozy dinner. Thanks for sharing!
This chili recipe looks amazing! I love how quick and easy it is with the Instant Pot. Can’t wait to try it this weekend! The video demonstration is super helpful too. Thanks for sharing!
This chili recipe is a game changer! I tried it last night, and my family loved it. The video made it super easy to follow along. Can’t wait to make it again for our game night! Thank you for sharing!
I just tried this Instant Pot chili recipe, and it’s a game changer! So easy to follow and full of flavor. This will definitely be my go-to for chilly nights. Thanks for sharing!
This chili recipe looks amazing! I love how quick and easy it is to make in the Instant Pot. Can’t wait to try out those seasonings! Thanks for sharing the video; it really helps with the prep! 🌶️🍲
I tried this Instant Pot chili recipe last night, and it turned out amazing! The flavors were rich and hearty, and I loved how quick and easy it was to prepare. The video tutorial was super helpful too! Definitely adding this to my regular meal rotation—thank you for sharing!
I tried this Instant Pot chili recipe last night, and it was a hit with my family! The flavors were absolutely amazing, and the video made it so easy to follow along. I love how quick and convenient it is to make a hearty meal in one pot. Thank you for sharing this recipe!
This chili recipe is amazing! I love how quick and easy it is to make in the Instant Pot. The video was super helpful, and my family devoured it. Can’t wait to try more recipes from you!