
Challah Bread Recipe
As someone who grew up in Eastern Europe in traditional villages, I remember my childhood filled with freshly baked bread from my grandmother. I watched her curiously as she made challah bread and, from a very young age, helped her. Now I make this bread myself, and while it looks sophisticated, it’s one of the easiest recipes anyone can master with simple steps and a bit of patience. Because baking bread is all about inner calm, love, and not rushing.

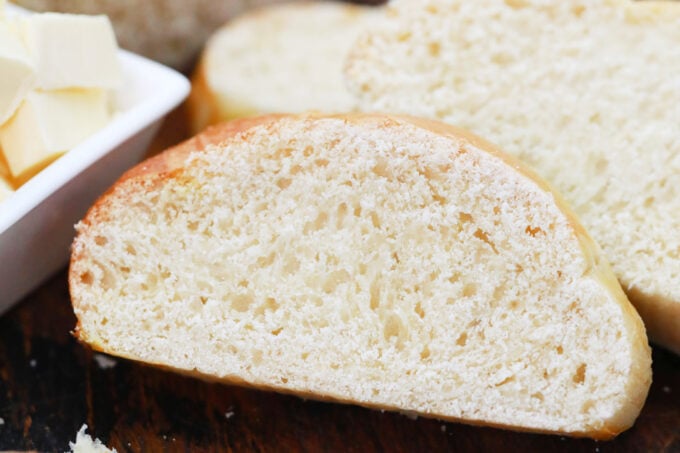
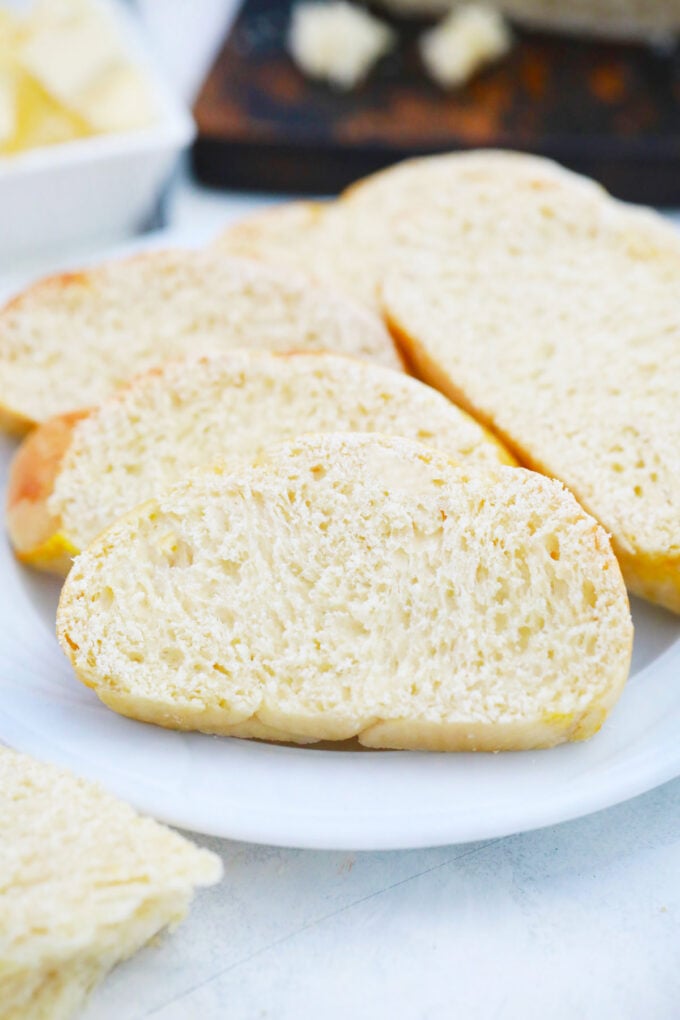
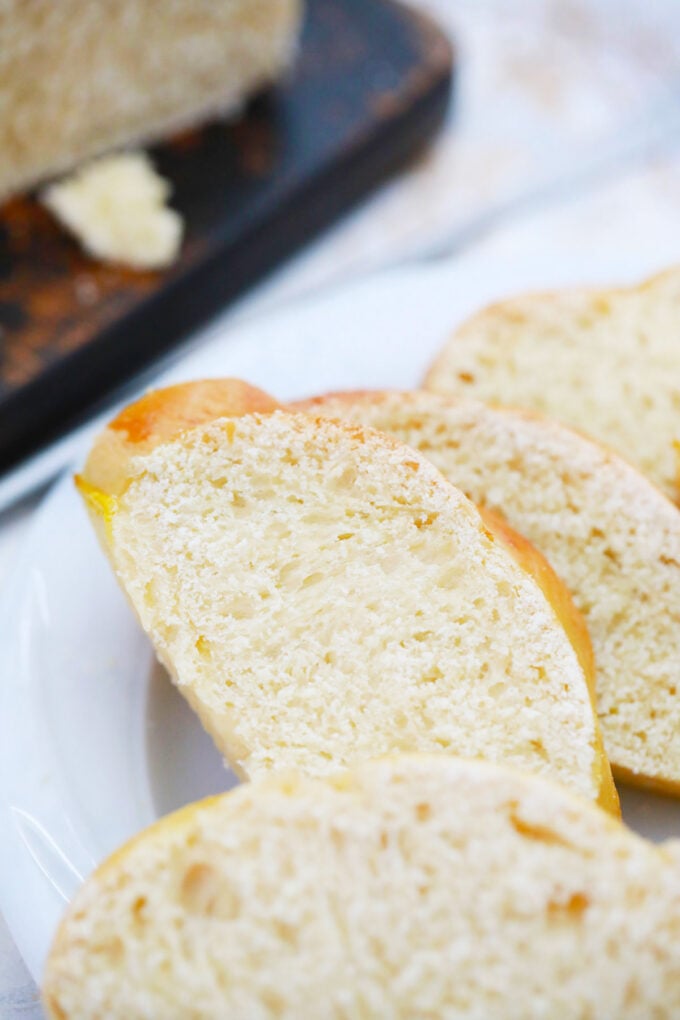
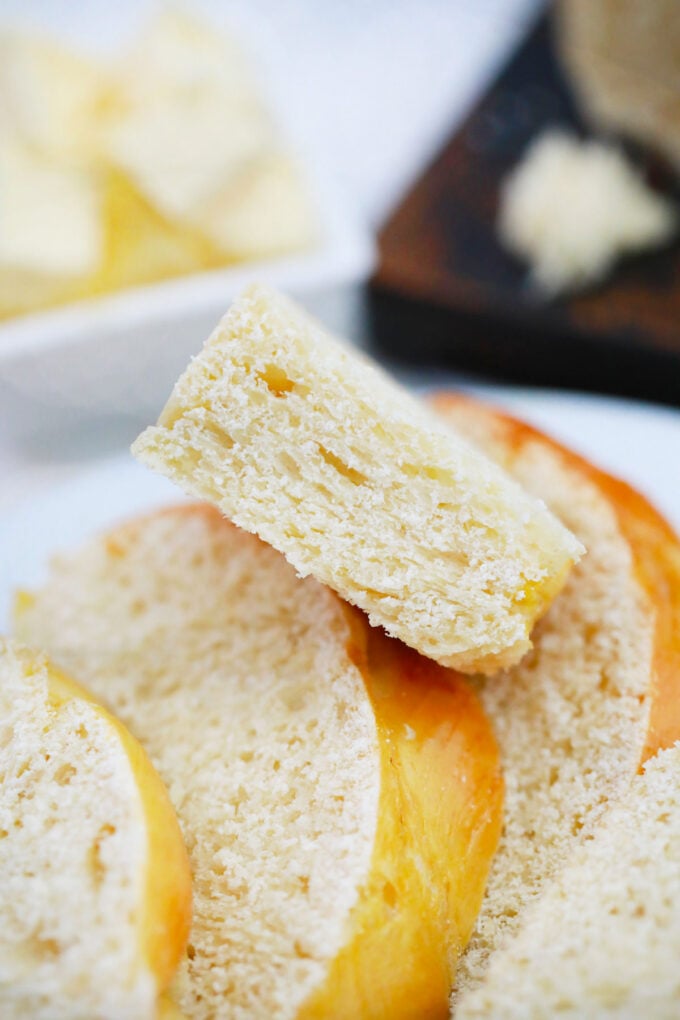
Challah Bread is rich and tender, with a fluffy interior that’s to the eggs. The branding and shiny egg wash give it a stunning look, making it ideal for sandwiches and fancy French toast recipes that look like they came from a high-end cafe. It’s hearty and a bit sweet, making it perfect for many recipes. I like it for breakfast with a layer of salted butter and homemade strawberry jam.
Table of contents
If you have been intimidated by homemade bread, this is your chance to shine and to master the skill. This homemade challah bread is the ideal recipe to start. It’s a yeast-based bread that is not pretentious, and on top of that, you will learn how to easily braid the bread. I am positive you will be proud and impressed by the end result.
Usually, when I make this recipe, I make a few extra loaves, and my friends and relatives look forward to receiving one as a gift. I also like to slice the bread and freeze individual slices; this way, I can just defrost them in the toaster. Another great tip, make an extra loaf, and let it go stale, yes, you read it right, after that use it to make this incredible Blueberry French Toast Casserole.
Why you will love this recipe
- Perfect for holidays: I like to serve challah during holidays such as Shabbat, Passover, and Rosh Hashanah. Making it at home has become a family tradition we look forward to.
- This recipe is easy: While this bread may look fancy, you will be surprised to find it has just a few steps to make the perfect loaf.
- No bread maker is needed: There is no need for a fancy bread maker. Just your two hands and a few simple ingredients.
- Very inexpensive: I can make several loaves for less than $10! I usually bake a few extra to gift to friends.
What you will need

- Dry ingredients: I use all-purpose flour for the best consistency and instant yeast to help it rise faster.
- Wet ingredients: vegetable oil to add moisture and richness while keeping it kosher, honey to sweeten, and eggs to enrich the dough and create a soft, airy crumb. I also add an egg yolk for extra richness.
- Seasonings: Just a little salt for a bit of flavor, as a preservative, and as a symbol.
How to make
Mix the dry ingredients: First, I combine the flour, yeast, and salt in my stand mixer.
Mix the wet ingredients: In another bowl, whisk together the oil, honey, two of the eggs, the egg yolk, and ¾ cup of lukewarm water to combine. Then I add it to the dry ingredients and knead on medium-low speed until a sticky dough forms that clings to the bottom of the bowl. This should take about five to seven minutes.

Knead the dough: Now, I dust my hands and counter with flour before kneading the dough into a smooth ball. Then I place the ball in an oiled bowl and flip it once to make sure it is coated all over. I cover it with plastic and let it sit in a warm spot for two hours or until it doubles in size.
Cut the ropes: After, I place it on a lightly floured surface and dust it with flour before deflating and cutting it into four 9-ounce long ropes about 20 inches long. I place them next to each other and pinch them together at the top, making them fan out.
Braid the loaf: To braid the loaf, I take the strand farthest to the right and weave it to the left through the other strands. Continue braiding until it is completely braided, then tuck in the ends.

Let it rise: Now, I put the loaf onto a baking sheet lined with parchment paper, loosely cover it with plastic wrap, and let it rise again in a warm place for two hours, or until it has risen about 1.5 times its size.
Bake: When ready, I preheat the oven to 350 degrees F and place the oven rack in the middle position. Then I beat the last egg and brush the dough with a pastry brush before placing the baking sheet on top of another to keep the bottom of the bread from getting too brown. I bake it for 25 to 35 minutes or until it is rich brown.
Cool and serve: Finally, I let it cool on a rack for a few minutes before slicing it.
Expert tip
How to make braiding simple
While there are many braiding videos online, the best way to learn is to just jump right in and try it yourself. But before you go ruining your dough, try it with something else, like rope or shoelaces. Simply tie some rope or shoelaces to the counter and practice until you get it perfect. Once you feel confident, start making the dough.
More tips to consider:
- Challah can be braided in many ways, using three to six strands.
- Instead of a braid, I have also made my challah into a knot or a larger circle.
- Active dry yeast can be used instead of instant, but it will take longer to rise.
- Make each strand wider in the middle so it is thick and puffy.
- Try to make each strand the same size so the bread is not lopsided.
Recipe variations and add-ins:
- Add fruit: Sometimes I like to add minced fruit such as apples, strawberries, blueberries, or peaches.
- Chocolate chips: The chocolate lover in me sometimes talks me into adding them to the dough. This is something I only do for special occasions.
- Add seeds: This bread is also wonderful topped with poppy, chia, or sesame seeds.
- Extracts: To make this bread more flavorful, I like to use a variety of extracts in the dough, such as almond, vanilla, and even mint.
- Regular loaf: This bread can also be shaped into a regular loaf for an amazing batch of French toast.
Serving suggestions:
I usually serve my challah bread as a centerpiece during the holidays when we celebrate the Sabbath or Rosh Hashanah. It pairs well with my tender, juicy slow-cooker beef brisket, made with an amazing barbecue sauce, or this classic corned beef. The bread is also delicious when turned into French toast. Usually, if I have a leftover loaf that has been sitting for a few days, I turn it into French toast casserole.
Another favorite, reminiscent of childhood, is this fancy bread, toasted with butter and homemade plum jam. Today, I turn it fancy and serve it for brunch with homemade blueberry butter or whipped strawberry butter, along with a variety of homemade jams. A combo that is a big hit is slightly chilled challah bread topped with whipped ricotta cheese and grilled peaches. They taste so good and are made in just 15 minutes with only a few ingredients.
How to store leftovers:
- Refrigerate: Wrap in plastic, and it will stay fresh at room temperature for 2-3 days or in the fridge for up to a week.
- Freezing: Wrap it in plastic, then place it in freezer bags. It will stay fresh for up to three months. I prefer and recommend actually slicing it and freezing individual slices.
- Defrost: Thaw overnight in the refrigerator for the best flavor.
Frequently asked questions
When I want to make mine ahead of time, I stop after it is ready for the second rise and let it chill in the fridge overnight. Then I take it out and let it reach room temperature before continuing with the rest of the steps, such as kneading, separating, and braiding. Just make sure it is at room temperature before handling it so it is pliable enough.
If this happens, it is usually because of expired or dead yeast. I always like to use fresh yeast when I make any kind of bread. But always check the expiration date. If in doubt, check it by proofing it in warm water with a little bit of sugar. The yeast can also be killed if the water is too hot. Make sure it is under 115 degrees F.
Challah bread is supposed to be slightly sticky. But if it is too sticky to handle, that is not normal. This can be from having too much liquid or not enough gluten. Sometimes, this can be the result of not enough kneading. But be careful, because over-kneading can make the dough too tough. High humidity can also cause sticky dough. Add a bit more flour to your hands and see if that helps.
Letting the dough rise too long can weaken the gluten, causing it to collapse. If it rises really big at first and then sinks after it cools, it is probably because it was overproofed. To test this before baking, poke it. If it springs back slowly, it is good. If it does not spring back at all, it is overproofed and may not rise.

More bread recipes:


Loved this recipe? I’d love to hear from you! 💛 Leave a 5-star rating ⭐️ in the recipe card below and share your thoughts in the comments – I read and appreciate every single one!
Let’s stay connected! Follow me on Facebook, Instagram, Pinterest, and YouTube for more delicious, sweet and savory recipes. Have a question? Ask in the comments, and I’ll be happy to help! 😊 with love Catalina!
Challah Bread
Ingredients
- 4 1/4 cups all-purpose flour plus more for dusting
- 1 tablespoon instant yeast
- 1 1/2 teaspoons salt
- 3/4 cup lukewarm water
- 6 tablespoons vegetable oil
- 6 tablespoons honey or maple syrup
- 3 eggs at room temperature
- 1 egg yolk at room temperature
Instructions
- In a stand mixer fitted with the dough hook, combine the flour, yeast, and salt. After that, mix on low speed for 30 seconds.
- In a separate bowl, combine the lukewarm water, oil, honey or maple syrup, 2 eggs, and the egg yolk. Whisk gently to combine.
- Add the egg mixture to the dry ingredients and knead at medium-low speed until a sticky dough that clings to the bottom of the bowl forms, which will take 5 to 7 minutes. The dough will seem wet.
- Dust your hands generously with flour, and also dust a working surface with flour. After that, transfer the dough to the working surface and dust the top with flour. Knead it into a soft, smooth ball.
- Lightly grease a large bowl with oil, place the dough in it, flip it over to ensure it's evenly coated so it won't dry out, and cover the bowl with plastic wrap. Place it in a warm place, and allow it to rise until doubled in size, 2 to 3 hours.
- After that, place the dough onto a lightly floured work surface and dust with flour. It will deflate.
- Cut it into four even 9-oz pieces, and then stretch each piece into a rope about 20 inches long.
- Arrange the ropes parallel to each other, pinch them tightly at the top, and then spread them out.
- You start by taking the strand farthest to the right and weaving it toward the left through the other strands. Take the strand furthest to the right and repeat the weaving pattern again: over, under, over. Repeat this pattern until the whole loaf is braided. Tuck the ends under to give the loaf a finished look.
- Transfer the braided loaf to a parchment-lined 13 x 18-inch baking sheet. Cover the loaf loosely with plastic wrap or a clean kitchen towel and let it rise in a warm, draft-free place until about 1.5 times its original size, 1 to 2 hours.
- Preheat the oven to 350 degrees F and set an oven rack in the middle position.
- In a small bowl, beat the remaining egg and brush the dough with it.
- Stack one baking sheet on top of another to help prevent the bottom crust from browning too much. Bake for 25 to 35 minutes, or until the crust is a rich brown and the internal temperature reaches 190°F to 200°F on an instant-read thermometer.
- Remove the bread from the oven and place it on a cooling rack. Slice and serve.
Notes
How to make braiding simple
While there are many braiding videos online, the best way to learn is to just jump right in and try it yourself. But before you go ruining your dough, try it with something else, like rope or shoelaces. Simply tie some rope or shoelaces to the counter and practice until you get it perfect. Once you feel confident, start making the dough.More tips to consider:
- Challah can be braided in many ways, using three to six strands.
- Instead of a braid, I have also made my challah into a knot or a larger circle.
- Active dry yeast can be used instead of instant, but it will take longer to rise.
- Make each strand wider in the middle so it is thick and puffy.
- Try to make each strand the same size so the bread is not lopsided.
This is SOOO perfect!!
Fluffy and yummy!
My favorite bread! I can’t wait to try this recipe!!
This Challah bread looks incredible! I bet it tastes amazing!
Perfect challah bread! I’ll be making it over and over again!
This is such a perfect challah bread recipe! Thank you so much for sharing!!
This looks and sounds delicious. I will give this a go next week!
This looks delicious. I love challah bread, but I’ve never tried making it before. It’s actually a lot easier than I thought it would be!
Perfect challah bread! We all loved it.
Never made challah bread before, such a great recipe!
I cannot wait to give this a try!