
How To Make Homemade Tater Tots
What a classic I have for you today! Homemade tater tots are so easy to make – you will be impressed. I have been making them ever since I developed this recipe. The best part? The tarter tots are customizable, I use my favorite seasoning, and adjust them to my preference. They turn out crispy and golden brown, making them ideal as a side dish or to enhance other recipes!

If you are like me and love tater tots, then this blog post is for you. I discovered them when I moved to America many years ago, and it was love at first bite. They are a must-have for our Sunday family breakfasts and also delicious on salads and wraps for added crunch. My favorite way of enjoying them is with a homemade omelette and candied bacon on the side. My husband is a huge fan of this hearty and satisfying tater tot casserole.
Table of contents
Nothing beats homemade versions of the foods we’re so used to buying pre-made. Nothing wrong with the convenience, but you will love the taste of the made-from-scratch tater tots. The best part of making these at home is the ability to control ingredient quality and customize them to your liking. I love mine with shredded parmesan and Italian herbs, while my kids prefer the more classic version. I usually make a double batch and freeze it for later. It’s such a delight to have them readily available.
Why you will love this recipe
- Everyone loves tater tots: From toddlers to adults, these little puffs of potatoes are always a hit. They can instantly elevate breakfast, and the best part is that they can be added to many more dishes.
- They’re easy to make: I just have to grate some potatoes, season them, and form them into small balls to fry until golden brown. Making tater tots at home is so easy that you may never come back to store-bought.
- Add any flavors I like: The best thing about making them myself is that I can add any herbs, spices, cheese, or veggies I like. I can customize them to my liking!
- Universal: Another great thing about these, besides being frugal and not breaking my budget, is that I can use them in different recipes or for breakfast, lunch, or dinner.
What you will need
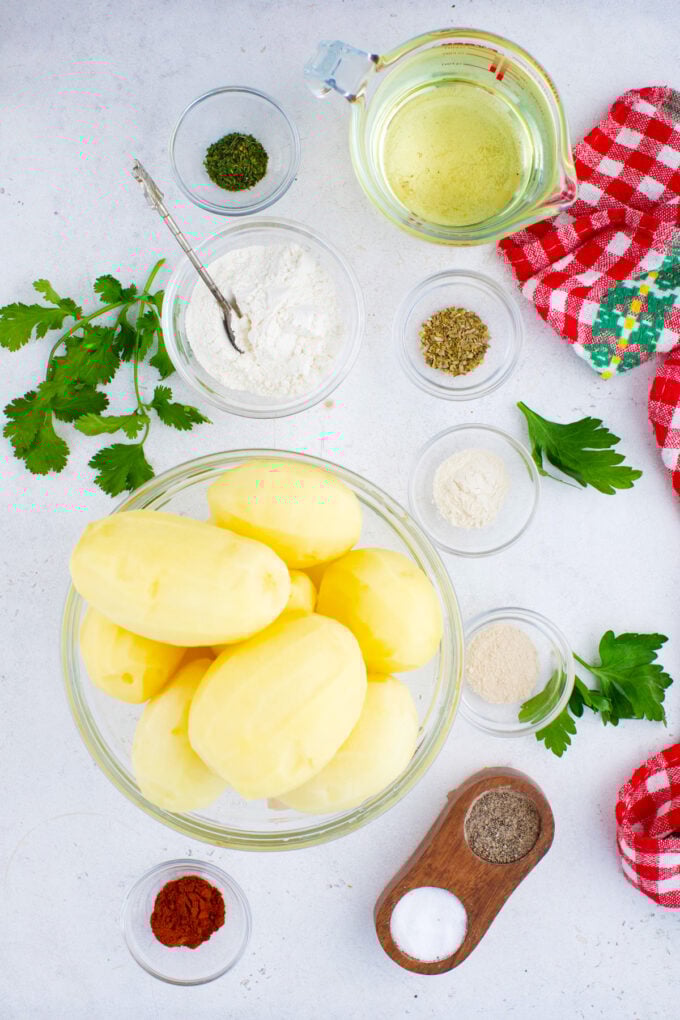
- Potatoes: I use about 4 pounds of russet potatoes, peeled and parboiled to make 6 cups.
- Wet ingredients: I prefer canola oil for cooking because it has a mild, clean taste.
- Dry ingredients: I use all-purpose flour because it has enough starch to hold everything together without becoming gummy or mushy.
- Seasonings: Garlic powder enhances the tots’ flavor with a punch of savory, while onion powder imparts a concentrated, subtly sweet note. I use powder instead of minced for these two because I don’t want any added moisture in my tots. I also add salt and pepper to taste throughout cooking to enhance the other ingredients.
- Herbs and spices: Paprika adds a vibrant color and spicy sweetness. Oregano adds an herbal depth that cuts through the richness of the other flavors. Parsley gives them an aromatic boost and a light, fresh taste.
How to make
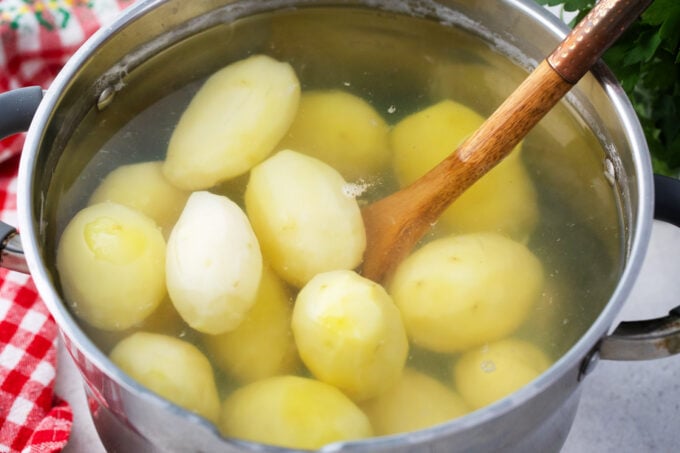
Parboil the potatoes: First, I place the potatoes in a pot of cold water, ensuring they are covered by at least an inch. I bring them to a boil and cook for about 5 minutes, or until fork-tender. Then I rinse them in ice-cold water and refrigerate them for 2 hours. Since it takes so long to cool the potatoes, I usually make them the day before.
Shred and dry: After the potatoes are cool, I shred them and lay them flat on a cheesecloth or clean kitchen towel. The fastest way to dry them is to wring them out, squeezing them until all the water is gone. Then I lay them flat and blot them with paper towels until all excess moisture is gone.
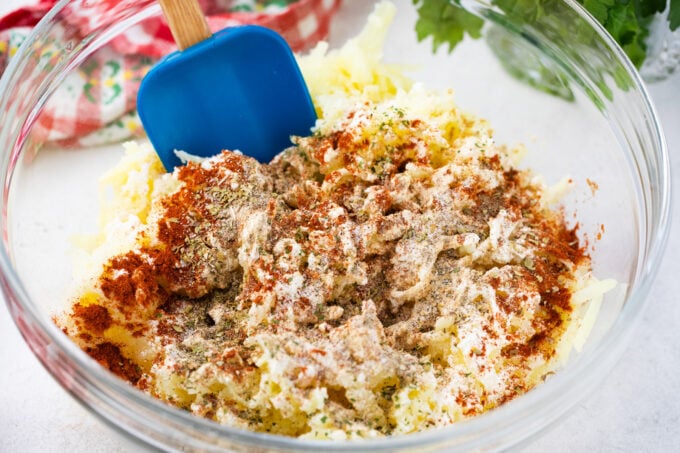
Make the mixture: Next, I combine the potato shreds with the flour, garlic powder, onion powder, oregano, paprika, and parsley in a large bowl, then season with salt and pepper to taste.
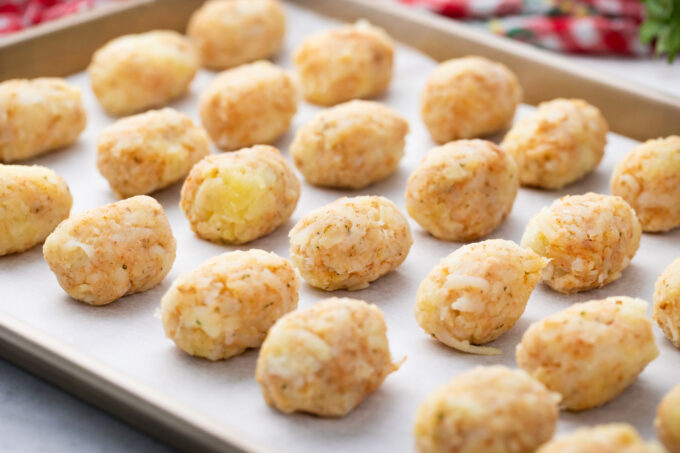
Shape the tots: Line a baking sheet with parchment paper and form the potato mixture into tots, ensuring they hold their shape. Once they are all finished, I place the sheet in the freezer while I prepare the oil. Or I refrigerate them for 20-30 minutes.
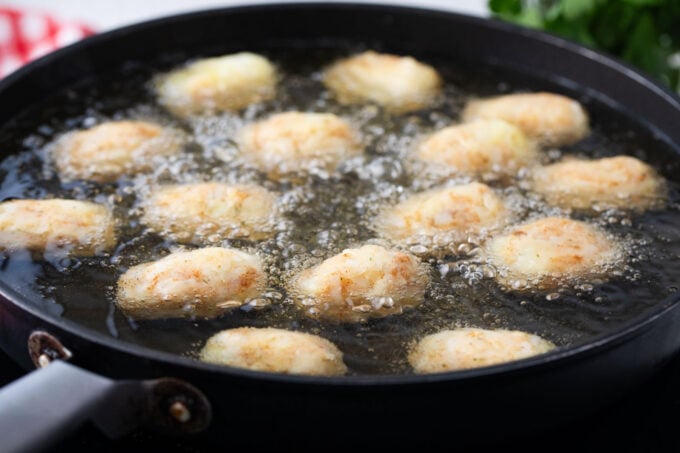
Fry the tots: Heat the canola oil in a deep fryer or Dutch oven over medium heat until it reaches 375°F. Then I fry the tots, about 7 or 8 at a time, ensuring they are not overcrowded. I let them cook for 3 to 4 minutes without touching them, until they are crispy and golden brown.
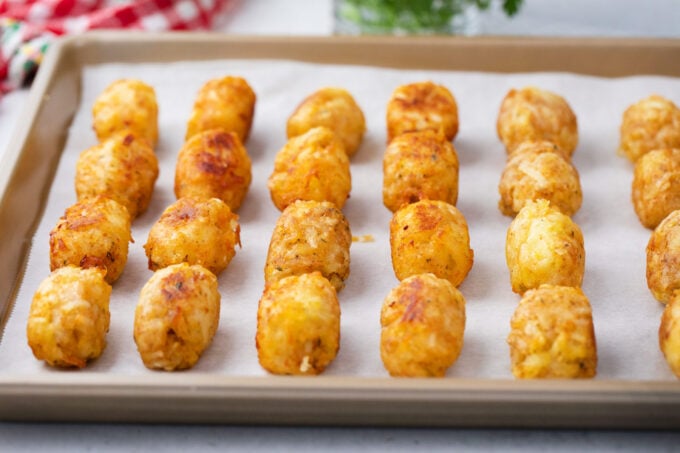
Remove and drain: As they finish, I remove them with a slotted spoon and place them on a paper-towel-lined rack to drain until all are cooked.
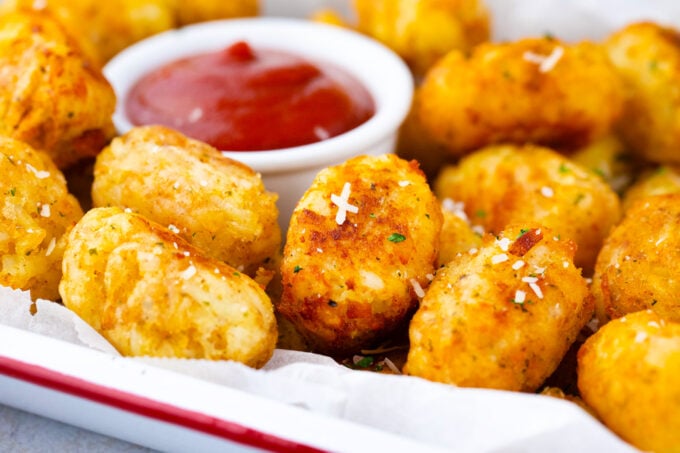
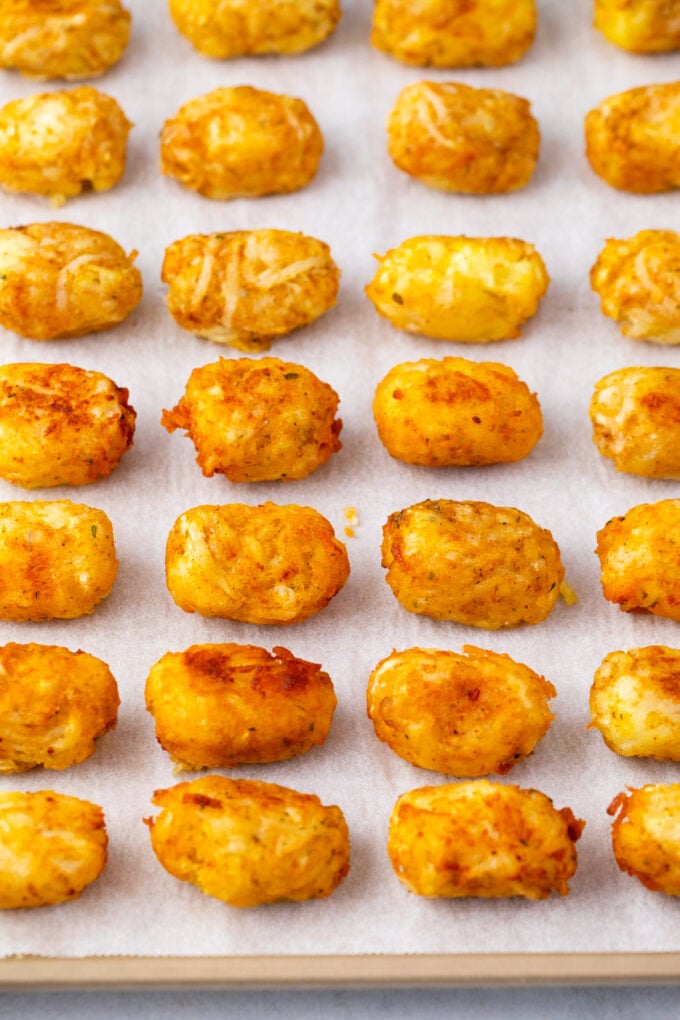
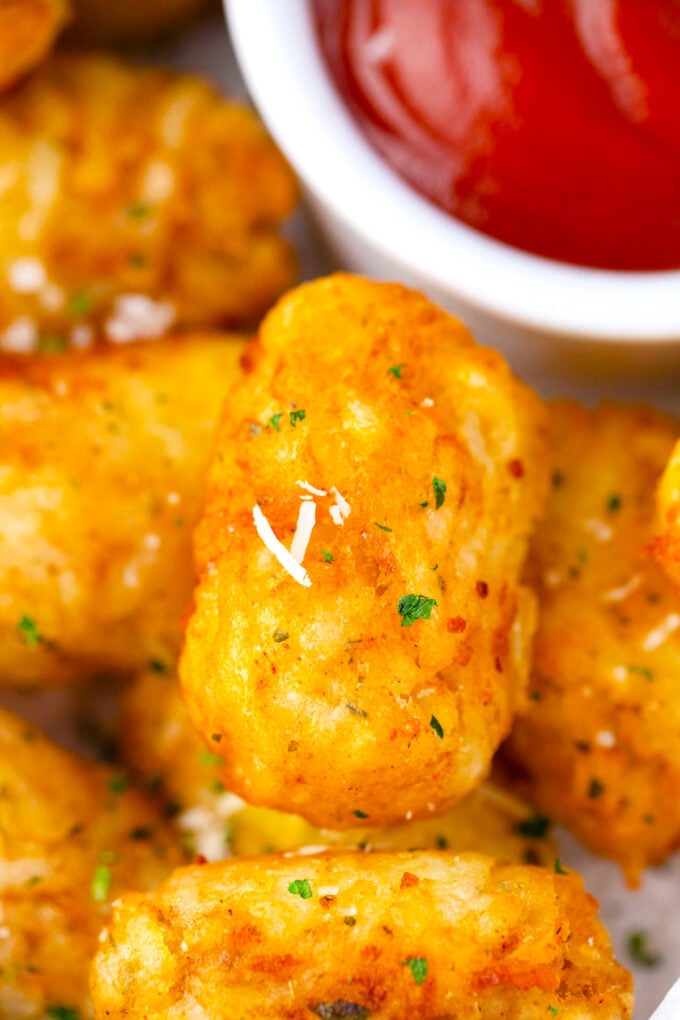
Garnish and serve: Finally, serve tater tots with dipping sauce garnished with parsley.
Expert tip
The best way to dry potato shreds
There are several ways to dry potato shreds for this recipe. The fastest way to do this is to place them in cheesecloth and twist to wring out the water. I do this several times to get as much water out as possible. Then I blot them with paper towels to remove any excess moisture. If I make a large number of tots, I use a salad spinner to process them in batches.
More tips to consider:
- Be sure to parboil them first, but do not cook them through.
- Rinse the extra starch off in cold water to prevent gumminess.
- Use russet potatoes because they hold their shape better and get nicely crispy.
- If you have lots of time, plan ahead and dry the potatoes in the refrigerator overnight.
- Make sure the potatoes are completely cool before grating, or the shreds will be mushy.
- Add 2 tablespoons of cornstarch to your mixture for extra crispy tots.
Recipe variations and add-ins:
- Crack tots: Adding bacon bits, ranch seasoning, and cheddar cheese turns these yummy tots irresistible.
- Cheesy tots: Any shredded or chopped cheese works well in these tater tots, as long as it is fresh.
- Pizza tots: Add some pepperoni bits, my Italian seasoning, mozzarella cheese, and minced sundried tomatoes to turn these into pizza-flavored tots.
- Spanish tots: Sometimes I add chorizo sausage and shredded Monterey Jack cheese to my potato mixture, then serve them with crema, guacamole, and Pico de Gallo.
- Hot tots: For those who really like spicy food, chop up some jalapenos and toss them in the mix.
- Taco tots: My kids love these when I sprinkle them with my taco seasoning and serve them with salsa and sour cream.

Serving suggestions:
Tater tots are a fun side dish for everything from fried eggs, burgers, and sandwiches to steaks and roasts. I love these with my air fryer cheeseburgers, which are juicy and can be cooked from fresh or frozen ground beef in just minutes. For something lighter, I serve them with these turkey burgers, which are a big hit with those watching their fat and calorie intake but still want juicy burgers with lots of flavor.
As I promised, these tots taste amazing with steak too. My grilled steak is the best and takes just 20 minutes to make. It is full of flavor from fresh herbs and spices, and melts in your mouth. Any kind of steak would be delicious here. But if you want something simple, like a sandwich, try my slow-cooker French dip sandwiches. The combination of tender meat, caramelized onions, and cheese is excellent, especially when paired with crispy tater tors.
How to store leftovers:
- Refrigerate: Cooled tater tots can be refrigerated in a sealed container for up to 3 days.
- Freezing: To keep them longer, I flash-freeze mine on a baking sheet, then place them in a freezer bag and freeze for several months.
- Reheating: Frozen tater tots can be baked at 400°F for 15 to 17 minutes.

Frequently asked questions
The only one I recommend is russet potatoes because they have just enough starch to be fluffy yet sticky, so they stay together well. Additionally, they are low in moisture, so they remain crisp rather than soggy. They give tots a fluffy interior and a crispy exterior. Yukon Gold potatoes are okay, but are creamier, so they do not get as crispy.
If the oil is not hot enough when you add the tots, they will absorb it rather than frying in it. It must be at least 350°F, but I prefer 375°F. That way, the outside will crisp immediately and stop the oil from getting into the potato. Also, do not add too many tater tots to the pan, as it will lower the temperature.
First, make sure the potatoes are completely dry. Squeeze out as much water as possible by wringing them out with a clean towel or cheesecloth. Then ensure there is a binder, such as the flour in this recipe, and that the mixture is rolled into tots firmly. Next, let them chill in the freezer while the oil reaches 375°F. This will help them set. Finally, do not overcrowd the pan or move it around.
Yes, just follow the directions up to the step where the tater tots are formed. Then, put the uncooked tater tots in the freezer until they are completely frozen. Once fully frozen, they can be placed in a freezer bag and stored for up to a month. When ready to cook, remove any ice crystals and fry as usual.
More potato recipes you will love:


Loved this recipe? I’d love to hear from you! 💛 Leave a 5-star rating ⭐️ in the recipe card below and share your thoughts in the comments – I read and appreciate every single one!
Let’s stay connected! Follow me on Facebook, Instagram, Pinterest, and YouTube for more delicious, sweet and savory recipes. Have a question? Ask in the comments, and I’ll be happy to help! 😊 with love Catalina!
Homemade Tater Tots
Ingredients
- 4 pounds russet potatoes peeled
- 4 tablespoons all-purpose flour
- 1 teaspoon garlic powder
- 1 teaspoon onion powder
- 1 teaspoon paprika
- 1/4 teaspoon dried oregano
- 1/4 teaspoon dried parsley
- Kosher salt and freshly ground black pepper to taste
- 1 cup vegetable oil
Garnish
- 2 tablespoons fresh parsley leaves chopped
Instructions
- Place the potatoes in a large saucepan and cover them with cold water, ensuring the water level is about 1-2 inches above the potatoes. Bring the water to a boil and cook the potatoes until they are parboiled, about 6-7 minutes.
- Once cooked, drain the potatoes well, remove them from the pot, and place them in a single layer on a cutting board to cool. I recommend refrigerating them for 2 hours or overnight in a sealed container.
- Use a box grater to finely shred the cooled potatoes. Then, use a clean dish towel to thoroughly drain the potatoes by pressing down on them to remove as much water as possible.
- Transfer the potatoes to a large bowl. Stir in the flour, garlic powder, onion powder, paprika, oregano, and dried parsley. Season the mixture with salt and pepper to taste. It should be workable but dry; if needed, add a little more flour.
- Line a baking sheet with parchment paper.
- Form potatoes into tots and place them onto the prepared baking sheet. Refrigerate for 20-30 minutes.
- Heat vegetable oil in a large Dutch oven over medium heat.
- Add the tots, about six at a time, depending on the size of the pot. Cook until they are evenly golden and crispy, about three to four minutes. Transfer them to a paper-towel-lined plate, then repeat with the remaining tots.
- Serve hot, garnished with parsley.
To Freeze:
- Method 1: Freeze them before frying. After you formed the tots and placed them onto the baking sheet, transfer them to the freezer. Once frozen, transfer them into Ziploc bags. You can later fry them, without thawing.
- Method 2: Freeze after frying. Let the tots fully cool. Transfer them to an airtight container. Freeze up to 1 month. To bake, preheat the oven to 400 degrees F and bake for about 15-17 minutes, until heated through.
Video

Notes
The best way to dry potato shreds
There are several ways to dry potato shreds for this recipe. The fastest way to do this is to place them in cheesecloth and twist to wring out the water. I do this several times to get as much water out as possible. Then I blot them with paper towels to remove any excess moisture. If I make a large number of tots, I use a salad spinner to process them in batches.More tips to consider:
- Be sure to parboil them first, but do not cook them through.
- Rinse the extra starch off in cold water to prevent gumminess.
- Use russet potatoes because they hold their shape better and get nicely crispy.
- If you have lots of time, plan ahead and dry the potatoes in the refrigerator overnight.
- Make sure the potatoes are completely cool before grating, or the shreds will be mushy.
- Add 2 tablespoons of cornstarch to your mixture for extra crispy tots.
These are fun! I’d love to make some with some sort of spicy sauce. They sound so good!
We love tater tots so much! I never thought about making my own but now I am super intrigued.
YUMMMMM! Homemade anything is so much better. A must try
Oh wow! THis is something I never thought to make homemade!
I bet these do taste heavenly. I have never though to make my own tater tots before but they look simple enough! Yum!
Those look really good. I’ve never tried making them myself before. I do love tater tots too. I would love to try making them myself too.
I think this may be something I want to try to make for the kids! I normally buy them but I bet homemade is so much better.
I have been looking for a great tater tot recipe! Thanks for sharing these!
It is always nice to know exactly what is in the the food you eat. Plus you could add in some fun seasonings.
This looks so good. I love the idea of making them homemade and being able to flavor them.
I havent had tater tots in year. I never thought to make them myself!
Tater tots is one of the best food created in the 50’s. Easy to prepare and fun to finish with friends during backdoor parties. Definitely a must try.
I can’t wait to try this homemade tater tots recipe! I love the idea of adding my own seasonings to make them unique. Thanks for sharing such a detailed guide!
Wow, this tater tots recipe looks amazing! I love the tips you shared on achieving the perfect crunch. Can’t wait to try making these at home! Thanks for the inspiration!
This recipe looks fantastic! I love that you included tips for getting the tater tots extra crispy. Can’t wait to try this out with some homemade dipping sauces. Thanks for sharing!
I tried this tater tots recipe last night, and they turned out amazing! Crispy on the outside and fluffy on the inside. Thanks for sharing such easy-to-follow instructions! I’ll definitely be making these again!
I just tried this recipe and wow, these are the best tater tots I’ve ever made at home! The tips on seasoning really made a difference. Can’t wait to share these with my family; they’ll be blown away! Thank you for such a fun and delicious recipe!
I tried this recipe today, and these tater tots turned out amazing! The crispy texture and flavor are just perfect. Thanks for sharing such a simple and delicious recipe! Can’t wait to make them again!
These homemade tater tots look amazing! I can’t wait to try this recipe out – I love the idea of baking them instead of frying for a healthier twist. Thanks for sharing such detailed instructions!
This tater tots recipe sounds amazing! I love that you used fresh potatoes instead of frozen ones. Can’t wait to try adding some cheese and herbs for an extra flavor boost. Thanks for sharing such a detailed guide!