
Fried Chicken Recipe
Nothing makes me happier than the sound of crispy fried chicken! When it comes to comfort food, fried chicken is our favorite meal. My go-to recipe produces the ultimate crunchy crust with an unmistakably flavorful and tender inside. I brine the chicken in buttermilk and a secret ingredient that completely elevates this meal. Keep on reading to find out how!

I have been making this recipe for many years, and it is by far our most mouthwatering fried chicken I have ever tried. I usually make it for game day as my friends beg me to serve it along with other favorites, like fried cheese sticks, crab cakes, and bacon-wrapped shrimp with brown sugar. An unforgettable spread of nostalgic, delicious food! I type this, and I am getting hungry.

Table of contents
I soak the chicken in buttermilk and pickle juice, which is my secret ingredient that completely transforms this recipe. It leaves the meat super tender and moist on the inside, with a crispy texture on the outside, thanks to coating it in a seasoned flour mixture. I always fry it in batches, patiently, without overcrowding the pan, to give it that restaurant-like crunch that we all love. There is no summer cookout or potluck without this showstopper fried chicken; it’s the dish that always delivers and never disappoints.
Why you will love this recipe
- It always tastes better when it is homemade. Cutting the chicken myself and using my seasonings makes this homemade fried chicken significantly better than anything I can get from a fast-food place or even a fancy restaurant. I like being able to use my blend of spices.
- Tender and juicy with crispy crust: Marinating the meat and letting it rest are two ways I make sure this chicken is tender and juicy with the crispiest and crunchiest crust.
- Making it myself is significantly cheaper: A batch of fried chicken from the restaurant can cost over $50, but I can make it at home with this recipe for under $10. And it certainly tastes better.
- A few ingredients: I rarely have to buy anything besides chicken for this recipe since I usually have everything I need. There are only a few basic ingredients.
What you’ll need
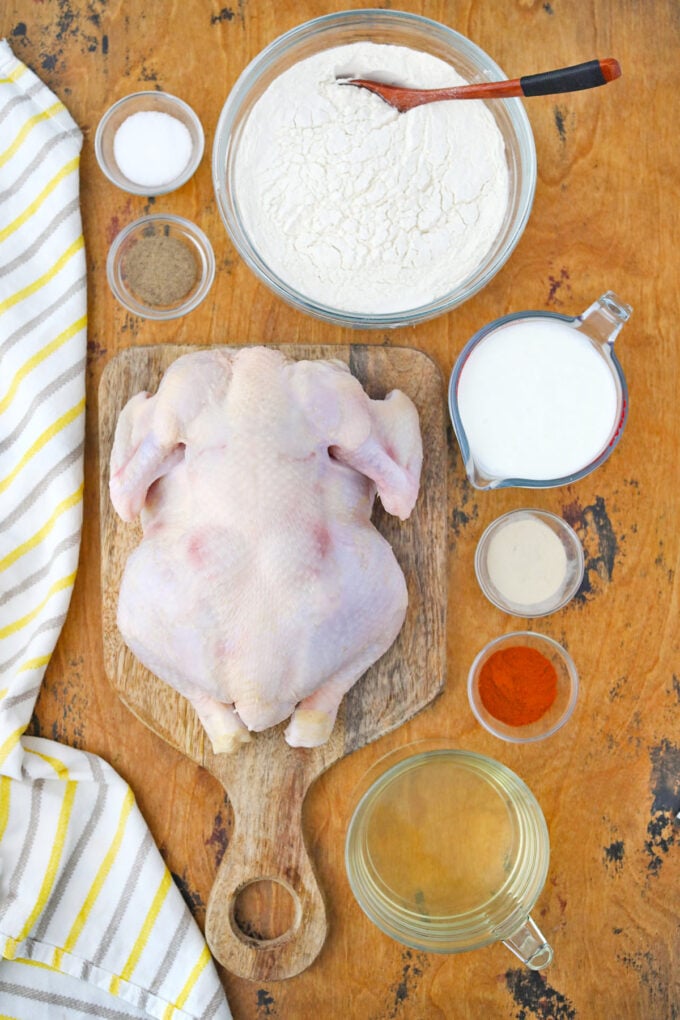
- Whole chicken – I cut my chicken to get the freshest and best pieces. I highly recommend getting an organic chicken from a reputable farmers’ market.
- Brine – I use buttermilk because the acidity tenderizes the chicken by breaking down the protein fibers. Also, the thick consistency coats it better to give it a crispier crust. My secret ingredient is pickle juice. This not only provides the chicken with a tangy flavor but also tenderizes the meat, making it melt in your mouth. It also helps retain moisture to make my chicken extra juicy. Plus hot sauce, but I like to add a dash of my favorite hot sauce to give it a hint of spiciness.
- Coating – I use all-purpose flour for a balanced texture and a neutral flavor to mix with the other ingredients. Garlic powder for a subtle garlicky taste that gives the chicken an all-over flavor without extra moisture, as it gets from minced garlic. Paprika adds a mild smoky flavor and a bit of warmth without an overwhelming spicy taste.
How to make
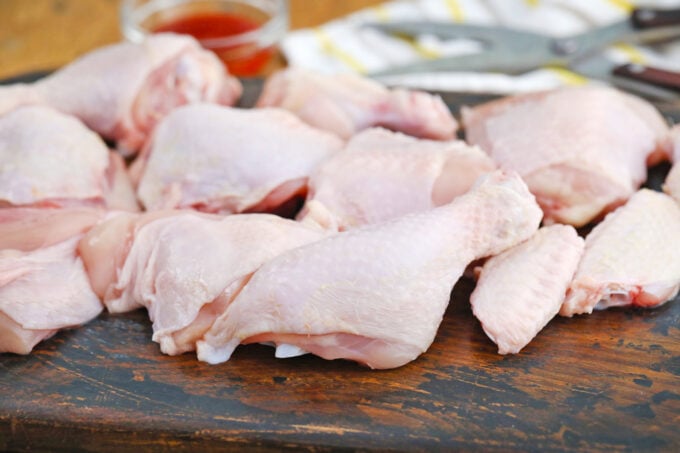
Cut: First, I cut the chicken into eight pieces.
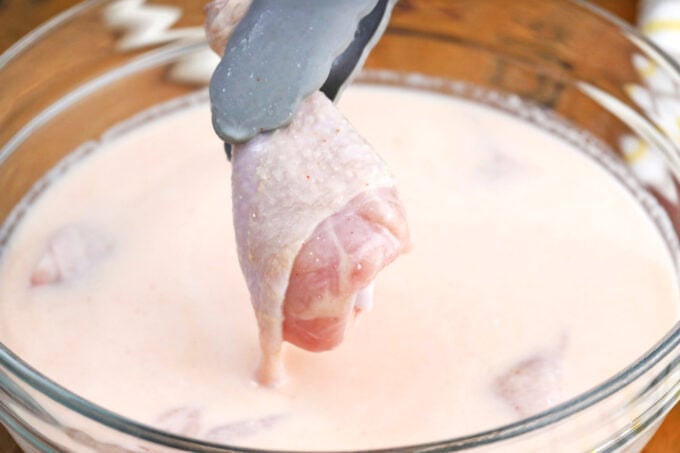
Marinate: Next, I combine the buttermilk, hot sauce, and pickle juice in a large bowl, then add the chicken pieces to marinate in the fridge for 30 minutes to 24 hours.
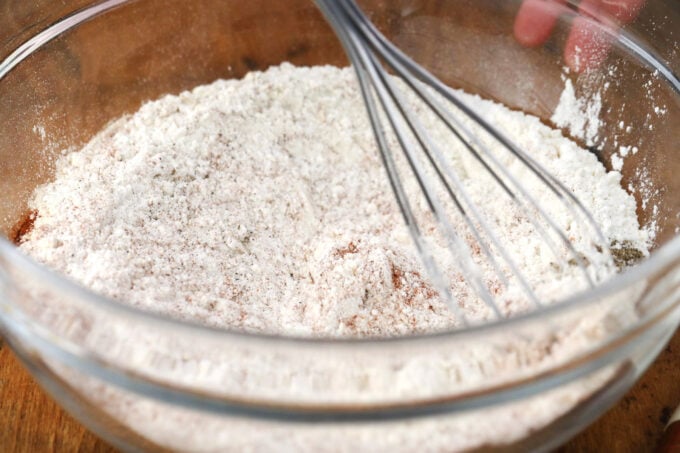
Mix and prepare: When I am ready to cook them, I mix the flour, paprika, and garlic powder with salt and pepper in a medium shallow bowl and place a wire rack on a baking sheet nearby. Place another rack on top of a baking sheet covered with paper towels to drain the cooked chicken.
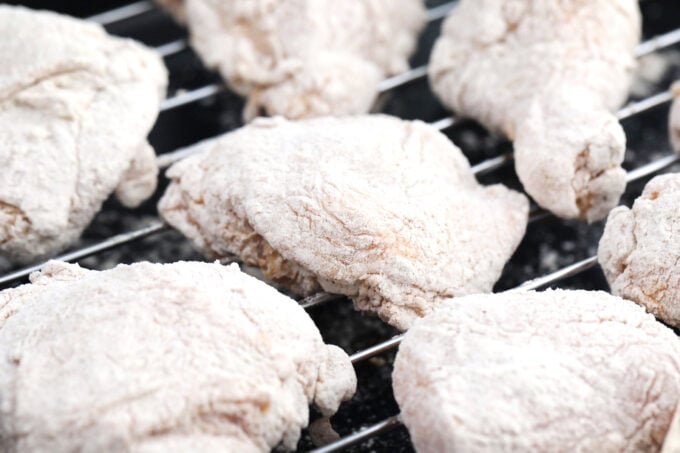
Dip and rest: Next, I remove one piece of chicken at a time from the marinade, letting the excess drip off before coating it well in the flour mixture and setting it on the wire rack. I continue until all the chicken pieces are coated, and then they have to rest for 30 minutes.
Heat the oil: Meanwhile, I fill a pan with oil and heat it to 365 degrees F. I prefer to keep a thermometer attached to the pan, so I know how hot the oil is at all times.
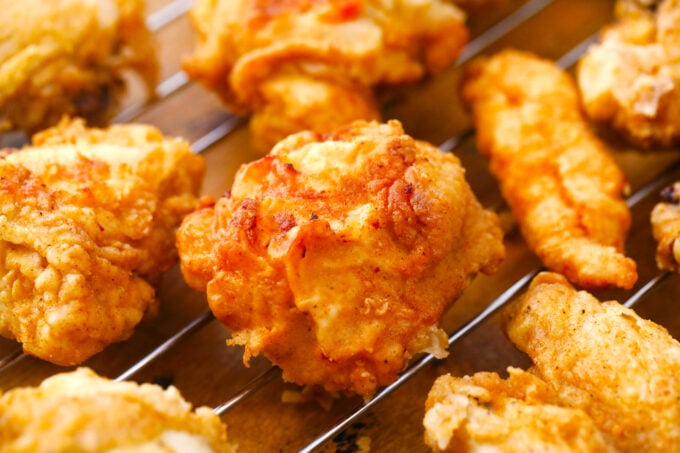
Fry the chicken: When it is ready and the chicken has rested, I fry it in batches, three or four pieces at a time, so they are not crowded. I cook them for 10 or more minutes (depending on the piece of chicken) until it is golden brown and crispy. The internal temperature should be 155 degrees F.
Drain, rest, and serve: Now, I remove the chicken and place it on the other rack to drain and rest for at least 10 minutes before serving.
Expert tip
How to cut a chicken for frying
I like to cut my chicken into eight pieces, but some people cut theirs into 10 pieces by slicing the chicken breasts into quarters instead of halves. Either way, it is easy to do with a sharp knife. First, with the breast side up, pull the leg away and slice through the skin, bending the leg back until it pops. Cut through that joint and detach the leg.
Then, turn the chicken on its side and pull the wing away to cut through the joint. Repeat on the other side. Now, turn the chicken back over and separate the breast from the back by cutting through the ribcage. Start at the shoulder joints and cut downward. Next, lay the breast skin side down and split the bone before slicing it in half.
At this point, the breasts can be cut into quarters by slicing them diagonally through the bone. Then, the legs should be cut through the joints to separate the thighs and the drumsticks. Be careful not to cut into the marrow. This can take some practice. Try feeling it with your fingers first or look for the fat line.
More tips to consider
- Do not throw away the backbone and neck. They can be used for chicken stock. Freeze them and they can be saved for up to six months.
- Before frying, it’s essential to bring the meat to room temperature for even cooking.
- Another way to check if the oil is hot enough is by using the tip of a wooden spoon. If little bubbles form around it, the oil is ready.
- Use another thermometer for the chicken. Take it out when it reaches 155 degrees F. It will continue to heat up as it rests until it reaches 165 degrees F when it is served.
- Drain the chicken on a wire rack OVER paper towels. Laying it on top of paper towels will make it soggy.
- Be sure to add plenty of salt and pepper. These are the main seasonings in your chicken, so don’t forget them.
- Avoid frying immediately after dredging, as this can cause the coating to peel off. It’s best to let it rest for at least 10 minutes on a wire cooling rack while the oil heats. Proper resting helps the coating stick, resulting in a crispy skin.
Recipe variations and add-ins:
- Cajun chicken: To give this chicken a Cajun flavor, I add a tablespoon of my deliciously spicy Cajun seasoning to the coating. It has a pleasant kick to it without being overly spicy. However, it is best to taste it first before using it.
- Only use certain pieces: Instead of using the whole chicken, sometimes I use breasts, drumsticks, thighs, wings, or a combination of these. That way, I don’t end up with a few pieces left over that nobody really eats.
- Cornstarch: Sometimes I add 1/4 cup of cornstarch to the flour mixture for even crispier chicken. It prevents the coating from being too thick and chewy.
- Ranch fried chicken: For a unique flavor, I add a tablespoon of my ranch dressing to the coating, and it takes this chicken to a whole other level of deliciousness.
- Honey mustard: Another way to jazz up the flavor is to add some honey and mustard to the brine. I usually add two tablespoons of Dijon mustard, two tablespoons of whole-grain mustard, and two tablespoons of honey.

Serving suggestions:
Fried chicken always goes great with my homemade coleslaw, which is pretty delicious. It has a perfect balance of creamy and crunchy that makes it scrumptious, and it is easy to make too. Potato salad is another perfect side dish. Whether it is a summer potluck or a winter dinner, I insist on serving my crispy fried chicken with a big bowl of classic potato salad. They go together so well that it doesn’t even matter if I serve mashed potatoes with it.
My kids also love it with mac and cheese casserole, crispy air-fried potatoes, and I always enjoy it with a big batch of homemade sweet potato fries made in the oven or air-fried zucchini fries. The absolute best dessert to go with fried chicken is homemade apple pie, of course. My homemade apple pie recipe is double-delicious with a creamy cheesecake layer built into it!
How to store leftovers:
- Refrigerate: It is best to refrigerate it in a shallow airtight container or wrap tightly with a heavy-duty aluminum foil or plastic wrap. Then, store it in the fridge for up to 3-4 days. However, once refrigerated, it may not be as crispy as before. Reheat it in the oven or microwave.
- Freezing: To keep them longer, I can also freeze them for up to three months in a freezer-safe container.
- Defrost: For the best results, I thaw them in the fridge overnight.
- Reheating: For crispy chicken, I reheat it in the oven at 375 degrees F for 10 minutes. I can also air fry for five minutes at 380 degrees F. Microwaving for a minute or two will also work, but it will not be as crispy.

Frequently asked questions
For extra crispy chicken, use the double-dip method. First, dip it in the buttermilk mixture, then in the flour. Once the resting period is over, repeat the process for a double coating. Another way to make this chicken extra crispy is to use a cast-iron skillet. It keeps the oil hotter, which makes the coating crispier. Also, do not overcrowd the pan. Giving each piece plenty of room to cook is essential.
This almost always has something to do with the cooking oil. It can be from using the wrong type of oil or old cooking oil. Certain low-smoke-point oils, such as peanut oil, sesame oil, coconut oil, or extra virgin olive oil, will burn easily and cause a bitter taste. Instead, use neutral oils like vegetable, peanut, or canola oil. Using old or reused oil will also cause this to happen. I always start with a fresh batch of oil and a new pan when I cook a new recipe.
One of the biggest mistakes cooks make is not letting their oil get hot enough or not waiting for it to reheat between batches. Always wait until the oil is between 360 degrees F and 375 degrees F before putting the chicken in to cook. I keep my thermometer in the pan, so I know the temperature at all times. That way, I know if I have to wait before adding the next batch. Another common issue is crowding. Give the chicken plenty of room to cook so each piece can fry instead of steaming.
When frying, it is essential NOT TO USE low smoke point oils such as extra-virgin olive oil. This will cause a bitter taste that you want to avoid. Instead, go with canola, vegetable, or peanut oil as they have a higher smoke point and are ideal for this recipe.

More crispy chicken recipes to try:


Loved this recipe? I’d love to hear from you! 💛 Leave a 5-star rating ⭐️ in the recipe card below and share your thoughts in the comments – I read and appreciate every single one!
Let’s stay connected! Follow me on Facebook, Instagram, Pinterest, and YouTube for more delicious, sweet and savory recipes. Have a question? Ask in the comments, and I’ll be happy to help! 😊 with love Catalina!
Homemade Fried Chicken Recipe
Ingredients
- 4 lbs whole chicken cut into pieces
- vegetable oil for frying
Brine:
- 2 cups buttermilk
- 2 cups pickle juice
- 1/4 cup hot sauce optional
Coating:
- 2 cups all-purpose flour
- 1 tablespoon salt
- 1 teaspoon ground black pepper
- 1 tablespoon smoked paprika
- 1 tablespoon garlic powder
Instructions
- Cut the chicken and discard the backbone. We usually cut the chicken into 8-10 smaller pieces.
- Add pickle juice and buttermilk to a large bowl, stir to combine. For a spicier kick, add some hot sauce as well.
- Next, add the chicken pieces into the mixture. Set aside for 30 minutes, or refrigerate for up to 24 hours.
- In a medium, shallow bowl, combine flour, salt, pepper, garlic powder, and paprika.
- Place a wire rack onto a baking sheet and set it nearby.
- Remove one chicken piece from the buttermilk mixture, toss it well into the flour mixture, and place it onto the prepared cooling rack. Let it sit for 20-30 minutes.
- To save time, add the flour mixture to a large baking dish, then add the chicken and toss to combine before placing it on the cooling rack.
- Place a large/deep frying pan and fill it 1/2 full with oil. Heat oil to 365 degrees and fry the chicken in batches, careful not to overcrowd it. Cook chicken for 10 or more minutes, until crispy and golden brown.
- Remove the chicken and place it on a cooling rack lined with paper towels to drain excess oil.
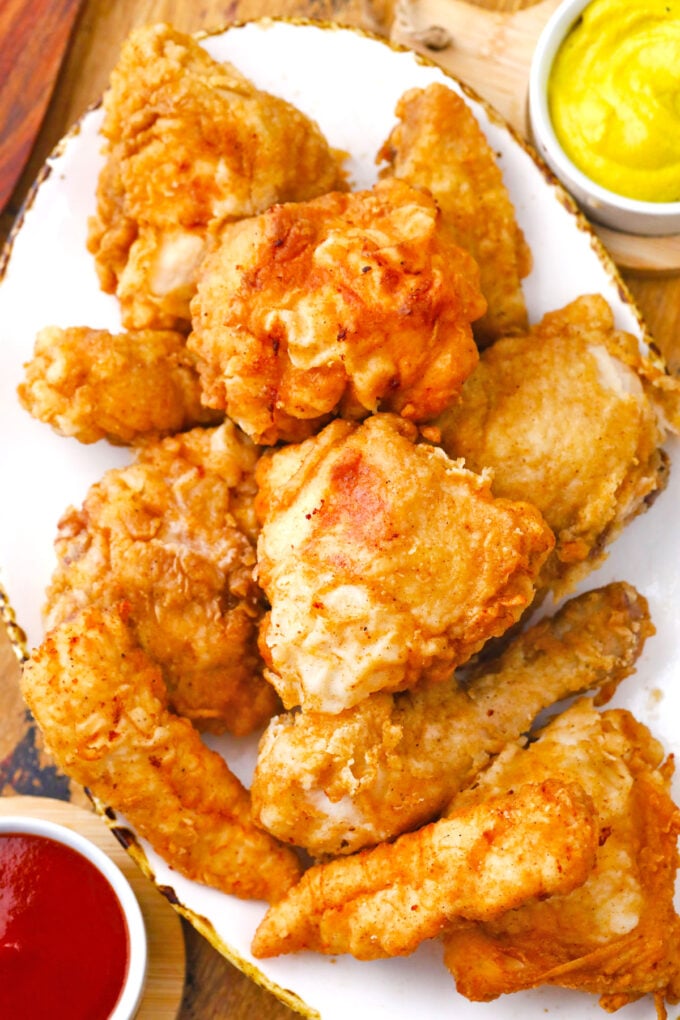
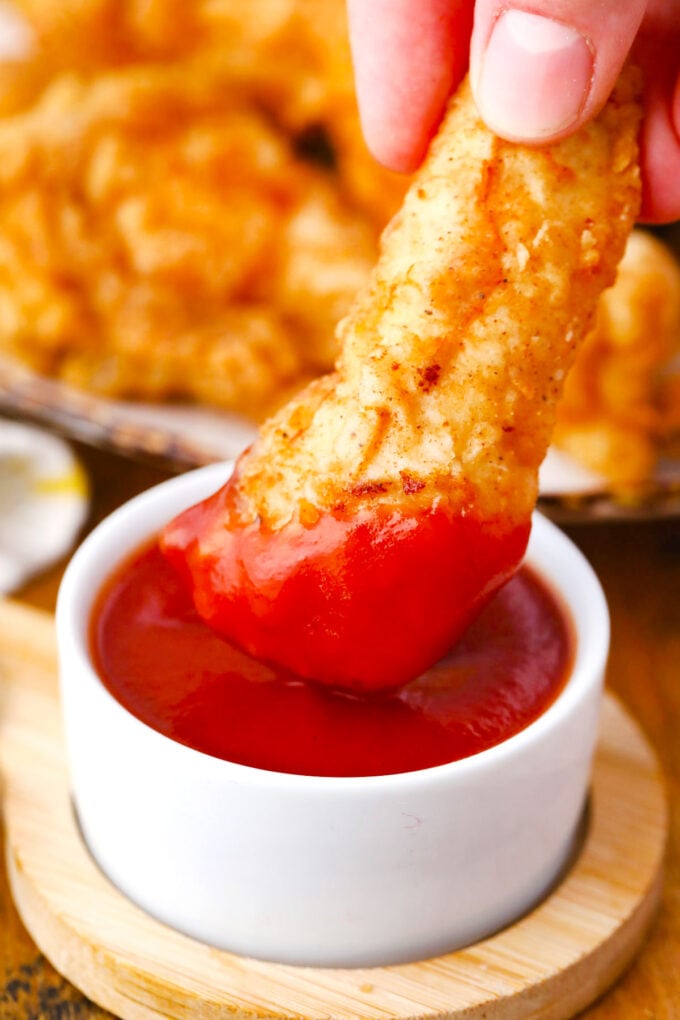
- Serve with your favorite sauce and enjoy.
Video

Notes
How to cut a chicken for frying
I like to cut my chicken into eight pieces, but some people cut theirs into 10 pieces by slicing the chicken breasts into quarters instead of halves. Either way, it is easy to do with a sharp knife. First, with the breast side up, pull the leg away and slice through the skin, bending the leg back until it pops. Cut through that joint and detach the leg. Then, turn the chicken on its side and pull the wing away to cut through the joint. Repeat on the other side. Now, turn the chicken back over and separate the breast from the back by cutting through the ribcage. Start at the shoulder joints and cut downward. Next, lay the breast skin side down and split the bone before slicing it in half. At this point, the breasts can be cut into quarters by slicing them diagonally through the bone. Then, the legs should be cut through the joints to separate the thighs and the drumsticks. Be careful not to cut into the marrow. This can take some practice. Try feeling it with your fingers first or look for the fat line.More tips to consider
- Do not throw away the backbone and neck. They can be used for chicken stock. Freeze them and they can be saved for up to six months.
- Before frying, it’s essential to bring the meat to room temperature for even cooking.
- Another way to check if the oil is hot enough is by using the tip of a wooden spoon. If little bubbles form around it, the oil is ready.
- Use another thermometer for the chicken. Take it out when it reaches 155 degrees F. It will continue to heat up as it rests until it reaches 165 degrees F when it is served.
- Drain the chicken on a wire rack OVER paper towels. Laying it on top of paper towels will make it soggy.
- Be sure to add plenty of salt and pepper. These are the main seasonings in your chicken, so don’t forget them.
- Avoid frying immediately after dredging, as this can cause the coating to peel off. It’s best to let it rest for at least 10 minutes on a wire cooling rack while the oil heats. Proper resting helps the coating stick, resulting in a crispy skin.
I don’t fix fried chicken very often because it isn’t as healthy as most chicken meals. I always use my cast iron skillet when I do fix fried chicken.
That looks so good and I have Chicken in the Freezer waiting to be cooked so I can’t wait to share this recipe with my husband and see if he would like to make it for dinner.
Yes please. I just love fried chicken. I actually have never tried making it on my own. I really should!
I love fried chicken. There’s something to be said about a good piece and deep-fried chicken. I don’t eat it all the time but when I do it as a special treat. It looks amazing.
Oh baby – I AM SO DROOLING OVER THIS! And I would make it in my air fryerrrrr! Ugh, YUM!
@gigi eats. Do you mind sharing how you did this recipe in an air fryer? Thank you
This fried chicken looks so yummy and crispy. Looking forward to giving it a try and adding it to our families weekly meal plan.
Now this sounds like an amazing recipe! I have to admit I love fried chicken but I don’t have it often and 100% have never tried making it myself.
This looks absolutely delicious. I have to admit that I have never made fried chicken before, but this buttermilk recipe makes me want to try it ASAP! My mom is Austrian and the only fried thing I’m comfortable making is fried chicken schnitzel. 🙂
That looks like it came straight out of a restaurant. Impressive! I’ll have to make this for my family some time.
Oh my, this looks so good! I am going to have to try it. I am from south Georgia and we love some fried chicken, I have tried to make it all different ways will add this to the list!
Your recipe looks awesome. It’s also kid-friendly. I’m now excited to try this at home next time we fry chicken.
I haven’t mastered fried chicken and I adore it. My gramma spoiled me. She could fry a chicken that would make you weep, it was that good.
Thanks for these tips. I have been frying chicken for years but have never did a brine before. Your chicken looks really good, I can’t wait to try your recipe.
Your fried chicken looks super yummy!! I have my own recipe that I love but need to try yours and compare the two…LOL!!
My boys love fried chicken big time. The use of pickle juice is interesting I’ve never tried that before. I will have to try your recipe ASAP.
This recipe sounds amazing. I love fried chicken. I’d love to make it myself sometime. This is sure to be a hit.
Which kind of pickle juice did you use?
Dill, Sweet, Bread & Butter?
we used Bread and Butter
Im drooling rightnow on your friend chicken recipe. We all love homemade friend chicken it is quick and easy to make. Cant wait to try this tomm.
I need to get a big cast iron skillet. I have a couple smaller ones, but nothing that I could fry up a bunch of chicken in for everyone.
Has anyone ever tried baking this fried chicken, recipe is amazing?
Has anyone tried baking this amazing fried chicken recipe?
I’m drooling right now
This was ohhhhh sooooo good. Didn’t use the hot sauce or the pickle juice. Super crispy and not greasy at all. We used chicken wings, cuz that’s what I had on hand. Will definitely be making again. Even the left overs were good.
Did you ever get a response on the air fryer?