
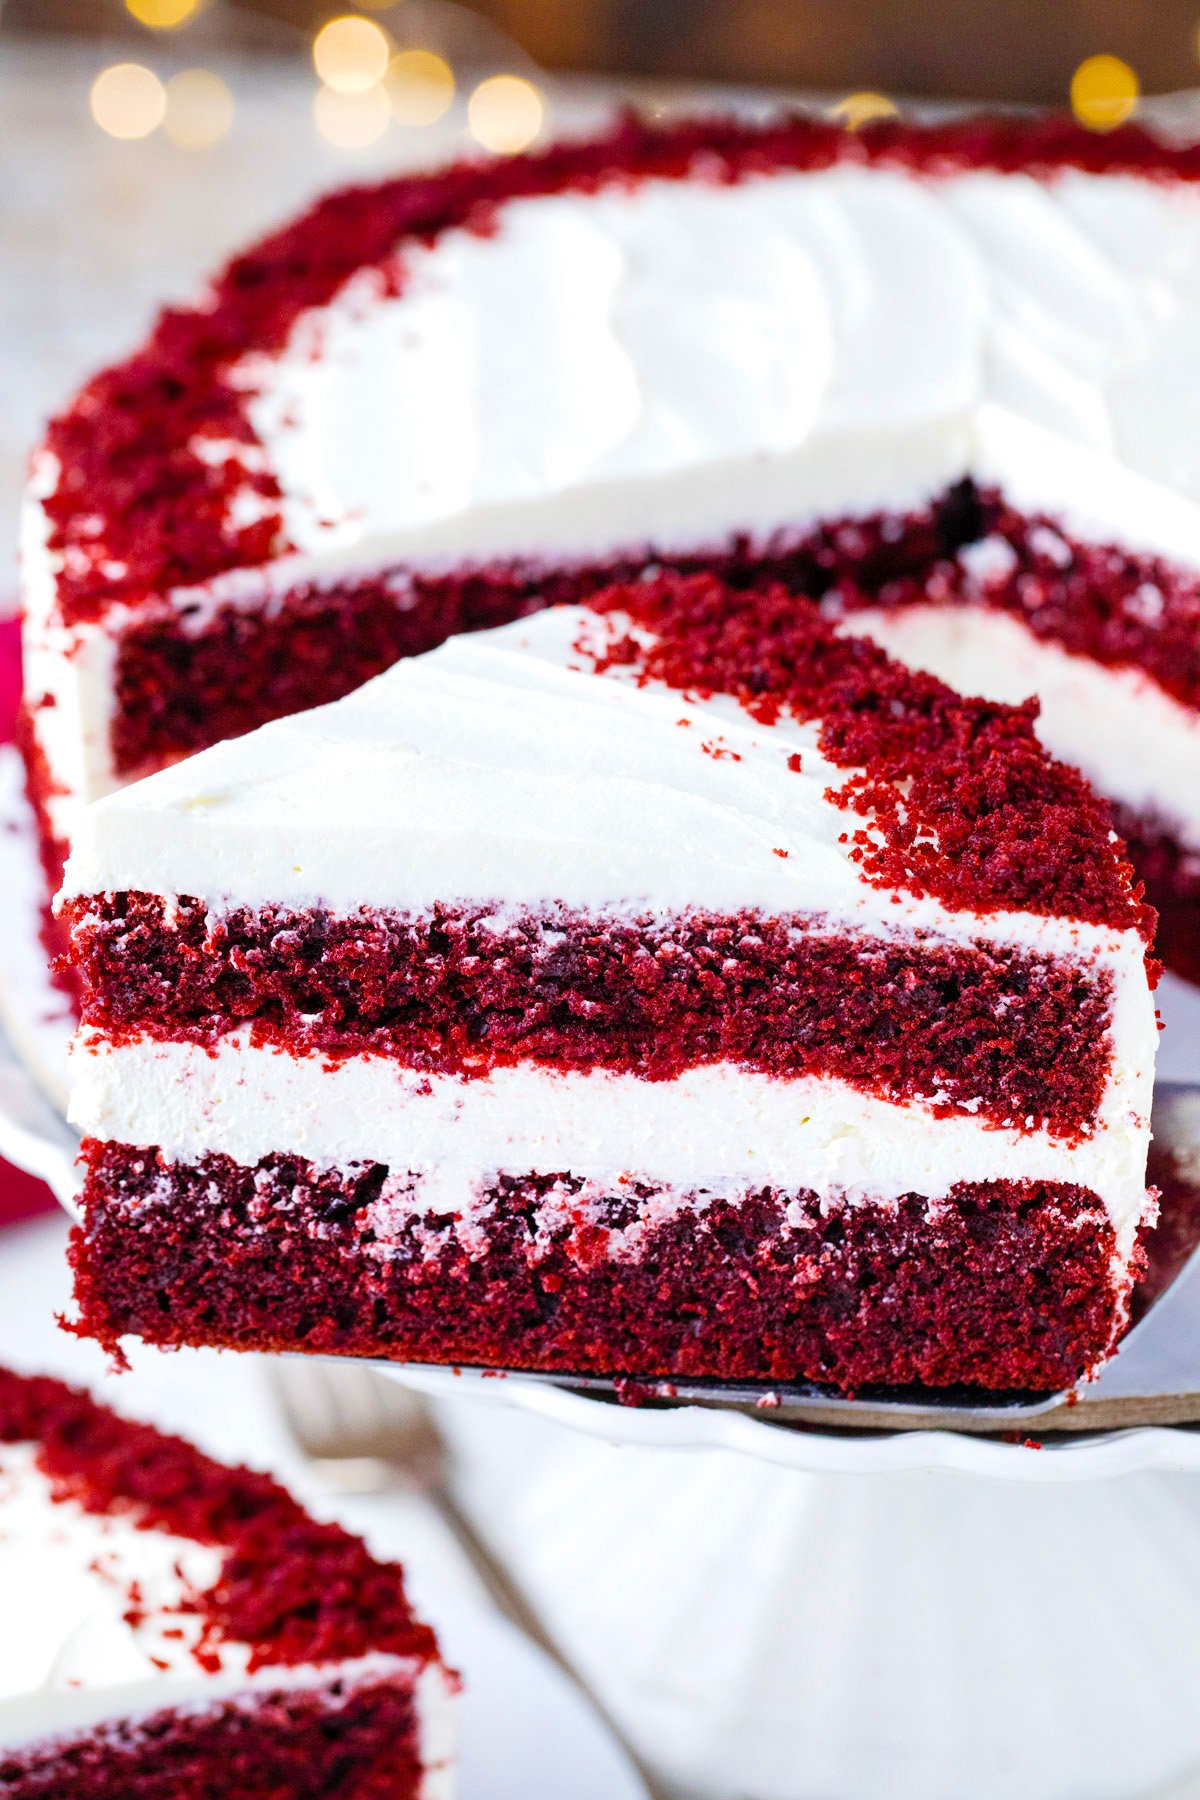
Red Velvet Cake from Scratch
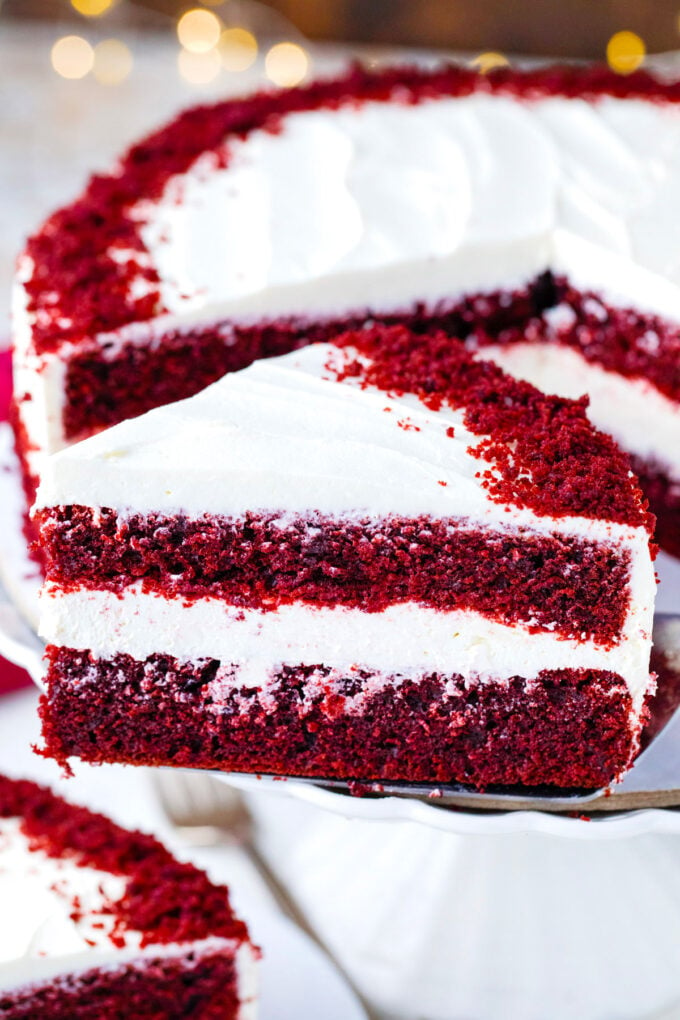
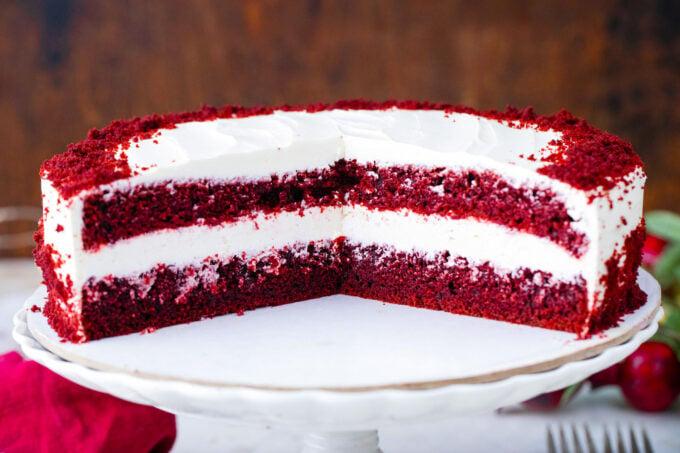
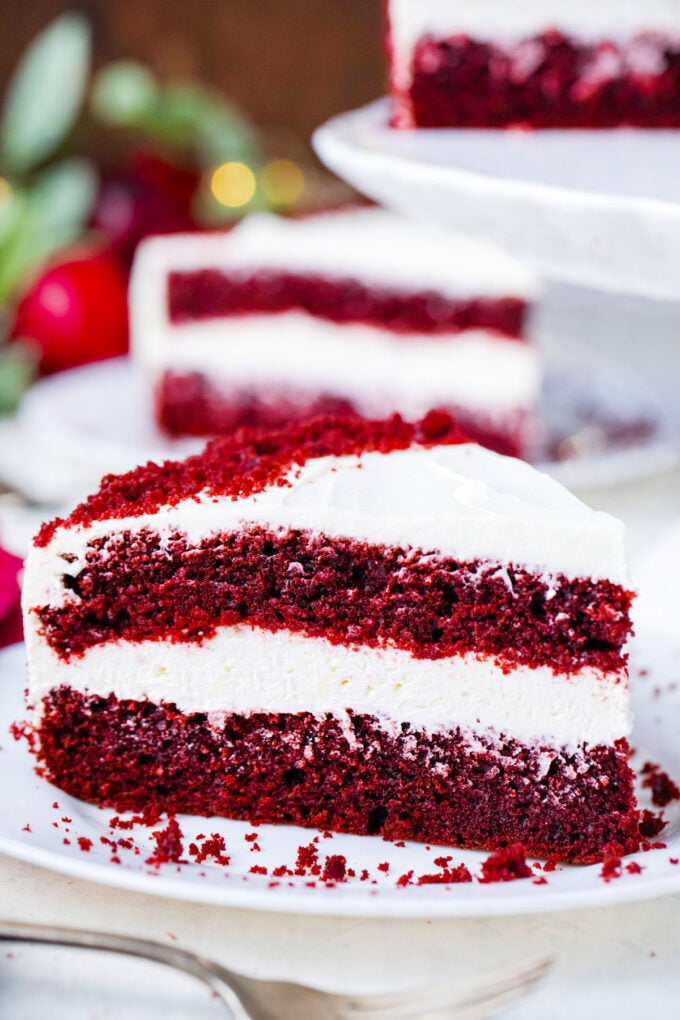
Coming from a family of famous bakers, my mom and my grandma are known for their mouthwatering concoctions, so I knew I needed to make something special to impress them. I decided on Red Velvet Cake, which was not as popular in Eastern Europe at the time, but has become one of my favorite desserts. Tender, soft, buttery, with a subtle chocolate flavor, covered in sweet and tangy cream cheese frosting, this is not just a dessert, it’s a statement, where less is more!
My affection for this particular cake grew and grew, and it evolved into creating other variations, like this red velvet crème brûlée, cheesecake-stuffed red velvet cookies, and even red velvet cake cheesecake. All are worth trying, and all have that exquisite taste and texture that these old-fashioned desserts are famous for!
Table of contents
As a professional baker, I know how important it is to use high-quality ingredients; they can transform a simple dessert into a work of art that everyone raves about. This indulgent cake is softer than most traditional American cakes and has a signature, velvety, moist texture that makes each bite melt in your mouth.
A tip to ensure it’s the perfect shade of red is to use red food gel instead of regular red food coloring. This is the secret that I have found and tested over many years. It makes a big difference in color and appearance. The vinegar and buttermilk in this recipe, together with the food coloring, make it different from a chocolate cake. Overall, the chocolate taste is fairly mild, but the flavors are delicately rich.
Why you will love this recipe
- A beautiful color: Whether I am serving it for Valentine’s Day or any other special occasion, this homemade red velvet cake is an attractive dessert to share. It instantly becomes the talk of the evening.
- It is so unique: Once I tried red velvet cake for the first time years ago when I moved to NYC, it instantly became my favorite. Not too chocolaty, not plain, I would call it sophisticated, combining the best of both worlds. A little chocolate, a luscious vanilla cream cheese frosting, that makes every bite an explosion for your taste buds.
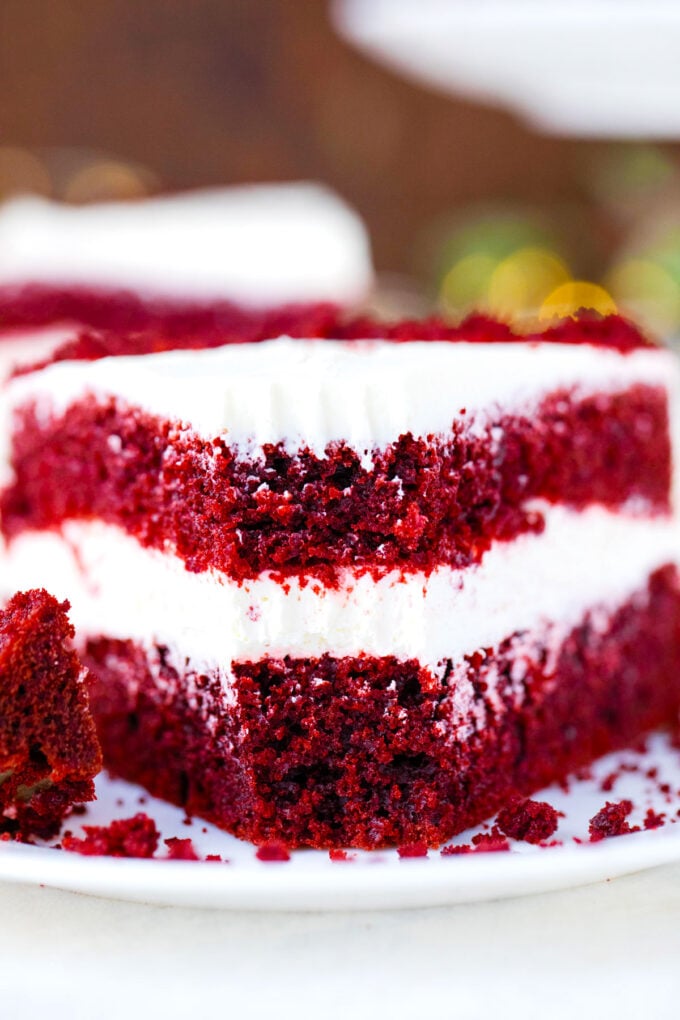
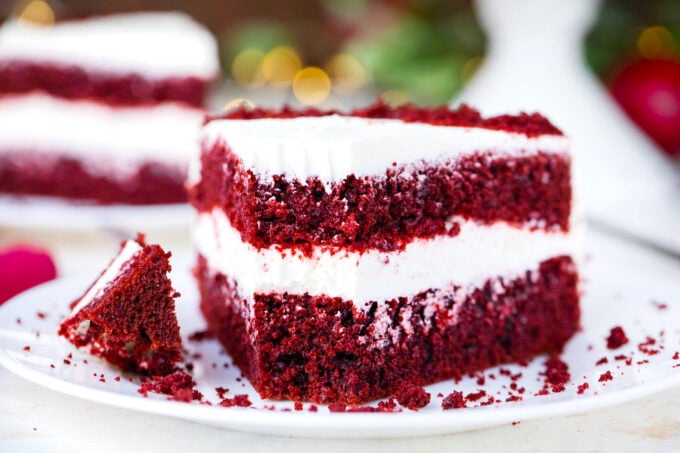
- Smooth as velvet: Just like the name states, the mouthfeel of this cake is velvety because of the combination of buttermilk and oil. The texture is unmistakably part of what makes this cake unforgettable. Not dry, not too dense, but smooth and tender.
- So easy: Making it at home has never been easier. If you do not have time for layered cakes, just bake the batter in a 9×13-inch pan, level the top, and cover it with a hefty layer of frosting and cake crumbs.
What you will need
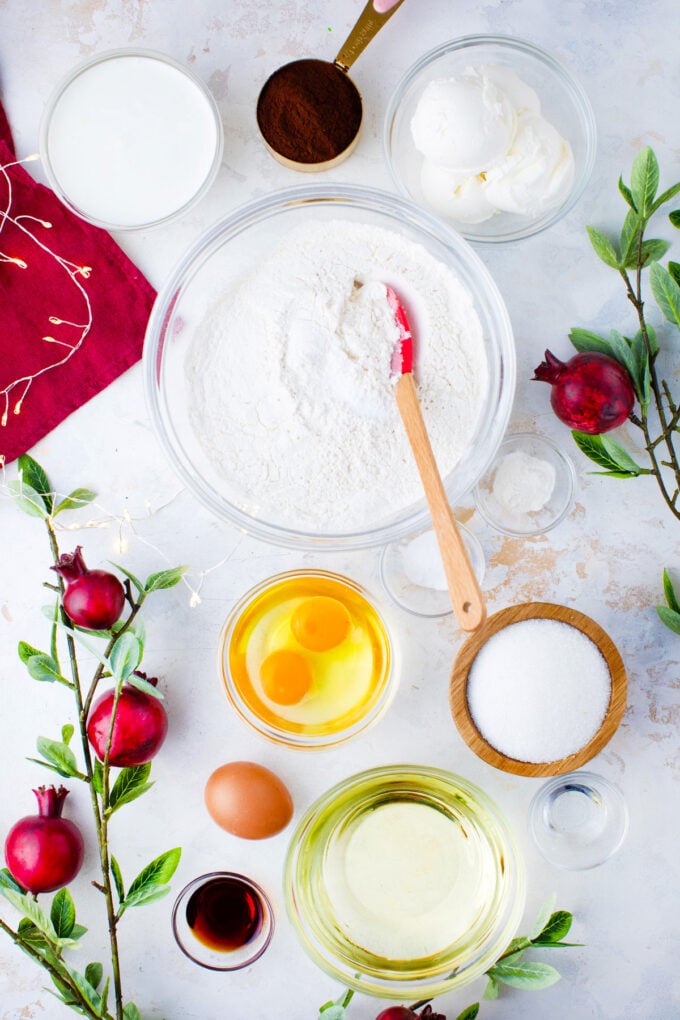
- Dry ingredients: All-purpose flour has just the right amount of gluten to provide structure while keeping the crumb soft and tender. I use both baking soda and powder to give this cake a balanced texture, leavening, and spread with extra lift and density.
- Wet ingredients: The eggs provide binding, structure, and leavening as well as moisture and richness. They should be at room temperature to help achieve a smoother, fluffier crumb. I use vegetable oil instead of butter because it creates an exceptionally moist and tender crumb. The buttermilk and vinegar both tenderize the gluten, softening the crumb and making it like velvet (per its name). They also help the cocoa turn red.
- Flavorings: I use cocoa powder (not Dutch processed) to add a bit of chocolate flavor. White granulated sugar adds moisture and clean sweetness, and helps aerate the fat for extra fluffiness. The pure vanilla extract adds a deep, rich complexity. I also add a little salt to balance out the other flavors.
- Extras: I use red gel food coloring to turn the cake into that beautiful shade of red.
For the cream cheese frosting:
- Dry ingredients: I use powdered sugar because it dissolves quickly, resulting in a velvety smooth frosting. I also add a bit of salt to enhance the flavors.
- Wet ingredients: I use a brick-style, full-fat cream cheese for the best texture, and soften it to room temperature. I use unsalted butter so I can control how much salt goes into the frosting. It should also be softened to room temperature. I use pure vanilla extract because the flavoring typically has a bitter aftertaste.
How to prepare
Preheat the oven: First, I preheat the oven to 350 degrees F. Then spray two 8-inch round cake pans with baking spray and line the bottoms with parchment paper. I also spray the parchment paper with baking spray for extra coverage.
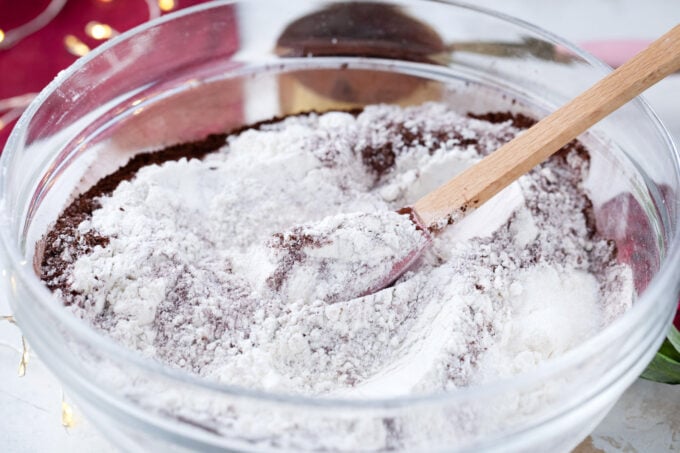
Mix dry ingredients: Now, I mix the dry ingredients in a medium bowl until combined and set aside.
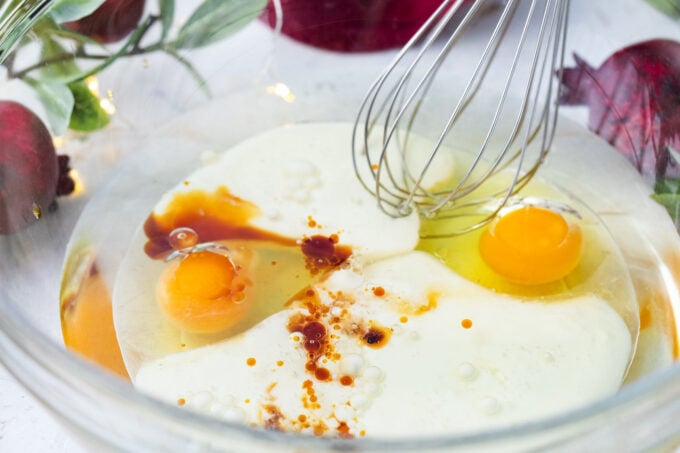
Mix wet ingredients: Next, I mix the oil, vinegar, buttermilk, vanilla, eggs, and food coloring in a large bowl with a hand mixer on medium speed until fully combined.
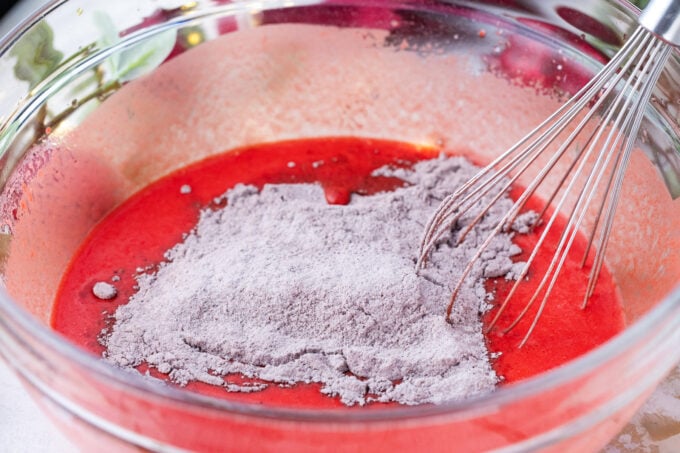
Combine the batter: After that, I turn the mixer to low speed and add the dry ingredients a little at a time, scraping the sides as needed, before pouring the batter evenly into the two pans.
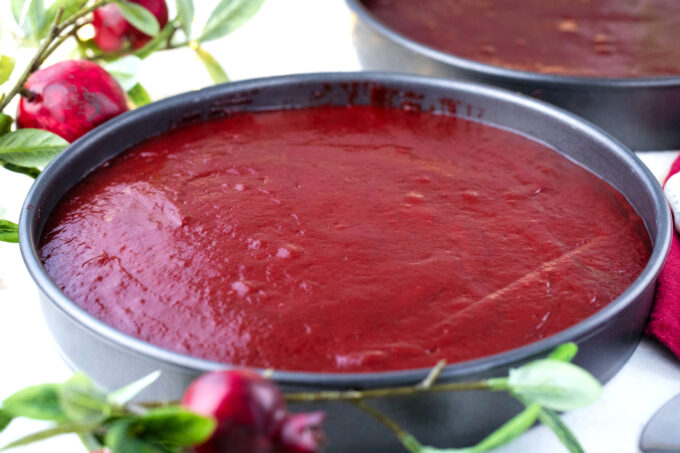
Bake the cakes: I bake them for about 30 minutes, rotating the pans halfway through.
Cool the cakes: Afterward, I remove them from the oven, run a knife around the edges to loosen them, and let them cool in the pans for 30 minutes. Then, I turn them out onto a plate before flipping them over onto cooling racks to cool completely.
Make the frosting: Beat the softened cream cheese and butter in a large bowl on medium-high speed until well blended. Then I add the powdered sugar gradually, along with the salt and vanilla, beating until creamy, scraping the sides as needed.
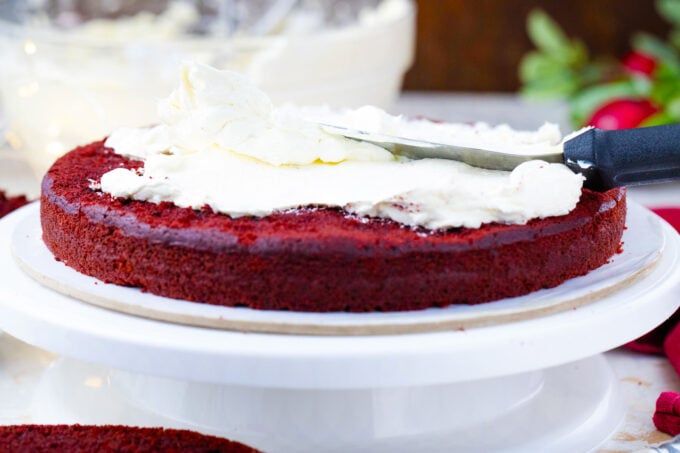
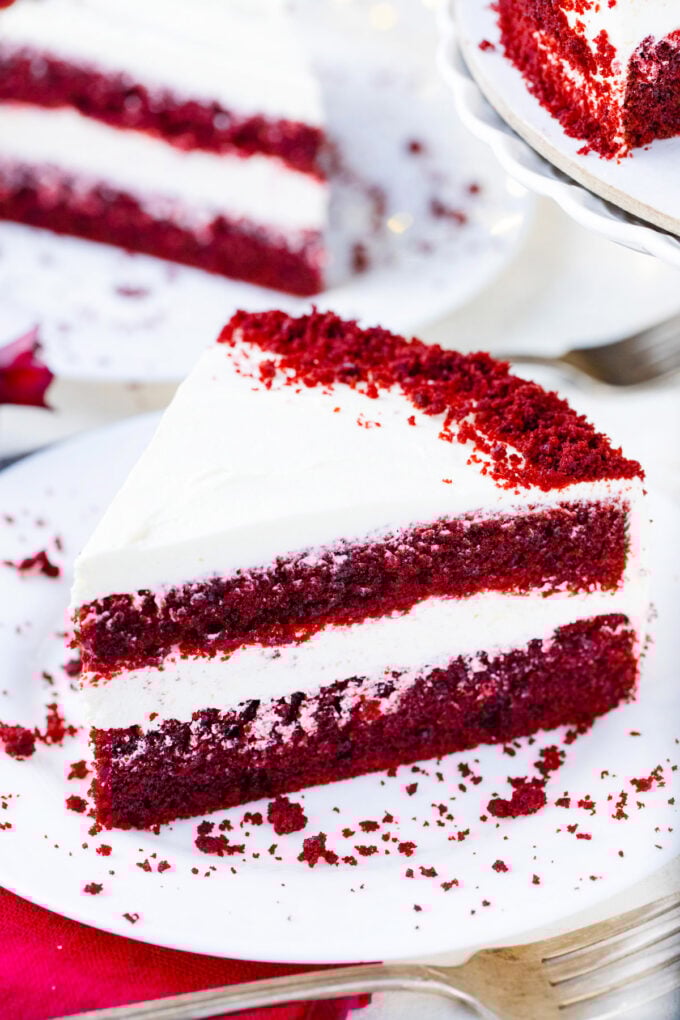
Flatten the layers: Once the cakes are completely cool, I use a serrated knife to slice the top layers to make them flat, then put the tops into a bowl and crumble them.
Frost the cake: Next, I spread ¼ cup of the frosting onto a cake stand and placed the first layer on top. I spread 1 cup of the frosting onto the cake layer, making it ½ inch thick.
Repeat: Then, I place the other layer on top and repeat.

Garnish with crumbles: Now, I cover the entire cake with the remaining frosting, then decorate the sides and top with cake crumbles.
Chill and serve: The frosted cake needs to chill for about 3 hours, or until it is slightly stiff, before serving.

Expert tip
Butter or oil for a moist crumb
For the moistest cake, I prefer to use vegetable oil. The reason is that butter contains only about 80-85% fat, while oil contains 100% fat. The rest of the butter is water or milk solids. That means, oil will keep the cake moist longer and softer if it is refrigerated. People often use butter for its richer flavor, but in this recipe, that is not a problem.
More tips to consider:
- Don’t use Dutch-processed cocoa for this recipe, as it lacks the natural red pigments. This is what helps it turn red when mixed with vinegar and buttermilk, rather than brown. You will need a lot more red food coloring to make it red.
- Be sure not to overmix the batter. Stop mixing once the dry ingredients have been combined with the wet ingredients.
- I made this recipe with 8-inch cake pans. Using a different size will change the cooking time.
- Make sure the ingredients are at room temperature for the best results.
- Use the spoon-and-level method to measure flour.
Recipe variations and add-ins:
- Other frostings: I have also enjoyed using whipped cream, mascarpone, and chocolate ganache on this cake.
- No buttermilk? Make your own buttermilk by mixing 1 tablespoon of lemon juice or white vinegar with 1 cup of milk. Let it sit for 10 minutes until it thickens, and then stir it again.
- Chocolate chips: Chocolate lovers will enjoy this. Add a cup of mini chocolate chips to the batter for a light touch of chocolate-chip flavor.
- Add some coffee: With just ½ cup of strong coffee, I can give this cake a burst of rich chocolate taste.
- Pudding in the mix: We have all had cakes with pudding, but putting it in red velvet cake is genius. However, remember that too much chocolate will make it taste a lot more chocolatey. I suggest vanilla or cheesecake flavor.
Serving suggestions:
This is a dessert that I love to serve with vanilla ice cream on the side. It needs something cool and creamy that will not overpower the flavors. My kids like it with chocolate ice cream or Oreo ice cream. On the other hand, I enjoy it with a London Fog latte or red velvet hot chocolate. The sweet and silky, creamy texture and taste pair well with this cake.
Looking for a cocktail that goes with this cake? I like it with my Baileys S’mores milkshake, made with chocolate ice cream, Baileys, vanilla vodka, and marshmallow fluff. When I serve this for Valentine’s Day, I usually add a festive chocolate bomb on the side. It is so much fun to add it to milk and to see it transform into hot chocolate; it makes dessert time more intentional and special.
How to store leftovers:
- Refrigerate: I carefully place my leftovers in a sealed container, and they will stay fresh in the fridge for 5 days.
- Freezing a frosted cake: To freeze, I like to wrap the individual slices in plastic and then place them in freezer bags after flash-freezing them to protect the frosting. They will stay fresh for several months that way.
- Freezing the cake layers: The layers can be frozen before frosting. First, I let them fully cool. After that, wrap them in plastic wrap and either add them to freezer-safe bags or cover them tightly in foil. Lay flat in the freezer and freeze for up to 3 months.
- Defrost: I thaw my frozen cake in the fridge overnight before serving.
Frequently asked questions
Overmixing the batter can lead to excessive gluten development, making the batter dense and the cake gummy. Only mix the wet and dry ingredients until they are combined. Also, make sure the ingredients are all at room temperature, especially the buttermilk, eggs, and butter. Finally, check that the baking soda and baking powder are fresh and not expired.
Beets, berries, and hibiscus are just a few ways to turn this delicious cake red without using artificial coloring. The easiest way to do this is to buy plant-based food coloring made with beetroot powder. Nutricost and Nature’s Flavors are two brands that sell these colorants. Dried hibiscus flowers can also be boiled down into a tea that will turn the batter a lovely red.
Using plenty of fat will make your cake moist and rich, preventing it from becoming dry and crumbly. Ensure it is a high-quality fat, such as real butter, rather than margarine. Also, substitute water or milk with buttermilk for extra tenderization and moisture. The acid also helps break down the gluten. I add vinegar to the mix for this same reason.
Improper measuring is probably the culprit. Too much flour will make the cake dry and crumbly, causing it to fall apart. The proper way to measure flour is the spoon-and-level method. First, sift the flour several times. Then, use a spoon to gently put the flour into a measuring cup until it overflows. Now, use the back of a butter knife to level it off. This will give you a perfect amount of flour without packing it.
More cake recipes to try:


Loved this recipe? I’d love to hear from you! 💛 Leave a 5-star rating ⭐️ in the recipe card below and share your thoughts in the comments – I read and appreciate every single one!
Let’s stay connected! Follow me on Facebook, Instagram, Pinterest, and YouTube for more delicious, sweet and savory recipes. Have a question? Ask in the comments, and I’ll be happy to help! 😊 with love Catalina!
Red Velvet Cake
Ingredients
- Baking Spray for the pans
- 2 1/2 cups all-purpose flour
- 1 1/2 cups white granulated sugar
- 1 teaspoon baking soda
- 1 teaspoon baking powder
- 1/2 teaspoon salt
- 1/3 cup unsweetened cocoa powder
- 2 large eggs at room temperature
- 1 1/2 cups vegetable oil
- 1 cup buttermilk room temperature
- 1 teaspoon white distilled vinegar
- 1 teaspoon vanilla extract
- 1 teaspoon red gel food coloring or 2 tablespoons regular food coloring
- Cream Cheese Frosting
Instructions
- Preheat oven to 350 degrees F.
- Spray two 8-inch cake pans with baking spray, cover the bottoms with parchment paper, and spray again with baking spray. Use three pans for thinner layers. Set aside.
- In a medium bowl, combine the dry ingredients: flour, sugar, baking powder, baking soda, salt, and cocoa powder. Whisk until well combined, then set aside.
- Add the wet ingredients to a large bowl: eggs, oil, buttermilk, vinegar, vanilla extract, and red gel food coloring. Using a hand mixer or stand mixer, whisk on medium speed until fully combined.
- Reduce the mixer speed to low and gradually add the dry ingredients mixture. Stop occasionally to scrape the sides and bottom of the bowl. Whisk just until fully combined.
- Divide the batter equally into the prepared pans.
Bake:
- Bake the cakes, rotating the pans halfway through cooking, until a toothpick inserted into the center comes out clean, about 30 minutes.
- Remove the cakes from the oven and run a knife around the edges to loosen them from the pans. Let it cool in the pans for about 20-30 minutes. Invert the cakes onto a plate and then re-invert them onto a cooling rack. Round side up. Cool completely before frosting.
Frost the Cake:
- To frost it, prepare the Cream Cheese Frosting according to recipe directions.
- Using a serrated knife or cake leveler, slice the tops of the layers to make them flat. Place the leftovers into a medium bowl and crush them into crumbs.
- Add 1/4 cup of frosting onto the bottom of a cake stand.
- Place the first layer of the cake onto the stand. Add approximately 1 cup of frosting to the cake layer, then, using an offset spatula, spread it evenly to create a 1/2-inch layer.
- Add another layer on top and repeat.
- Cover the entire cake with the remaining frosting. Use the cake crumbs to garnish the sides and top edges of the cake.
- Refrigerate for at least 3 hours, or better, overnight, before serving.
- Stored in the refrigerator for up to 4-5 days. Preferably in an airtight container.
Video

Notes
Butter or oil for a moist crumb
For the moistest cake, I prefer to use vegetable oil. The reason is that butter contains only about 80-85% fat, while oil contains 100% fat. The rest of the butter is water or milk solids. That means, oil will keep the cake moist longer and softer if it is refrigerated. People often use butter for its richer flavor, but in this recipe, that is not a problem.More tips to consider:
- Don’t use Dutch-processed cocoa for this recipe, as it lacks the natural red pigments. This is what helps it turn red when mixed with vinegar and buttermilk, rather than brown. You will need a lot more red food coloring to make it red.
- Be sure not to overmix the batter. Stop mixing once the dry ingredients have been combined with the wet ingredients.
- I made this recipe with 8-inch cake pans. Using a different size will change the cooking time.
- Make sure the ingredients are at room temperature for the best results.
- Use the spoon-and-level method to measure flour.
I actually made red velvet cake to day and always make cream cheese frosting to go along with it. We just had a piece a little bit ago, so good.
This looks so tasty and pretty. I don’t think I’ve seen a cake decorated like that before. My husband is a big fan of red velvet cake. I
I love to bake. It is my favorite hobby but I have never once made a Red Velvet Cake. I will be trying this soon. I’m happy you posted this in time for me to make it for Valentines Day. My family will be thrilled! Thanks for the idea.
Oh yum! Red velvet cake is one of my favorites. I would love to make this for my family.
Oh wow this red velvet cake look super delicious. It’s so nice to be able to bake your own cake so you can adjust the quantity of ingredients according to your liking. I’ll try this next time. 🙂
I remember eating Red Velvet cake in the 70s and not liking it. I am sure my grandmother used beet juice in hers.
yummm this cake looks amazing! I am allergic to gluten… but red velvet use to be my fav.
Your Red Velvet Cake looks absolutely mouthwatering! I haven’t baked a red velvet cake for ages! Have to give your recipe a try asap!
This red velvet cake looks so delicious. My daughters absolutely love red velvet cake and they would love to help me make this one!
Can cake flour be used instead of flour
Yes, you can, just reduce the baking powder from the recipe.