
Pumpkin Fudge – 5 Ingredients 5 Mins
If you ask me for the best way to kick off pumpkin season, without a doubt, I would say by making my no-bake pumpkin fudge. This seasonal and easy-to-make dessert, full of pumpkin spice, takes just five minutes and five ingredients to prepare.

This no-bake fudge recipe, filled with warm and cozy fall flavors, is the perfect treat for all the fall celebrations. With Halloween fast approaching, this is one of my favorite desserts on the table. My other favorite fall treats are Instant Pot Pumpkin Cheesecake and Pumpkin Pound Cake.
Table of contents
I know many fudge recipes involve numerous steps, which can be intimidating, especially for those who are not comfortable working with kitchen thermometers and handling hot, bubbly candy. My mission was to create a super simple, creamy, delicious, and easy-to-make Pumpkin Fudge that anyone can make at home. I must say that this is a winner, ready in just 10 minutes, plus the refrigeration time. The recipe requires only a few ingredients and your ability to operate a microwave.
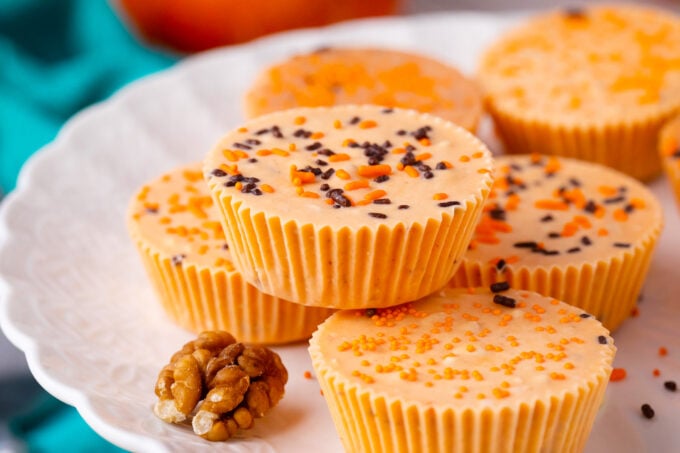
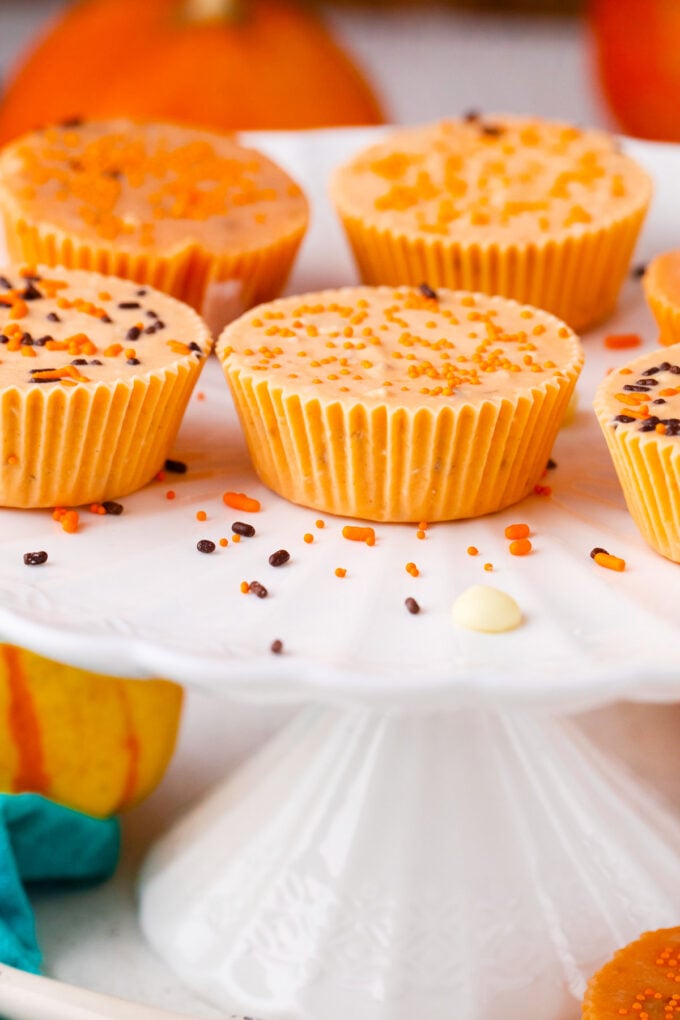
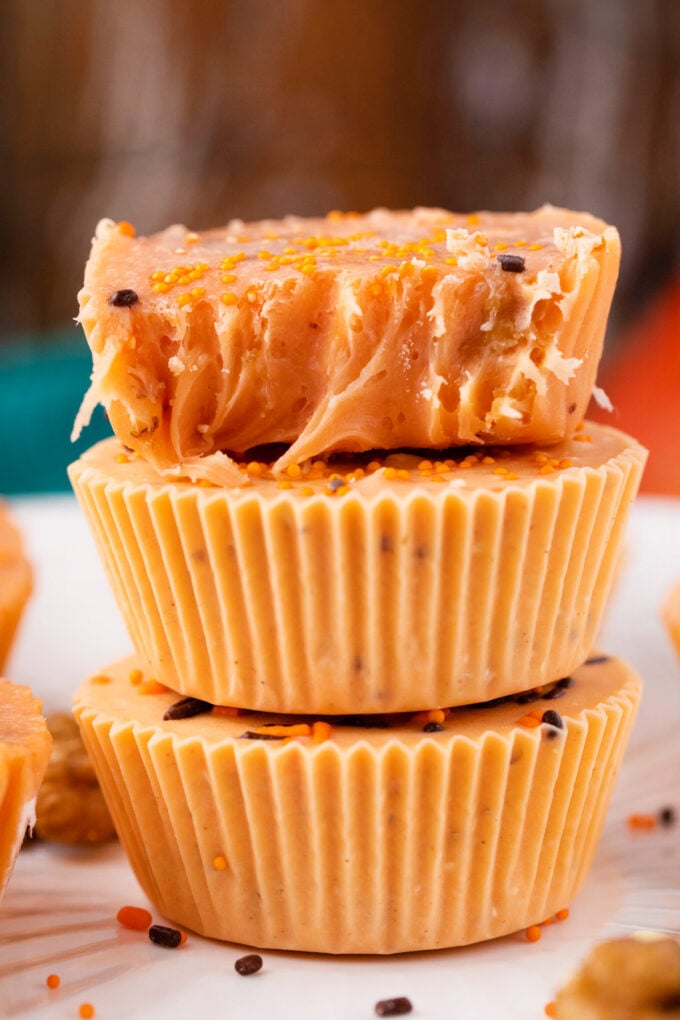
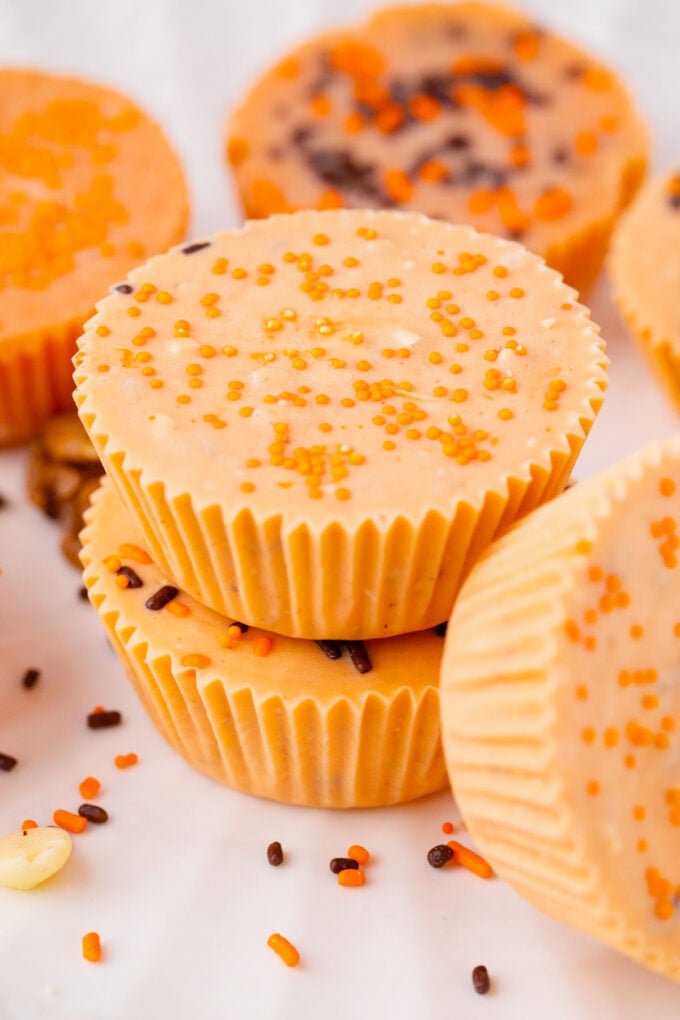
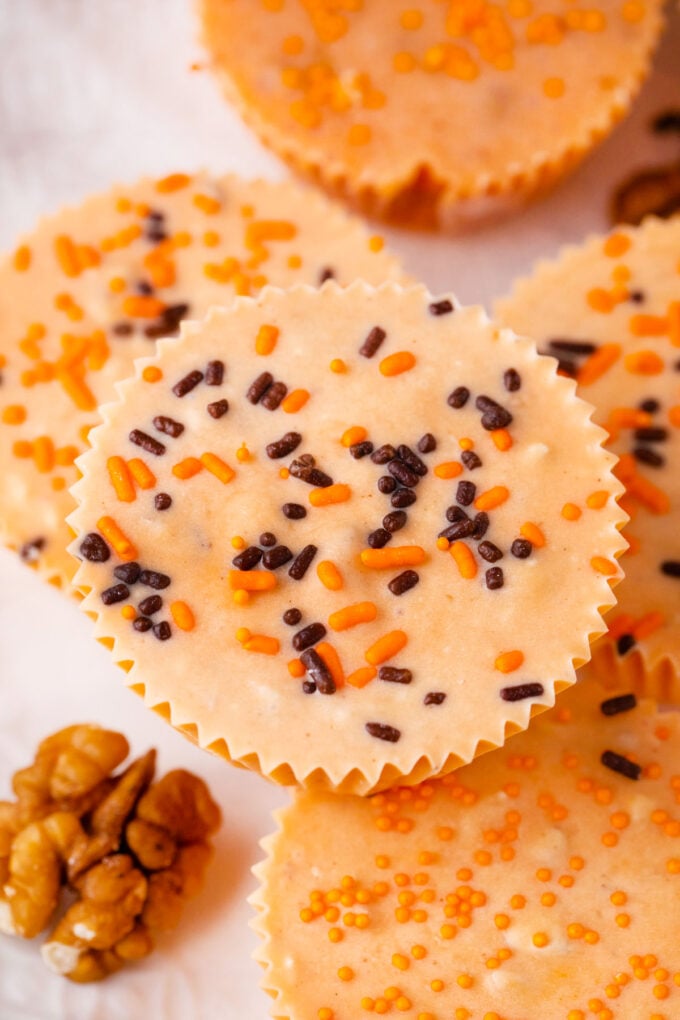
You will find this fudge to be super creamy, soft, and delicious, with a hint of crunch from the mixed-in walnuts and sprinkles. I love making it with my kids; it’s a nice tradition we have right before Halloween. I usually make a triple batch, and we give it to trick-or-treaters. Everyone loves it, and usually, they ask for more. If you are looking for a fun, fuss-free, and customizable recipe to make with the kiddos, you’ve found the right one.
Why you will love this recipe
- Great flavor profile: Since my two favorite desserts, Pumpkin pie and fudge, are also my go-to holiday treats, I combine them for the ultimate easy no-bake dessert.
- It is perfect for the holidays: This fudge looks excellent on my Thanksgiving table, and everyone loves it. The best part? It can be made ahead, as it lasts easily in a container at room temperature for 2 weeks.
- No-bake: Since there’s no need to use the oven or the stove, there is also no candy thermometer needed.
- Only five ingredients: Actually, there are only four ingredients if walnuts are not your thing.
- Gluten-free: Don’t worry about gluten if anyone has a gluten allergy; this recipe is naturally gluten-free.
What you will need
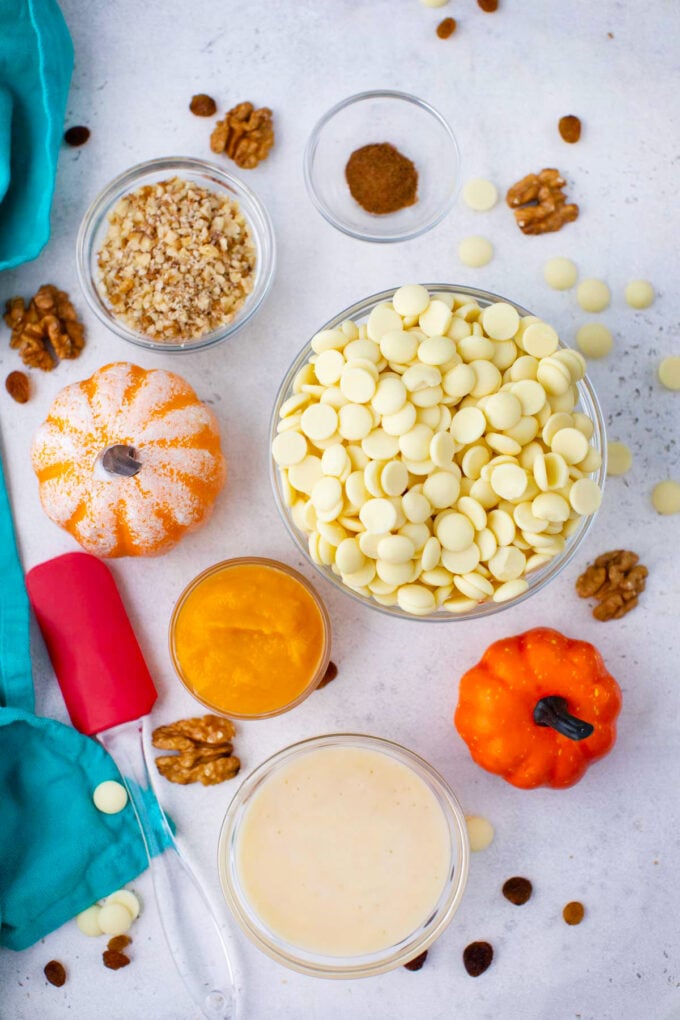
- Chocolate: I prefer white chocolate melting wafers over chips because they melt smoothly and creamily.
- Wet ingredients: Sweetened condensed milk is a shortcut to use instead of mixing butter, milk, and sugar. It has the perfect balance of all three. I use my own pumpkin puree, made from scratch, because it contains no preservatives or additives.
- Spices: Instead of adding individual spices, I use pumpkin pie spice because it has the perfect blend of warm, sweet flavors.
- Nuts: I like to use chopped walnuts in my fudge, but other nuts are fine too.
How to make
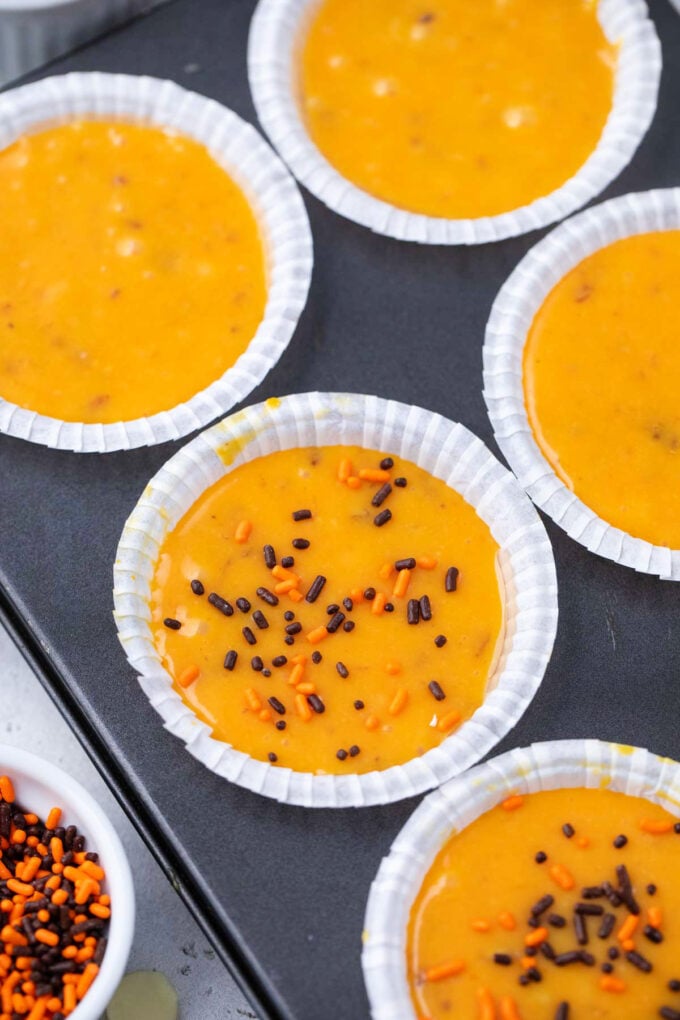
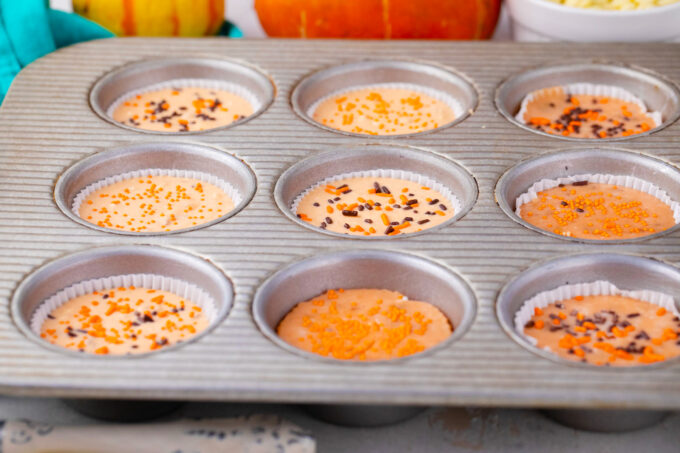
Line the muffin tin: First, I line a muffin tin with paper liners.
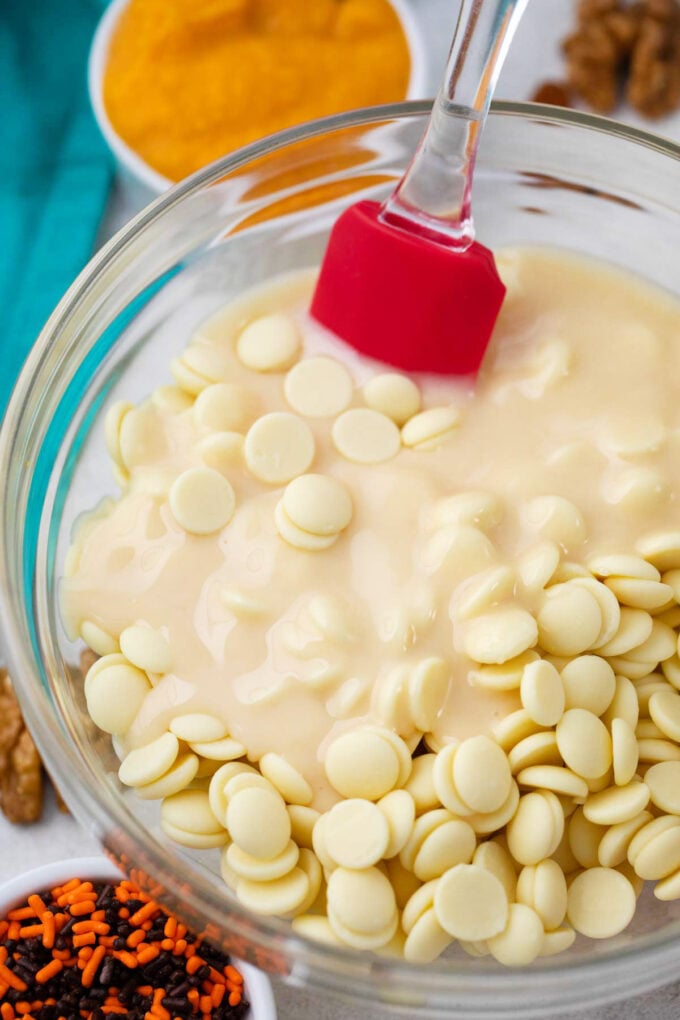
Melt the chocolate: Then, I put the chocolate and condensed milk in the microwave to melt for 20 seconds at a time, stirring after each interval, until the mixture is fully melted.
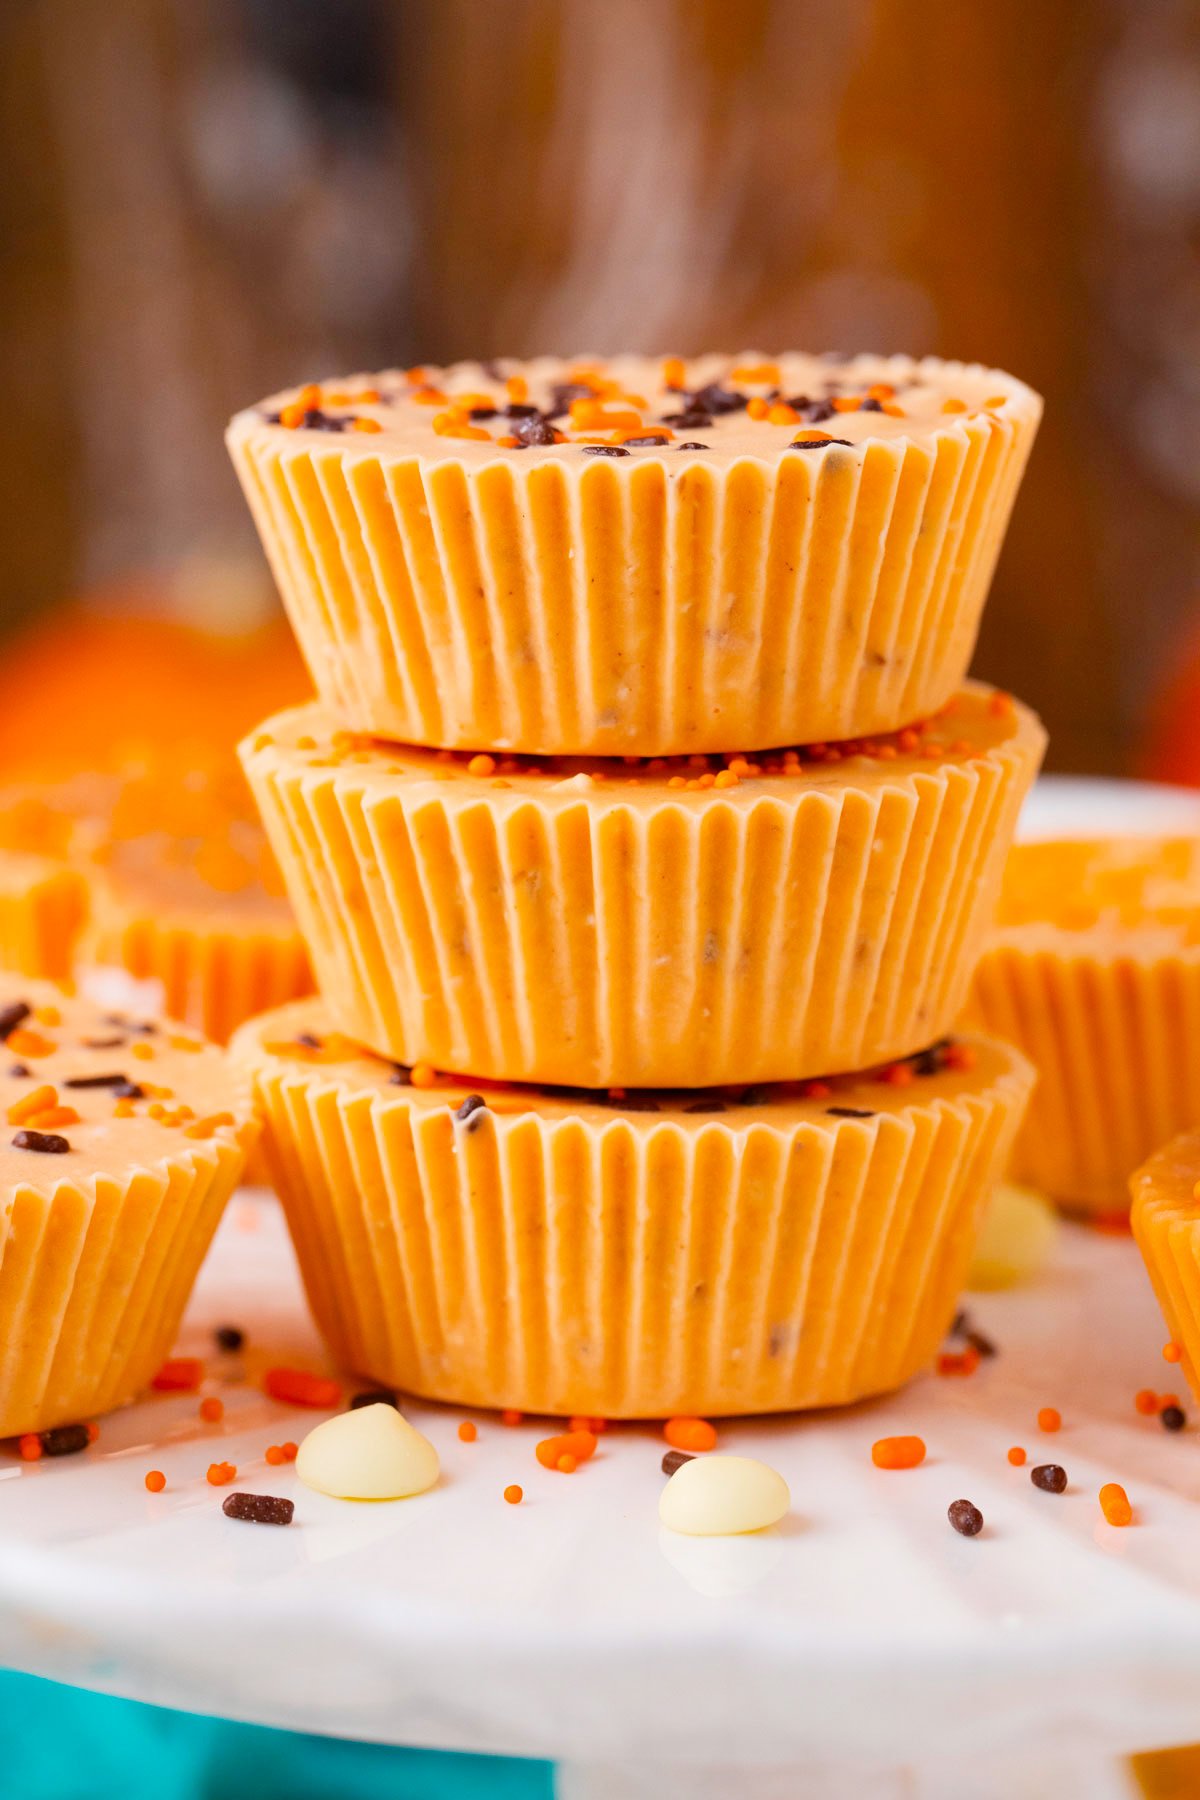
Stir and pour: Afterward, I stir in the pumpkin puree, pumpkin pie spice, and nuts, and I usually add a few drops of orange food coloring before pouring the batter into the muffin cups.
Chill and serve: The fudge should be chilled in the fridge for two to three hours before serving.
Expert tip
Preventing runny fudge that won’t set
One of the biggest frustrations of making fudge is when it doesn’t set properly. To avoid that, first, make sure to get pumpkin puree instead of pumpkin pie filling. Also, use a cheesecloth or fine wire sieve to drain the pumpkin puree, removing any excess moisture. Then, get sweetened condensed milk instead of evaporated milk and measure it carefully. Finally, use a candy thermometer to make sure the fudge is between 235°F and 245°F.
More tips to consider:
- Use a well-known brand (Eagle or Carnation) of sweetened condensed milk for the best taste and texture. The off-brands have variations in the amount of sugar, butter, and milk in them.
- The same with white chocolate. For the best taste, use a high-quality brand and opt for wafers over chips.
- Fresh pumpkin puree always tastes better than canned pumpkin puree.
- Have all the ingredients ready before starting because the chocolate starts to set quickly.
- Also, white chocolate is very pretentious, so be extra, extra careful when melting it. Usually, I do 20-second intervals in the microwave and lots of stirring to make sure I am not overheating it. In addition, if you overheat the white chocolate, it will clump and separate, making it unusable, unfortunately.
- Use gel food coloring, as it is the best option in this recipe, since liquid food coloring may cause the white chocolate to separate.
- Feel free to skip the food coloring altogether if you are not making the fudge for a festive occasion.
- For clean cuts, dip the knife in hot water after each slice.
Recipe variations and add-ins:
- Other gourds: Instead of pumpkin, sometimes I use sweet potato puree for a different flavor. Just be sure to drain it well so it isn’t runny.
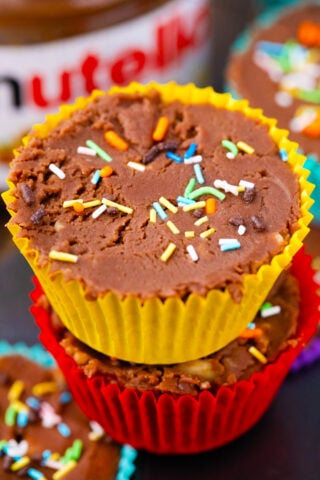
- Dark chocolate: For a darker fudge, use dark or milk chocolate. I like dark chocolate because it blends so well with the pumpkin flavor.
- Caramel sauce: For a gooey and rich pumpkin topping, drizzle on some of my caramel sauce. It is easy to make in just 10 minutes.
- Sprinkles: Add a festive touch to these fudge cups with some holiday sprinkles. I like the black and orange ones for Halloween or the little pumpkins for Thanksgiving.
- Dried fruit: Another way to make this fudge tastier is to add some dried fruit. My favorite is cranberries, but it also tastes yummy with raisins or cherries.
Serving suggestions:
I am a huge fan of this recipe because it’s incredibly versatile and can be made in advance. I usually have some on hand all fall season long, and add it to lunch boxes, give it as hostess gifts, or take it to church. It is also a hit at potlucks, where I pair it with sweet potato cheesecake bars and 30-minute pumpkin churros on my dessert tray. These light and crispy treats are perfect to dip in maple cream cheese.
When serving this fudge to my kids, I like to pair it with my pumpkin spice hot cocoa bombs. They’re incredibly fun, and I only need five ingredients to make them. The kids love to drop them in hot milk and watch them melt. The marshmallows and candy melts pop out and float to the top while the pumpkin spice and chocolate make the milk taste incredible. I usually enjoy a pumpkin spice latte that tastes better than Starbucks and only takes a few minutes to make.
How to store leftovers:
- Refrigerate: To better preserve them, I store leftovers in an airtight container and then seal it with a tight-fitting lid. In a cool place, the fudge will keep for about 2 weeks. Alternatively, storing it in the fridge will extend its life to 3 to 4 weeks.
- Freezing: I can also wrap it in plastic and freeze it in freezer bags for several months.
- Defrost: To thaw, I place it in the fridge overnight.
Frequently asked questions
The main reason fudge does not set is because it does not get hot enough. It has to be cooked between 235 and 240 degrees F. However, with this recipe, the issue may also lie with the measurements, as two different liquids need to be measured. Instead of using a whole can of sweetened condensed milk, only five tablespoons are required. Use liquid measuring spoons. Not a real tablespoon. Additionally, the recipe calls for only two tablespoons of pumpkin puree, rather than the whole can.
The best way to fix this problem is to scrape the fudge into a saucepan and stir in two tablespoons of milk over medium-low heat, stirring constantly until it comes to between 235°F and 245°F. Then, pour it into the prepared muffin tins again and let it cool for two to three hours. It should be just fine. If not, there must be something wrong with the measurements.
One of the easiest ways to prevent graininess is to add some marshmallows or marshmallow creme to the recipe. This prevents the formation of sugar crystals, which is what makes fudge grainy. It makes the fudge feel softer overall, allowing it to melt in your mouth. In fact, using marshmallow creme is considered foolproof compared to traditional fudge-making methods.
Evaporated milk is condensed milk without the added sugar, with the water content cooked off until it has a consistency that is similar to cream. Also, evaporated milk and sweetened condensed milk cannot be used interchangeably in cooking, because the sugar content in one product is much higher than that of the other; therefore, the products are different in taste and texture and produce different results.
More no-bake fudge recipes:


Loved this recipe? I’d love to hear from you! 💛 Leave a 5-star rating ⭐️ in the recipe card below and share your thoughts in the comments – I read and appreciate every single one!
Let’s stay connected! Follow me on Facebook, Instagram, Pinterest, and YouTube for more delicious, sweet and savory recipes. Have a question? Ask in the comments, and I’ll be happy to help! 😊 with love Catalina!
No-Bake Pumpkin Fudge
Ingredients
- 2 cups / 12 ounces/ 340 grams white chocolate melting wafers
- 5 tablespoons condensed milk
- 2 tablespoons pumpkin puree unsweetened
- 1/2 teaspoon pumpkin spice
- 1/4 cup chopped walnuts or pecans optional
Optional:
- food coloring: orange
- mix-ins: walnuts, raisins, sprinkles, etc
Instructions
- Line a regular muffin tin with paper liners, using only six. Set it aside.
- Combine the chocolate and condensed milk in a large, microwave-safe bowl. Microwave the mixture in 20-second increments, stirring after each interval until the chocolate has completely melted.
- Be sure to stir thoroughly each time, as the residual heat can help melt the chocolate without needing additional microwaving. This method prevents overheating and separation of the chocolate.
- Stir well until smooth, stir in pumpkin puree, walnuts, pumpkin spice, and a few drops of orange gel food color (if using).
- Pour mixture into the lined muffin cups and refrigerate for 1-2 hours.
- Once the fudge has cooled and hardened, it can be served.
Video
Notes
Preventing runny fudge that won’t set
One of the biggest frustrations of making fudge is when it doesn’t set properly. To avoid that, first, make sure to get pumpkin puree instead of pumpkin pie filling. Also, use a cheesecloth or fine wire sieve to drain the pumpkin puree, removing any excess moisture. Then, get sweetened condensed milk instead of evaporated milk and measure it carefully. Finally, use a candy thermometer to make sure the fudge is between 235°F and 245°F.More tips to consider:
- Use a well-known brand (Eagle or Carnation) of sweetened condensed milk for the best taste and texture. The off-brands have variations in the amount of sugar, butter, and milk in them.
- The same with white chocolate. For the best taste, use a high-quality brand and opt for wafers over chips.
- Fresh pumpkin puree always tastes better than canned pumpkin puree.
- Have all the ingredients ready before starting because the chocolate starts to set quickly.
- Also, white chocolate is very pretentious, so be extra, extra careful when melting it. Usually, I do 20-second intervals in the microwave and lots of stirring to make sure I am not overheating it. In addition, if you overheat the white chocolate, it will clump and separate, making it unusable, unfortunately.
- Use gel food coloring, as it is the best option in this recipe, since liquid food coloring may cause the white chocolate to separate.
- Feel free to skip the food coloring altogether if you are not making the fudge for a festive occasion.
- For clean cuts, dip the knife in hot water after each slice.
Nutrition

Yay! I love that you are making pumpkin now. I am SO ready for pumpkin season, and this fudge is the perfect way to start it off.
I guess I’d be OK saying farewell to summer if it meant getting a piece or two of this fudge 🙂
Oh how fun! I can’t wait to try this with the kiddos, they would have a blast making, and eating these:)
The fudge is so easy and tasty!
I tried this pumpkin fudge and is delicious and very easy to make! Thanks!
Yeaaa! Perfect for season to come, great idea for holidays and easy to make. What a beautiful treat indeed!
Wow! This looks better than chocolate fudge to me! In your ingredient list, do you mean sweetened condensed milk?
yes, sweetened condensed milk
Can this be made in a pan, and then cut into squares, rather than being made in individual liners? If so, what size pan would be correct? I am accustomed to making fudge in an 8″ square pan, like the quantity that produces. Thanks!
An 8″ square pan will work 🙂
I made this fudge and it’s great!
I just have a question why won’t my fudge harden more in the fridge ? I put it in for a couple hours and it got a little harder but not much. So when I try to pull off the cupcake liner it’s just mushy, what should I do!?
Use a bit more white chocolate next time, every brand is different, so that may be the issue.
Is it IMPOSSIBLE to make this with MILK CHOCOLATE instead of white?? Like regular fudge with pumpkin flavor???
Sure, you can use milk chocolate if you prefer it.
In the “Melting the Chocolate” section you have listed to melt the chocolate in a microwave for 20 minutes, which obviously is a mistake. Is it supposed to be for up to 2 minutes, in 20 second intervals??
Yes, its 20 second intervals, as stated in the recipe card. Sorry for the confusion.
Looked pretty unappetizing before adding the food coloring–of course, now mine looks like lumpy Velveeta, but it tastes amazing! Using mini cupcake wrappers, I ended up with 24, which comes to just under 2.5g of sugar each (for those keeping track).
This pumpkin fudge is so delicious! I love the combination of sweet and savory flavors.
This pumpkin fudge recipe looks so quick and delicious! I love how simple the ingredient list is—definitely trying this out for fall. Thanks for sharing the video too; it makes it even easier to follow along! 🍂🎃
This pumpkin fudge looks absolutely delicious and so easy to make! I love that it only requires five ingredients and just five minutes. Perfect for fall gatherings! Can’t wait to try this recipe! 🍂🎃
This pumpkin fudge recipe looks amazing! I love how simple it is with just five ingredients and takes only five minutes. Perfect for fall treats! Can’t wait to try it out! 🎃🍬
This pumpkin fudge recipe is a game changer! I love how simple it is with just five ingredients and ready in no time. Perfect for fall gatherings! Can’t wait to try it! 🍂🍬
This Pumpkin Fudge recipe looks absolutely delicious and so easy to make! I love how few ingredients are needed, and the video is super helpful. I can’t wait to try this out for the fall season! Thanks for sharing! 🍂🎃
This Pumpkin Fudge recipe looks absolutely delicious and so easy to make! I love how it only requires five ingredients and can be prepared in just five minutes. Perfect for satisfying my sweet tooth this fall. Can’t wait to try it out!
This pumpkin fudge recipe looks absolutely delicious and so easy to make! I love that it only requires 5 ingredients and minimal prep time. Can’t wait to try it out for my fall gatherings! Thanks for sharing the video too!
This looks absolutely delicious and so easy to make! I love how it only requires five ingredients and takes just five minutes. Perfect for a quick fall treat! Can’t wait to try this recipe! 🍂🍫