
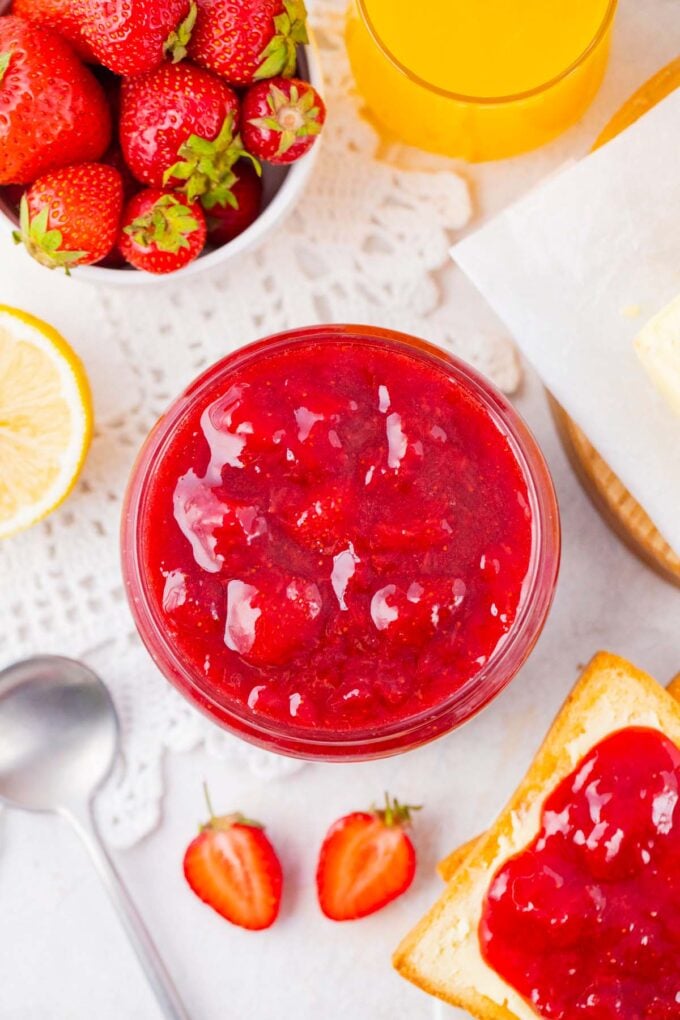
Easy Strawberry Jam – No Pectin
I am at a point in my life when I can say that I genuinely enjoy making jam. I’m not sure if that means I’m getting older or if my taste in food is improving over time. Let’s assume it’s the second. However, I am obsessed with transforming fresh strawberries into the most delicious strawberry jam in just one hour, using only six ingredients!
I am making this recipe without pectin or any fancy tools. Just berries, sugar, a splash of lemon juice and lemon zest, and a cornstarch slurry to thicken it. When it’s that easy and stress-free, you can’t just stop at one batch. I always take advantage of the abundance of fresh fruits during the summer and also make plum jam, as well as another favorite, this peach jam.
Table of contents
I love making jam from scratch, and now it has become a family tradition. The kitchen smells heavenly of sweet strawberries, and the kids always stop to steal a few spoons. The best thing is that the recipe is so easy that we turn it into a fun family project that we all enjoy making together. I am sure that once you give it a try, and see the. The vibrant color and superior taste of homemade jam, compared to store-bought, will make this recipe a constant in your household as well.
Why you will love this recipe
- Just a few ingredients: You only need six basic, readily available ingredients. A short shopping list that will not break the budget!
- Fuss-free: Making jam sounds fancy, but with this recipe, I’m showing you all the tricks on how to make the perfect homemade jam in just about one hour!
- Customizable: Making the jam at home lets you be in control of what goes in. You can also add a variety of different berries and flavorings to make it unique.
- Stores well: I always make a big batch and ensure that I can save some for later. It’s just so comforting to open a jar of strawberry jam during winter. It also makes a great hostess gift!
What you will need
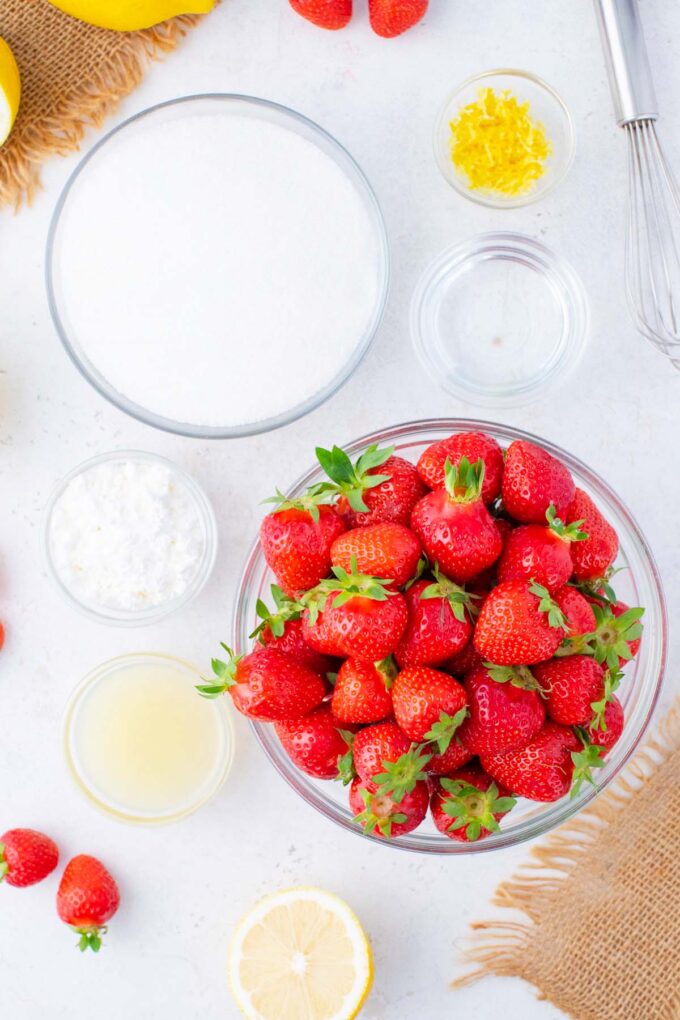
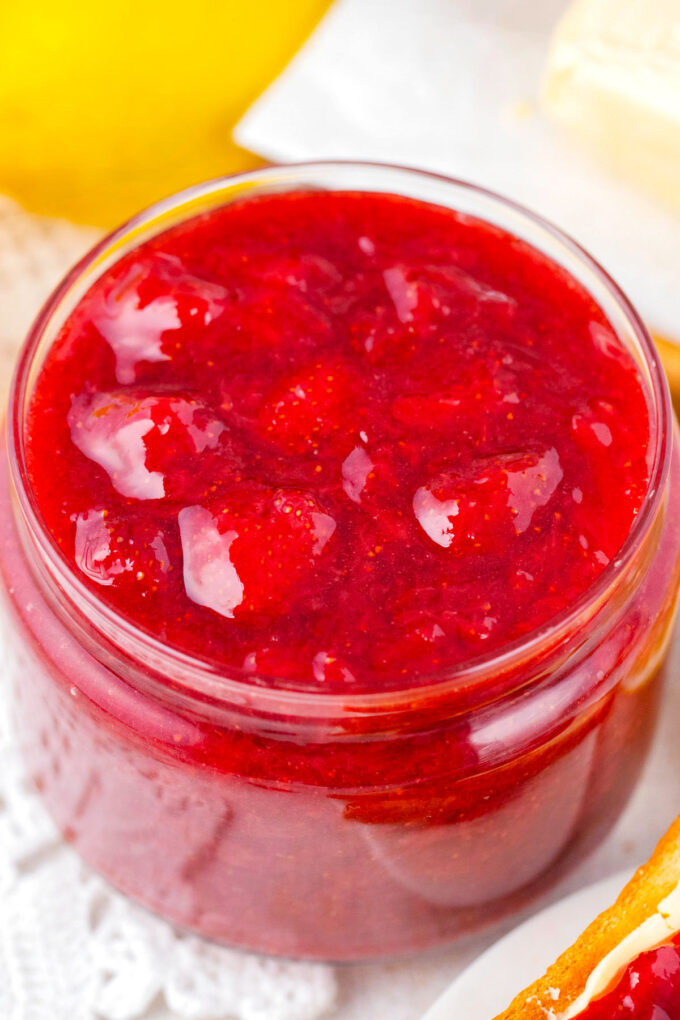
- Strawberries and citrus: I use two pounds of fresh, sweet, and fragrant strawberries, which I purchase from the farmer’s market, and I mix them with sugar, lemon juice, and lemon zest. Lemon juice is essential in preventing the strawberries from oxidizing too quickly.
- Slurry: To avoid simmering the jam for hours, with lots of sugar, to achieve that jammy, sticky texture, I make a quick slurry by mixing cornstarch and water to help thicken the mixture more quickly.
How to make
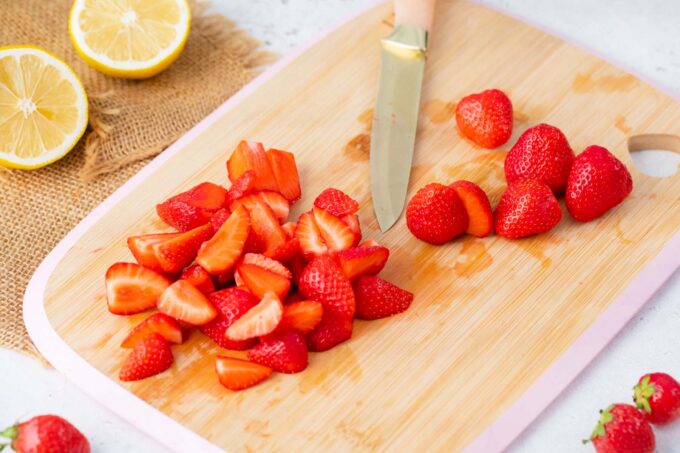
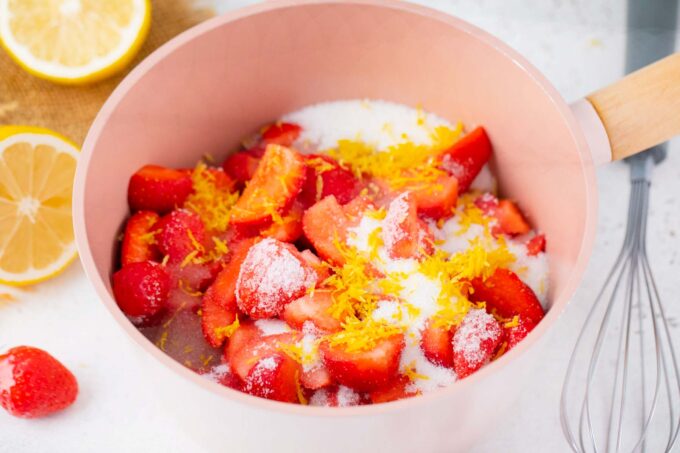
Prepare: First, I prepare the berries. I wash them under cold water and pat them dry with paper towels. I also check and discard any mushy berries. Next, I cut and discard the stems, slice the berries into quarters, and add them to a saucepan.
Macerate: I gently mash the berries using a potato masher, pressing just a few times, as I prefer my jam to be chunky. After that, I stir in the sugar, lemon juice, and lemon zest and let the mixture sit for 20-30 minutes; during this time, the strawberries release more juice.
Simmer: I place the saucepan over low to medium heat and gently stir the mixture until the sugar is dissolved. I increase the heat, bringing the mixture to a boil, after which I decrease the heat to medium and let it simmer for 15-20 minutes, or until bubbly and thick.
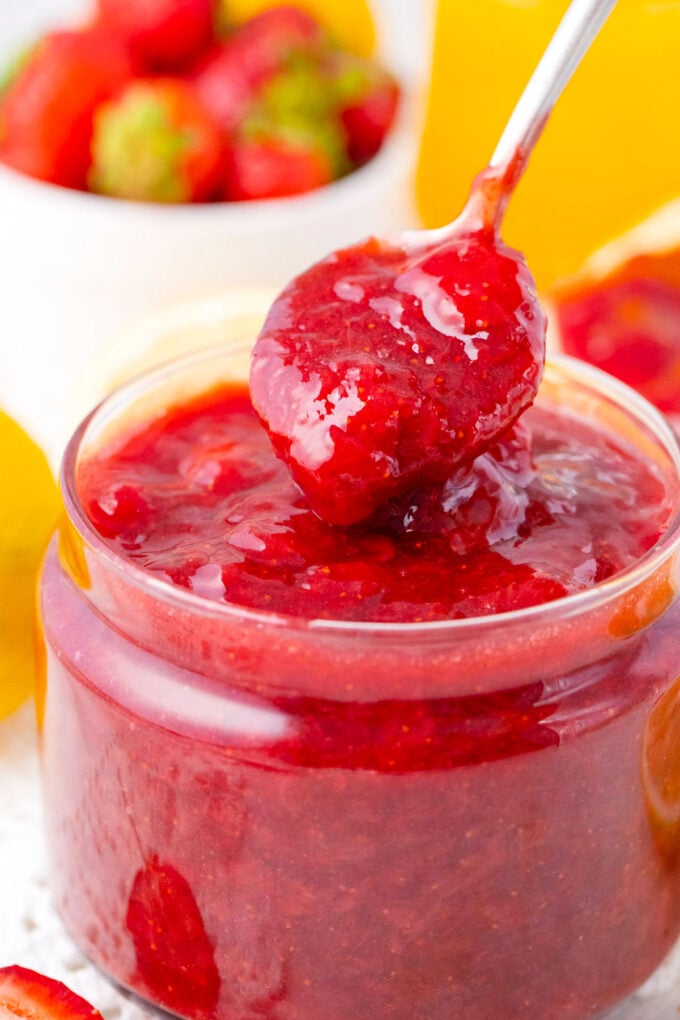
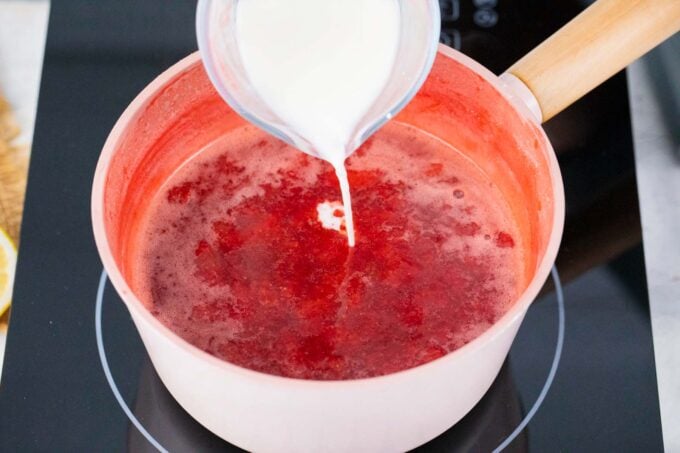
Thicken: Now, I mix the cornstarch with water until the cornstarch is fully dissolved, and then I add the slurry to the strawberry mixture. I gently stir and simmer the jam for a few minutes, allowing it to continue thickening. At this point, you can add more slurry, but keep in mind that the jam will continue to thicken as it cools.
Store: I let the jam simmer slightly, then scoop it into jars and let it cool thoroughly to room temperature. After that, I seal the jars and transfer them to the refrigerator. For more details on canning the jam, refer to the “How to store” section of this post.
Expert tip
The importance of lemon juice
Lemon juice is a key ingredient that should not be skipped, as it balances the natural sweetness of the strawberries. Additionally, it helps the jam set, being rich in pectin and citric acid. Lemon juice is essential for achieving the jammy texture that we all love, as well as for preserving the bright color of the strawberries during the cooking process. Additionally, it is a more natural way to slightly extend the jam’s shelf life when not canned and stored in the refrigerator.
More tips to consider
- When choosing the strawberries, look for ripe but firm berries. If the berries are too soft, the jam will turn out too watery.
- Mash the berries based on your preference; you can leave the sliced berries intact or thoroughly mash them. Keep in mind that the more you mash the berries, the more water the jam will contain; therefore, you will need to simmer it for a long time to thicken it, or add more sugar or a cornstarch slurry.
- Constantly stir the jam while it simmers to prevent burning and to thicken it evenly.
- A good way to check the jam for doneness is to do the cool test: take a small spoonful and place it on a chilled plate. If it runs down the plate and seems too watery, cook it for a little longer.
- Always let the jam slightly cool before transferring it to jars; this reduces condensation and preserves the jam’s texture.
- Always use a clean spoon when serving the jam to avoid cross-contamination.
Recipe variations:
- Various berries: I enjoy creating a berry medley by combining strawberries, raspberries, and blackberries.
- Vanilla flavors: I also enjoy stirring in the insides of a vanilla bean; the vanilla flavor makes this jam extra special and fancier.
- Almond extract: I also enjoy stirring in 1/4 teaspoon of almond extract into the jam after it has cooled.
- Spicy: Make it a gourmet jam by using chopped spicy red peppers; this is the perfect combination for some cheese, crackers, and hot strawberry jam.
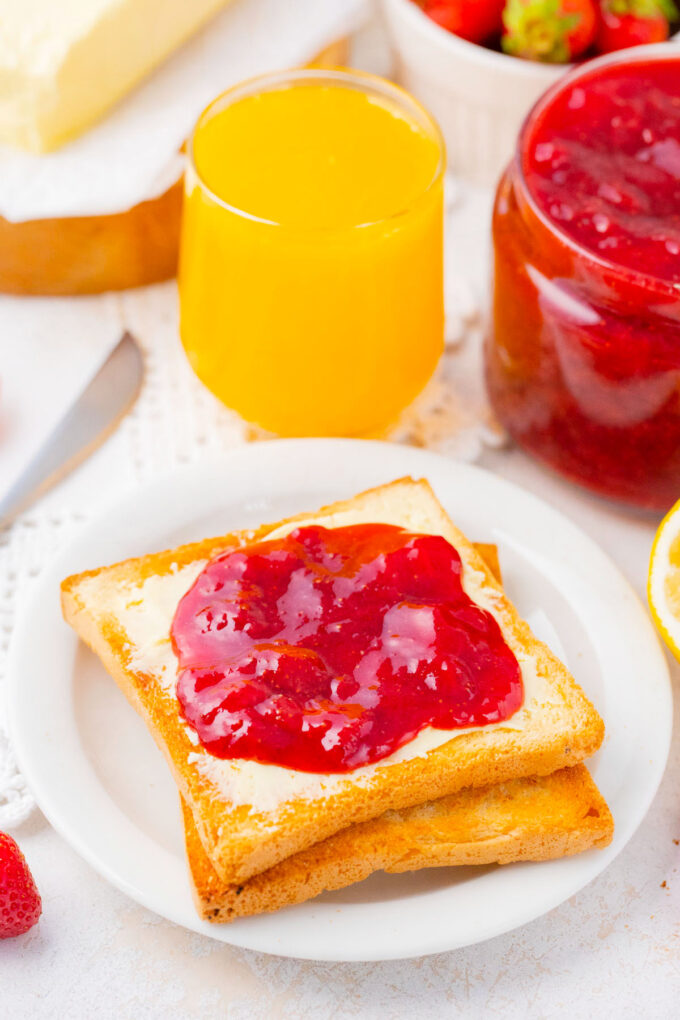
How to serve
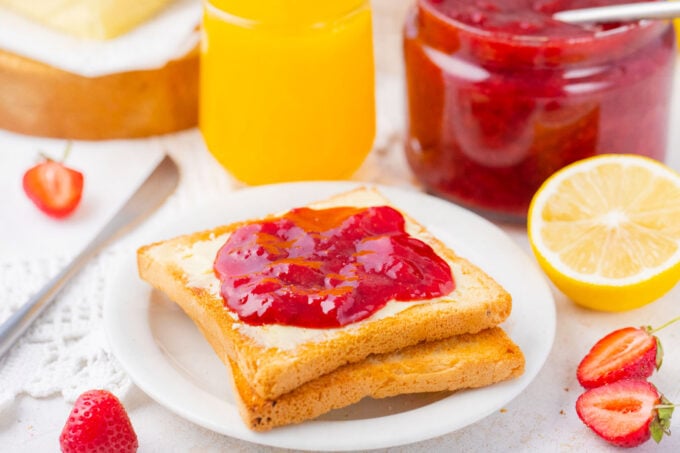
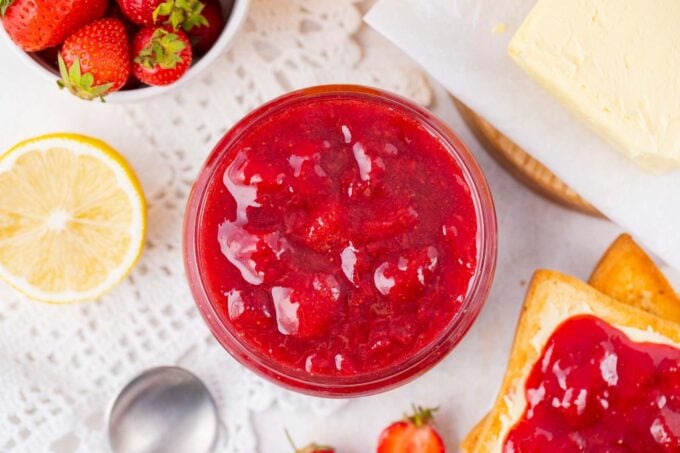
All summer long, I make sure to have a few jars in the refrigerator. The jam is delicious on toast with butter, on fluffy Nutella pancakes, and waffles. I also like to add it to strawberry chia seed pudding and yogurt parfaits. My kids enjoy it on French toast sticks and chocolate muffins.
This jam is also a great addition to a cheese plate, such as this air-fried brie charcuterie board. It pairs beautifully with a sharp aged cheddar cheese and crackers. It also makes great hostess gifts, so I usually make a few extra jars to give to friends and family.
How to store:
Refrigerator or freezer
- Refrigerate: Place the jam in an airtight jar and refrigerate for up to 14 days.
- Freezing: Once the strawberry jam has cooled completely, you can freeze it for up to three months in a freezer bag or freezer-safe container.
- Defrost: Thaw overnight in the refrigerator for optimal results.
- Reheating: There is no need to reheat, but you may need to pour off any liquid that forms on top of the frozen jam.
Canning strawberry jam
I highly recommend making a larger batch and canning it. This way, you have it on hand whenever a craving strikes.
- Prepare the boiling water canner. Heat the jars and lids in the simmering water (do not boil) until ready for use. Set the bands aside.
- Transfer the slightly cooled strawberry jam into the hot jars, leaving 1/2 inch headspace, and tap the jars to remove air bubbles.
- Wipe the rim, place the hot lids on the jars, apply the band, and adjust until the fit is fingertip-tight.
- Add the jars to a boiling water canner and process for 30 minutes; the processing time remains the same for both pints and quarts.
- Remove the jars and let them cool to room temperature. Check the lids for seal after 24 hours; they should not flex up and down when the center is pressed.
- The canned jam is good for one year when stored in a cool, dry place. Once you open the jar, it can be stored in the refrigerator for 3 to 4 weeks.
Frequently Asked Questions
No, you do not need pectin to make strawberry jam. However, strawberries are naturally low in pectin, which helps thicken the jam. In that case, you either have to simmer the jam longer to achieve the right sticky texture or add a cornstarch slurry, which helps thicken the jam. The lemon juice is also essential, as it helps the strawberries release a small amount of pectin, which in turn allows the jam to set.
There are several methods to thicken strawberry jam, one of which is to simmer it with sugar for an extended period until it reaches the desired consistency. Second, add lemon juice and lemon zest to the strawberry mixture, as it helps release pectin and allows the jam to set. The third option is to use powdered or liquid pectin, and the fourth option is to use a cornstarch slurry.
The recommendation is to use 1.75 oz (50) of powdered pectin per 2 lbs (0.9 kg) of strawberries and approximately 4 cups of sugar. I prefer to make my jam with less sugar, so I usually do 2 lbs of strawberries, 2 cups of sugar, and two teaspoons of powdered pectin. However, the measurements may vary per brand, so it’s always important to check the specific recommendations.
I recommend the chilled plate test. First, place a plate in the freezer for 10-15 minutes. After that, add a teaspoon of the hot jam to the chilled plate. If the jam wrinkles and does not run down the plate, it’s set. If the jam looks watery and spreads excessively on the plate, it needs to be cooked for a longer period.
More recipes with strawberries


Loved this recipe? I’d love to hear from you! 💛 Leave a 5-star rating ⭐️ in the recipe card below and share your thoughts in the comments – I read and appreciate every single one!
Let’s stay connected! Follow me on Facebook, Instagram, Pinterest, and YouTube for more delicious, sweet and savory recipes. Have a question? Ask in the comments, and I’ll be happy to help! 😊 with love Catalina!

Strawberry Jam
Ingredients
- 2 pounds fresh strawberries cleaned and chopped
- 1 1/2-2 cups white granulated sugar more sugar makes it thicker and sweeter
- Juice of one lemon
- 1 tablespoon lemon zest
Optional:
- 2 tablespoons cornstarch
- 4 tablespoons water
Instructions
Prepare the strawberries:
- Wash strawberries only when you are ready to use them. Do not remove the stems before washing, as the strawberries will absorb extra water.
- After you wash them under cold water, let them drain in a colander for a few minutes. Check and discard any mushy or moldy berries.
- Cut and discard the stems, and slice the strawberries into quarters or dice them.
- Add them to a large, heavy-bottomed saucepan and mash using a potato masher. Mash them as much as you want, depending on whether you prefer the jam chunkier or smoother.
- Add sugar, lemon juice, and lemon zest and let them macerate for about 20-30 minutes. The strawberries will release more juice.
Cook:
- Place the saucepan over low to medium heat and stir until the sugar is completely dissolved. Then, increase the heat to medium-high and bring the mixture to a rolling boil. Once boiling, reduce the heat to medium and let it simmer, stirring occasionally, for about 15 to 20 minutes. If needed, continue simmering until the mixture becomes bubbly and thick.
Thicken (optional):
- If you would like your jam to be thicker, mix two tablespoons of cornstarch with four tablespoons of water in a cup until it is fully dissolved. Then, add this mixture to the jam and stir well. Simmer for a few minutes. If necessary, you can repeat this process, but remember that the jam will continue to thicken as it cools.
Store:
- Pour the slightly cooled jam into jars and allow it to cool to room temperature. Seal the jars and store them in the refrigerator for up to two weeks or longer.
- Check the post for tips on freezing and canning the jam.
Notes
The importance of lemon juice
Lemon juice is a key ingredient that should not be skipped, as it balances the natural sweetness of the strawberries. Additionally, it helps the jam set, being rich in pectin and citric acid. Lemon juice is essential for achieving the jammy texture that we all love, as well as for preserving the bright color of the strawberries during the cooking process. Additionally, it is a more natural way to slightly extend the jam’s shelf life when not canned and stored in the refrigerator.More tips to consider
- When choosing the strawberries, look for ripe but firm berries. If the berries are too soft, the jam will turn out too watery.
- Mash the berries based on your preference; you can leave the sliced berries intact or thoroughly mash them. Keep in mind that the more you mash the berries, the more water the jam will contain; therefore, you will need to simmer it for a long time to thicken it, or add more sugar or a cornstarch slurry.
- Constantly stir the jam while it simmers to prevent burning and to thicken it evenly.
- A good way to check the jam for doneness is to do the cool test: take a small spoonful and place it on a chilled plate. If it runs down the plate and seems too watery, cook it for a little longer.
- Always let the jam slightly cool before transferring it to jars; this reduces condensation and preserves the jam’s texture.
- Always use a clean spoon when serving the jam to avoid cross-contamination.
Everything you ever wanted to learn about strawberries and jam was in this article. I may not make it soon but this is a keeper of a post.
OH wow. That really is easy. I have to make this. Homemade jam always tastes the best.
I was not aware of natural pectin in apple skin and lemon peel! This will be awesome to make when the strawberries are ready for picking
There is nothing like fresh jam. Strawberry happens to be my total favorite!
I love strawberry jam and I really can’t wait to give this a try!
We make strawberry jam from scratch as well and it is one of my favorites. This looks delicious!
This is the most delicious way to preserve strawberries. My grandmother used to make strawberry jam, and other fruit jams when she was still alive. We haven’t had homemade jam in ages though. I will try your recipe this weekend.
Lovely, Catalina!
I’ve been raised in a family where jam-making was the ultimate skill. So many jams and flavors in my life! But I would love to try your recipe, too.
I’ve never attempted to make jam from scratch, but I can just imagine how delicious!
What a perfect recipe for summer. Can’t wait to try and make this.