
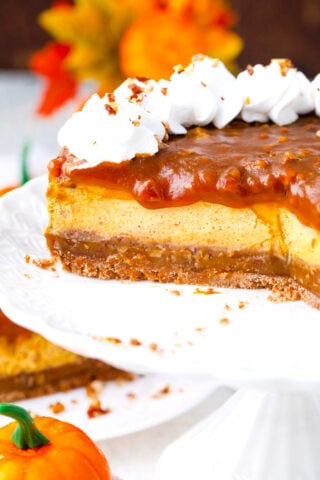
Red Velvet Cake Cheesecake
This Red Velvet Cake Cheesecake is one of the most beautiful and delicious cakes I have ever made. The tenderness of the red velvet layers combines so well with the richness and creaminess of the New York Cheesecake. This show-stopper dessert is a copycat of the famous Cheesecake Factory cheesecake, and it is my favorite from their menu!

If you love a fantastic dessert, you must make this decadent recipe. This is the perfect cake for Valentine’s Day or any special occasion. It may look like a lot of work, but it is just like making and putting two cakes together. The red velvet cake and cheesecake layers will go on top of each other with my homemade cream cheese frosting in between each layer.
Table of contents
For those who love the Cheesecake Factory red velvet cake cheesecake, why not make it at home instead of spending ten times the amount to buy it at the restaurant? This easy recipe requires simple ingredients, some planning in advance, and a bit of patience.
With two layers of luscious red velvet cake and two layers of rich cream cheesecake topped with my homemade cream cheese frosting, this is a cake that dreams are made of; no wonder it’s their celebration cake. And you can make it yourself at home.

Why you will love this recipe
- Save money: The Cheesecake Factory sells its cake for $10.50 per slice, but you can make it for about $20 per cake.
- It is not a lot of work: Make two cakes and stack them on each other. The recipe involves more steps, but they are not complicated.
- Gorgeous cake: Fancy enough for a celebration, this cake is perfect for a special occasion. You can Decorate it with sprinkles, write someone’s name, or say congratulations.
- Freeze it: Those midnight cravings can be tamed with individual servings that have been frozen to fix them.
What you will need
For the cake:
- Baking spray – I use olive oil baking spray, but you can use the spray you like.
- All-purpose flour—Cakes made with all-purpose flour are chewier and denser than those made with cake flour because they have lower protein and higher starch.
- Granulated white sugar—With its natural flavor and crystals, granulated sugar is the obvious choice for this luscious cake batter.
- More dry ingredients – I added baking soda, baking powder, and cocoa powder to achieve the intense chocolate flavor that red velvet cake is famous for.
- Wet ingredients include buttermilk, vegetable oil for moisture, white distilled vinegar, vanilla extract, and red food coloring.
- Large eggs – At room temperature, they whip to a fuller consistency and will hold their shape better and for longer.

For the cheesecake:
The cheesecake layers are made with a classic mix of cream cheese, sugar, eggs, sour cream, vanilla, and a bit of flour to prevent the cheesecake from cracking.
Cream cheese frosting:
I used my foolproof cream cheese frosting recipe, which calls for unsalted butter, cream cheese, powdered sugar, and vanilla extract.
How to make it
Preheat the oven: First, I preheat the oven to 350 degrees. Then, I spray two eight-inch cake pans with baking spray, cover the bottoms with parchment paper, and respray them.
Mix the dry ingredients: Now, I whisk flour, sugar, baking soda, baking powder, cocoa powder, and salt in a medium bowl.

Mix the wet ingredients: Next, I whisk oil, buttermilk, eggs, vanilla, vinegar, and food coloring in a stand mixer on medium speed until combined.

Combine: I turn it on low and add the dry ingredients a little at a time, stopping to scrape the sides of the bowl when needed. Then, I divide the batter equally between the two cake pans.

Bake the cakes: After baking them for about 30 minutes, rotating them halfway through until a toothpick inserted in the middle comes out clean, I run a knife around the edges to loosen them. I let them cool in the pans for 30 minutes before turning them out onto plates and then flipping them onto a cooling rack, round side up, to let them cool completely.

Preheat the oven again: I then turned the oven to 325 degrees F and prepared the same two cake pans in the exact same way.
Cheesecake batter: I beat the cream cheese for one minute with a stand mixer. I add the sugar and flour and mix until combined with no lumps, scraping the sides of the bowl. Add the sour cream, vanilla, and salt and beat until mixed.

Bake the cheesecake: Once combined, I divide the batter into the two pans and bake for 40 to 45 minutes. They will be wobbly in the center and puffy on the edges.

Cool and chill: To cool, I turn off the oven, crack the door open, and let them cool completely in the oven for at least one hour before removing them to the counter. I chill them for five to six hours and run a knife around the edges of the pan, but do not remove them.
Make the frosting: Now, I beat the softened butter and cream cheese until blended. Gradually, I added powdered sugar and then mixed in vanilla and salt. I beat the mixture until creamy, stopping to scrape the sides of the bowl.
Frost the cake: I place a piece of cake paper on top of a cake stand and spread 1/3 cup frosting on top of it. Then, using a cake leveler, I level the cake layers before placing one on the cake stand. I spread another 1/3 cup of frosting on top of the cake. Finally, I level the cheesecake and put it on top of the cake, frosting it as well.

Finish and serve: I continue with the remaining cake layer and cheesecake layer before using the remaining frosting to cover the rest of the cake. Lastly, I decorate the edges of the cake with cake crumbs and chill it for at least four hours for the cheesecake and frosting to set.
Expert tip
The perfect cheesecake layer
First, ensure the ingredients for the cheesecake layer are at room temperature. Cold cream cheese will create lumps when whisked, so always let it soften to room temperature for a silky smooth cheesecake. Also, chill the cheesecake layer well before adding it to the set. It should be fully set and cold when stacking to prevent it from cracking or sliding.
More tips to consider
- Use a boxed red velvet cake mix and store-bought cream cheese to save time. That way, you only need to make the cheesecake and assemble it.
- Adding vinegar to red velvet cake helps make it airy and light and gives it a silky, soft, and pillowy texture; do not skip it.
- Stop whisking after the eggs. Use a wooden spoon or spatula to mix the flour gently.
- Also, measure the flour using a spoon and level method so you do not end up with too much flour.
- Too much leavening can also cause crumbling. Measure carefully.

Recipe variations and add-ins:
- Other frosting: Use chocolate instead of vanilla cream cheese frosting for a different taste.
- Add fruit: This cake tastes incredible with a few scoops of strawberry sauce.
- Make it crunchy: Another way to top this yummy cake is to sprinkle some chopped nuts.
- Tropical style: Make it tropical by covering it with toasted coconut and chopped pineapples.
- Candy top: The kids love it when I decorate the top with candy like M&M’s, Reese’s Pieces, or Skittles.

Serving suggestions:
This cake would be perfect with this red velvet hot chocolate. Red velvet cake cheesecake is a nice dessert after a special dinner, like red wine pot roast or pineapple pork loin.
This would be a special cake for a birthday party or anniversary celebration. I enjoy mine with whipped cream on the side and a scoop of vanilla ice cream. It also tastes delicious when topped with a drizzle of caramel sauce or tangy blueberry sauce to balance the sweetness.
How to slice the cake:
- Run along, sharp, thin-bladed slicing knife under hot tap water.
- Then, starting with the tip of the knife, position it well and run it clean through the cake.
- Before making another cut, wash and clean the knife.
- Another way is to use a cheese wire or unflavored dental floss.
How to store:
- Refrigerate: Store leftovers in an airtight container in the fridge for up to four days.
- Freezing: Flash-freeze leftover cheesecake into individual pieces. Then, store them in freezer bags after wrapping them in plastic and foil. It will stay fresh for three months.
- Defrost: Thaw overnight in the fridge for the best texture and taste.

Frequently asked questions
The usual reason for this is overwhisking the batter after adding the flour. After the eggs have been mixed in, stop using the whisk and use a wooden spoon instead. It is also essential to make sure to measure the flour correctly.
Use the spoon and level method rather than the scooping method. Spoon the flour into the measuring cup and level it with the back of a knife. Using too much leavening can also be a problem. Too much gas will cause it to expand and then deflate.
This results from overmixing the batter or baking the cake for too long. To avoid this and keep the cake moist, mix the ingredients just until combined. Also, ensure you do not skip the oil and buttermilk; they add moisture to the cake.
To prevent the layers from sliding, chill the cheesecake layer for at least four hours or better overnight. The cake layers must be cooled completely, and the frosting should be refrigerated for 30 minutes to one hour so it’s not runny. Use a thick layer of frosting to help the layers stick together and prevent sliding.

Other Cheesecake Factory copycats:


Loved this recipe? I’d love to hear from you! 💛 Leave a 5-star rating ⭐️ in the recipe card below and share your thoughts in the comments – I read and appreciate every single one!
Let’s stay connected! Follow me on Facebook, Instagram, Pinterest, and YouTube for more delicious, sweet and savory recipes. Have a question? Ask in the comments, and I’ll be happy to help! 😊 with love Catalina!
Red Velvet Cake Cheesecake
Ingredients
Red Velvet Cake Layers:
- Baking Spray for the pans
- 2 1/2 cups all-purpose flour
- 1 1/2 cups sugar
- 1 teaspoon baking soda
- 1 teaspoon baking powder
- 1/2 teaspoon salt
- 1/3 cup cocoa powder
- 2 large eggs at room temperature
- 1 1/2 cups vegetable oil
- 1 cup buttermilk room temperature
- 1 teaspoon white distilled vinegar
- 1 teaspoon vanilla extract
- 1 teaspoon red gel food coloring or 2 tablespoons regular food coloring
Cheesecake Layers
- 24 ounces cream cheese softened to room temperature
- 1 cup granulated sugar
- 2 large eggs room temperature
- 1/2 tablespoon vanilla extract
- 1 cup sour cream room temperature
- 2 tablespoons all-purpose flour
- 1/2 teaspoons salt
Cream Cheese Frosting
- Cream Cheese Frosting Recipe search it on the blog
Instructions
Red Velvet Cake Layers:
- Preheat oven to 350 degrees F.
- Spray two 8-inch cake pans with baking spray, cover the bottom to fit with parchment paper, and spray again with baking spray. Set aside.
- In a medium bowl, combine dry ingredients: flour, sugar, baking powder, baking soda, salt, and cocoa powder. Whisk to combine. Set aside.
- Add wet ingredients to a large bowl: eggs, oil, buttermilk, vinegar, vanilla extract, and red gel food coloring. Using a hand mixer (or stand mixer), whisk on medium speed until thoroughly combined.
- Reduce the mixer speed to low and slowly add the dry ingredients. Stop occasionally to scrape the sides and bottom of the bowl. Whisk just until thoroughly combined.
- Divide the batter equally into the prepared pans.
Bake Cake Layers:
- Bake, rotating the pans halfway through the cooking process until a toothpick inserted into the center of the cakes comes out clean, about 30 minutes.
- Remove the cakes from the oven and run a knife around the edges to loosen them from the pans. Let them cool in the pans for about 20-30 minutes. Invert the cakes onto a plate and then re-invert them onto a cooling rack, round side up. Cool completely before frosting.
Cheesecake Layers:
- For this layer, preheat oven to 325 degrees F.
- Spray two 8-inch cake pans with baking spray and cover the bottom to fit with parchment paper. Set aside.
- In a large bowl, beat cream cheese for 1 minute. Add sugar and flour and mix until thoroughly combined and there are no lumps. Scrape down the sides of the bowl with a spatula.
- With the mixer on low, add the eggs to the mixture, one at a time, and beat until just mixed through, careful not to over-beat. Scrape down the sides of the bowl with a spatula.
- Add salt, vanilla extract, and sour cream and beat until mixed through, stopping to scrape the sides and bottom of the bowl with a spatula.
- Divide the cheesecake batter equally into the prepared pans. Level the tops with a spatula.
- Transfer the cake into the preheated oven and bake it for 40-45 minutes. The cheesecakes should be just slightly wobbly in the center but puffy and settled on the sides.
- Turn off the oven and crack open the door. Cool cheesecakes entirely in the open oven.
- Once completely cooled, remove the cakes from the oven and refrigerate for at least 5-6 hours. Run a butter knife around the edges to release the cakes from the pan. Store in the fridge until ready to assemble.
Assemble the Cake:
- Prepare the Cream Cheese Frosting per the recipe directions.
- Start with a cake stand and place a cardboard round cake paper on top. Add 1/3 cup of frosting and spread it.
- Level its layers using a cake leveler or a sharp, serrated knife. Place one layer on the cake stand.
- Add 1/3 of the frosting and spread it in an even layer.
- Level the cheesecake layer using a sharp, serrated knife. Level the edges. Place it on top of the frosting layer.
- Repeat with the remaining layer and another cheesecake layer.
- Use the remaining frosting to cover the cake entirely.
- Add cake crumbs to the edges of the cake.
- Chill it for at least four hours, better longer, before serving it so the frosting sets.
- Serve with a side of whipped cream.
I’ve been looking for a delicious dessert to make for Valentine’s Day and this is definitely it! I LOVE all things red velvet…can’t wait to try this one!
Looks like a great recipe. However, where’s the recipe for the cream cheese frosting? It just says “cream cheese frosting” , but nothing under that. At least I didn’t read any instructions/ingredients on how to make the cream cheese frosting.
should be a link in the ingredients, or just do a search on the blog.
I love red velvet so much! I cannot wait to try!!
This cake is absolutely gorgeous!! Perfect for Valentine’s Day!!
I want a slice (or 3) of this so badly!
Looks heavenly! I’m craving for this right now, adding to my list of must makes!
Definitely worth every calorie!
This is so pretty! Love the recipe too!
A bit time consuming, but totally worth it!
Gorgeous and decadent! What more could I need?!
Its perfect for a special occasion!
There is no recipe for the cream cheese frosting?????
just search for it on the blog, you will love it!
This looks great and much easier then my mom’s recipe for making the red velvet cake. One question did you not use a spring form pan for the cheesecake layers seems like you used 8inch cake pans? I want to be sure before I attempt this recipe. Thanks so much for your help!
You are correct I used 8inch cake pans for the cheesecake and I put parchment paper on the bottom, this way after the cheesecake is chilled you can just flip it out of the pan.
Hi – If I want to cook this in a 6 x2 inch cake pan what should the cook time be changed too
30-40 mins
Can I make this in a 13x9in as one layer on the other
yes, sure.