
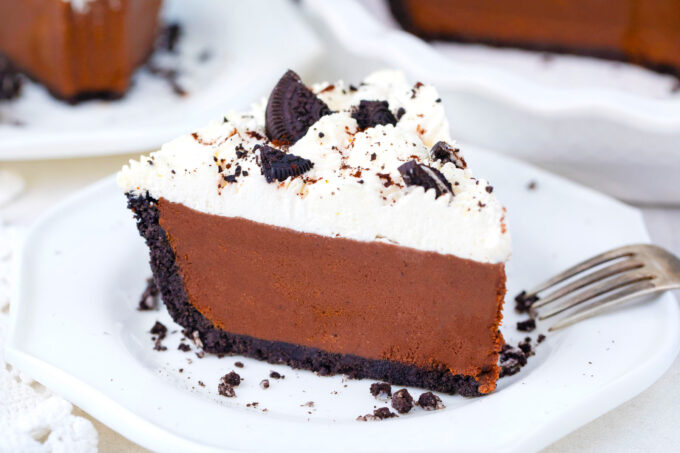
No Bake Chocolate Pie with Oreo Crust
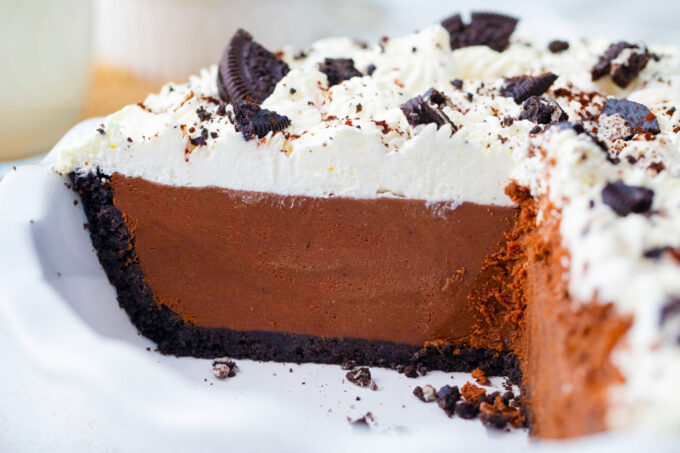
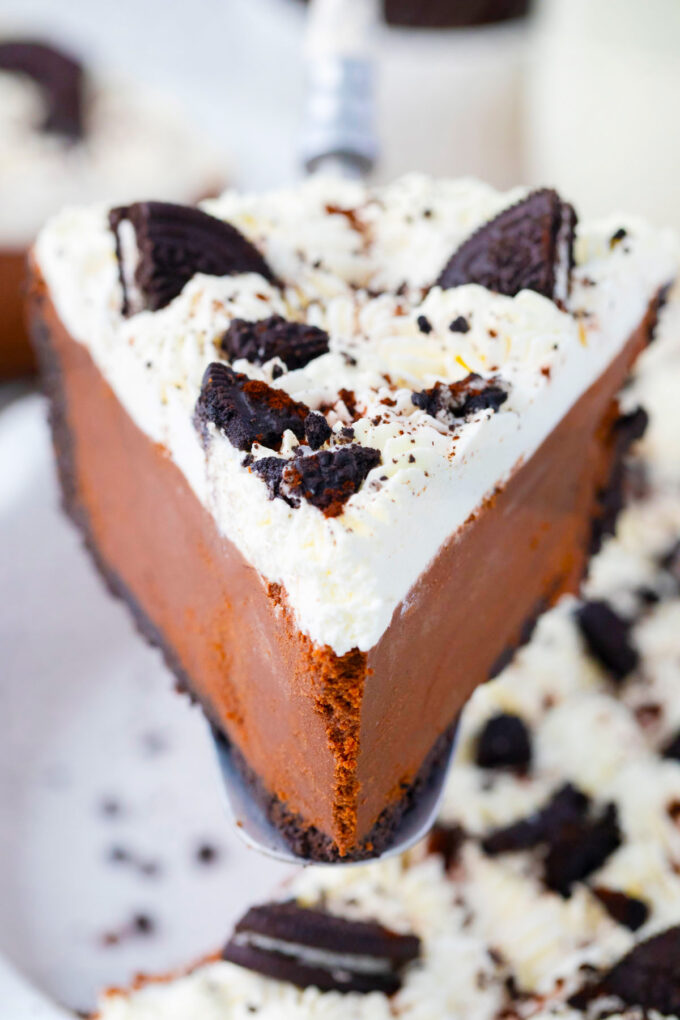
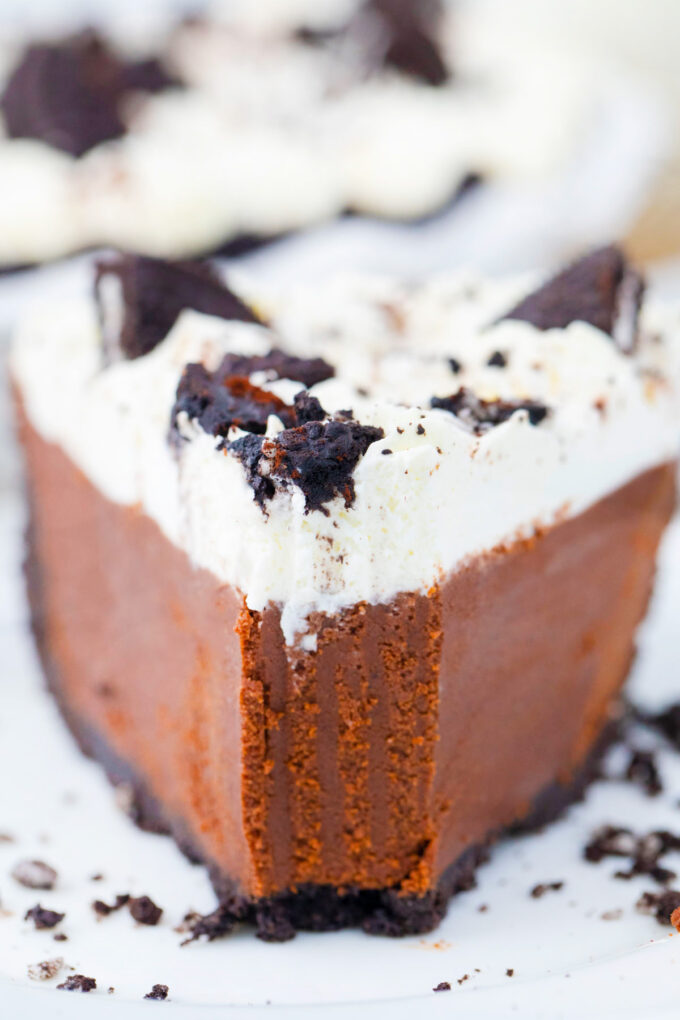
As an avid chocolate lover, I absolutely love this No-Bake Chocolate Pie with an Oreo crust. It takes me just under 30 minutes to assemble it, and the end result is something magnificent. The velvety smooth chocolate filling is so rich and creamy that it feels like you are eating a giant, fancy truffle.
In my family, we are all chocolate-obsessed, so on my blog, there is no shortage of chocolate desserts. This Chocolate Banana Bread and Chocolate Baileys Poke Cake are among readers’ favorites that always get rave reviews. These recipes have been on the blog for years, have received millions of views, and have made many people happy! Highly recommend you give them a try too.
Table of contents
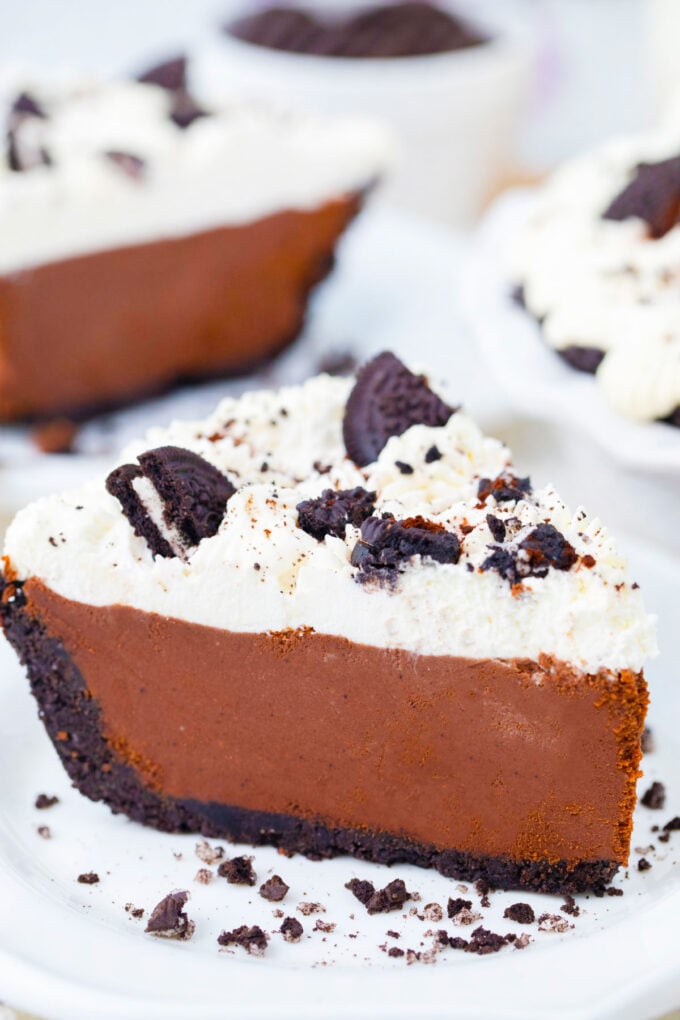
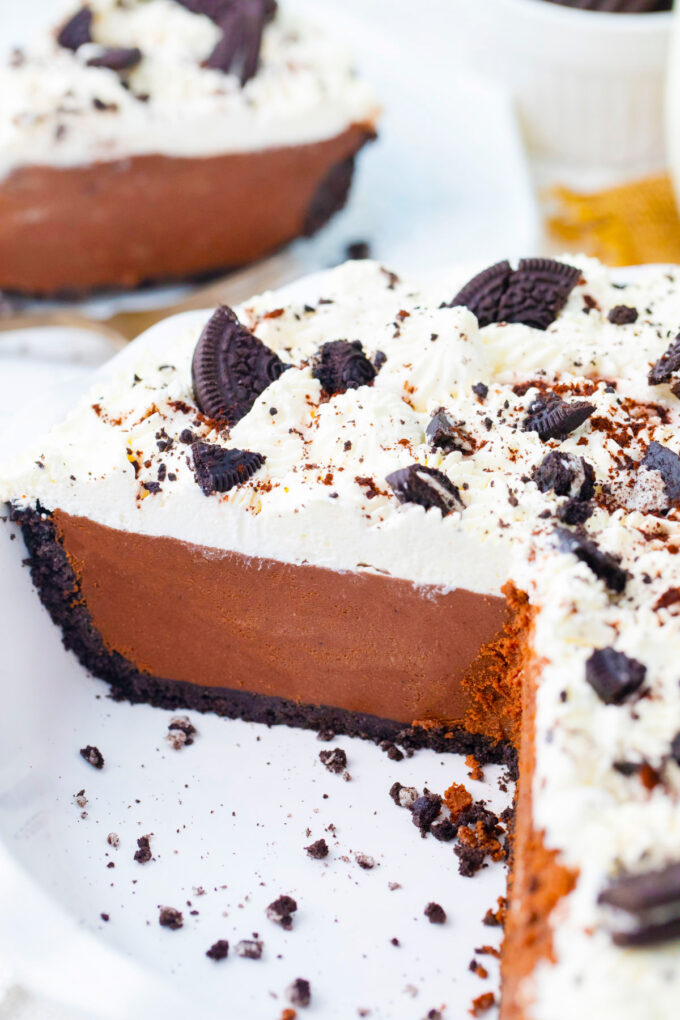
No-Bake Chocolate Pie with Oreo Crust is probably the best thing ever that you can make to satisfy a chocolate craving! The decadent chocolate filling, the light crunch of the buttery Oreo crust, and the fluffy whipped cream topping make it a sophisticated, luxurious, homemade no-bake dessert that will impress everyone.
It almost reminds me of chocolate cheesecake, but lighter, and so much easier to make. This sinfully delicious dessert is ideal for date nights and special occasions like Valentine’s Day. Since it’s so easy to make, it’s also perfect on a weeknight when a craving hits, and you want to devour something more special than a chocolate bar. I guarantee you that once yoy try this recipe, you will make it over and over again.
Why you will love this recipe
- No oven needed: I love that I don’t even have to turn on the oven for this delicious chocolate pie. A scrumptious dessert that can be made by whipping together simple ingredients and chilling? Count me in! I especially like to make this dessert during hot summer days, it’s rich and refreshing at the same time.
- It’s quick and easy to make: It takes me less than 30 minutes to assemble this treat, and after that, I just have to wait.
- Fancy enough for a party: I can make it look fancy enough for a party or special occasion, but it is easy enough for any night of the week. No matter the occasion, this dessert is bound to impress.
- Versatile ingredients: With the Oreo crust and chocolate filling, I can play by adding different mix-ins. I tried it with fresh berries, stirred into the chocolate mixture, and it was to die for! Also, choosing your favorite Oreo flavor can instantly elevate this concoction.
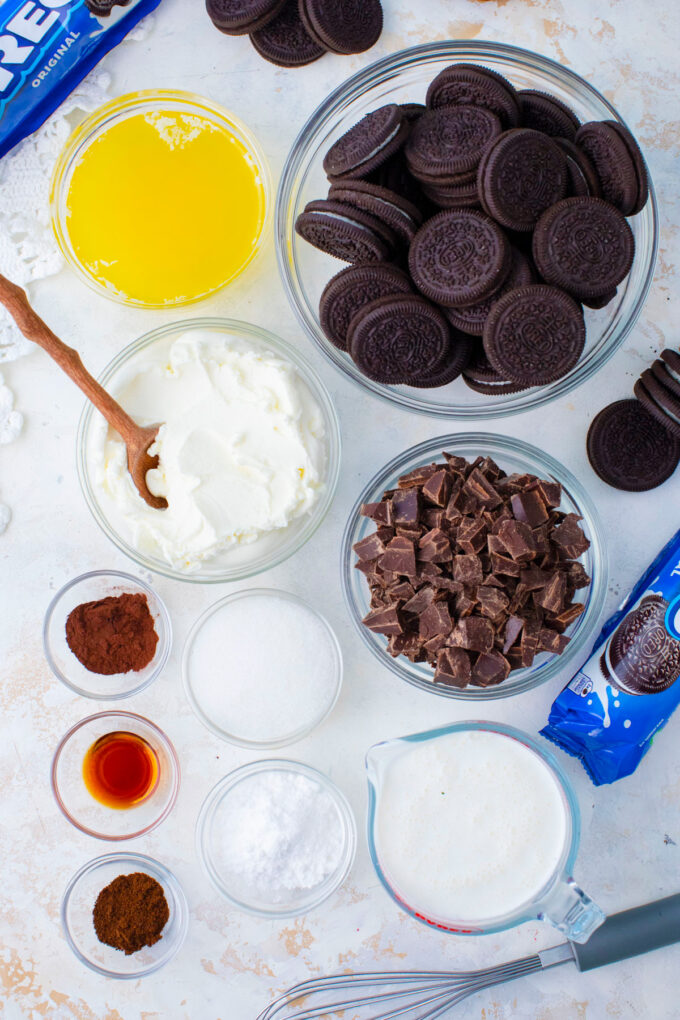
What you will need
For the crust
- Cookie crumbs: I like to use regular Oreo cookies, crushed into crumbs, with the filling included to make the mixture creamy. The rich, sweet chocolate is the perfect crust for the creamy, mild chocolate filling.
- Butter: I use unsalted butter, so it doesn’t add any saltiness to the crust, melted and cooled to blend with the crumbs. It is like the glue that holds it all together and gives it a rich, buttery taste.
For the filling
- Wet ingredients: Heavy cream is important for its high fat content (at least 36% milkfat), which gives the filling a rich, velvety mouthfeel. It also helps with stability, so the pie holds its shape better. Mixing the melted butter with the chocolate and cream enhances the richness and creates a silkier texture. I use pure vanilla extract, which comes from vanilla beans, while imitation vanilla is mostly synthetic vanillin that can leave a bitter aftertaste.
- Dry ingredients: Mixing powdered sugar with the cream adds smooth sweetness and prevents graininess. It also helps prevent overwhipping. The espresso powder intensifies the chocolate flavor for a more complex taste.
- Cheese: Instead of cream cheese, I use mascarpone for an extra-smooth feel and a sweeter, less tangy flavor.
- Chocolate: I prefer chopped baking chocolate (semi-sweet) to chocolate chips because it melts more smoothly. Chips have additives to maintain their shape and prevent melting. My favorite chocolate is Ghirardelli because it is rich, smooth, and always tastes perfect.
For the topping
- Wet ingredients: Heavy cream works best for whipped cream because it has a higher fat content, which creates a luxurious mouthfeel.
- Dry ingredients: Powdered sugar dissolves fast for smoothness and has cornstarch to help it hold its shape longer. I also sprinkle some cocoa powder on for extra chocolate flavor and color.
- Oreo cookies: I like to chop them up and use them to decorate the cake.
How to prepare
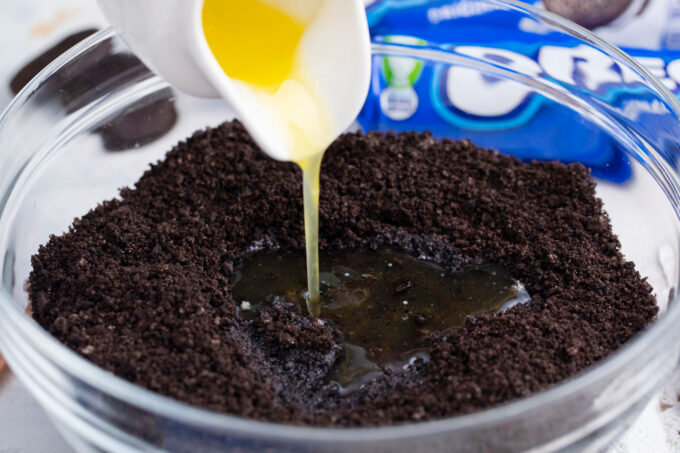
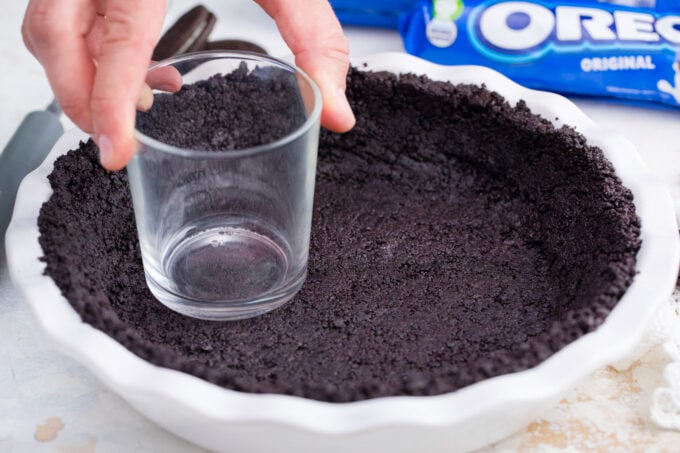
Prepare the crust: First, I grease a 9½-inch pie pan with oil or spray it with baking spray. Then, I mix the cookie crumbs and melted butter.
Press and chill: After that, I press the mixture into the bottom and up the sides of the pan. I place it in the refrigerator to harden.
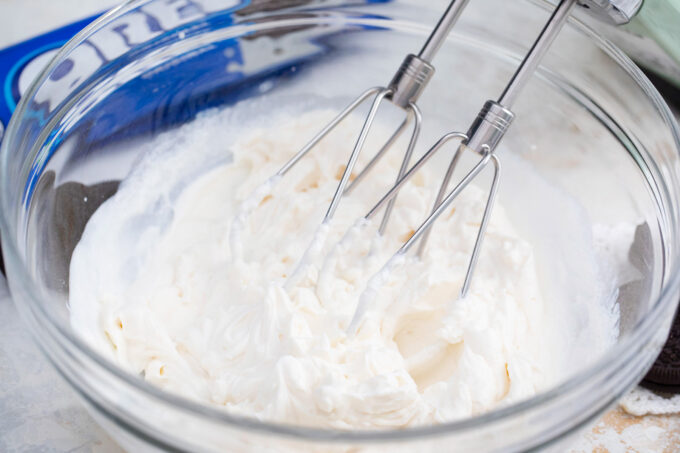
Whip the cream: While I wait, I whip 1 cup of heavy cream with the powdered sugar and vanilla in my mixer on high until it thickens and holds its shape.
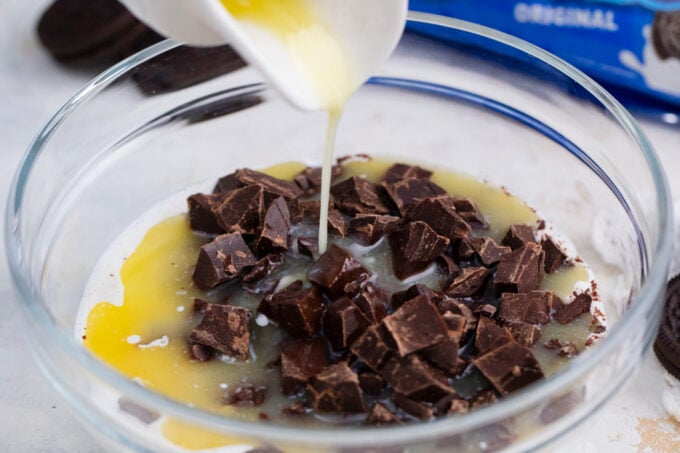
Melt the chocolate: Now, I mix the chocolate, butter, and ½ cup of cream in a bowl, then microwave for 1 minute. I stir and microwave for another minute, then add the espresso powder. This, I stir until the chocolate is completely melted and shiny.
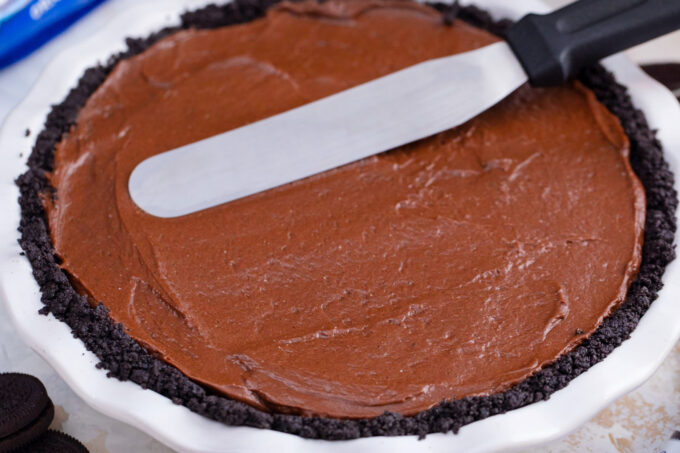
Fill the crust: Once it cools a bit, I whisk in the mascarpone until smooth, then fold in the whipped cream with a spatula and pour it into the chilled pie crust.
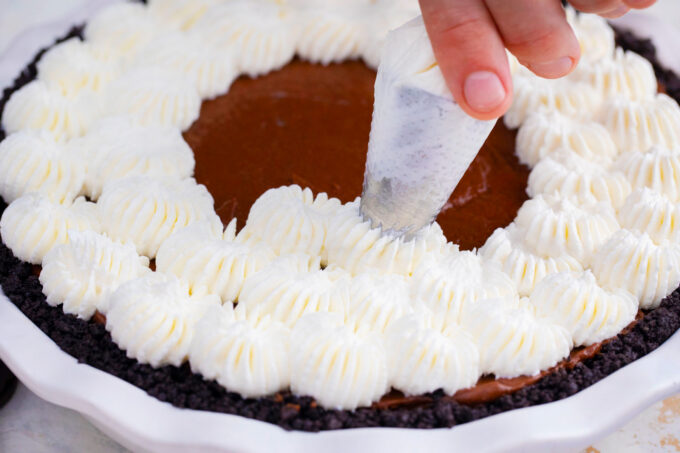
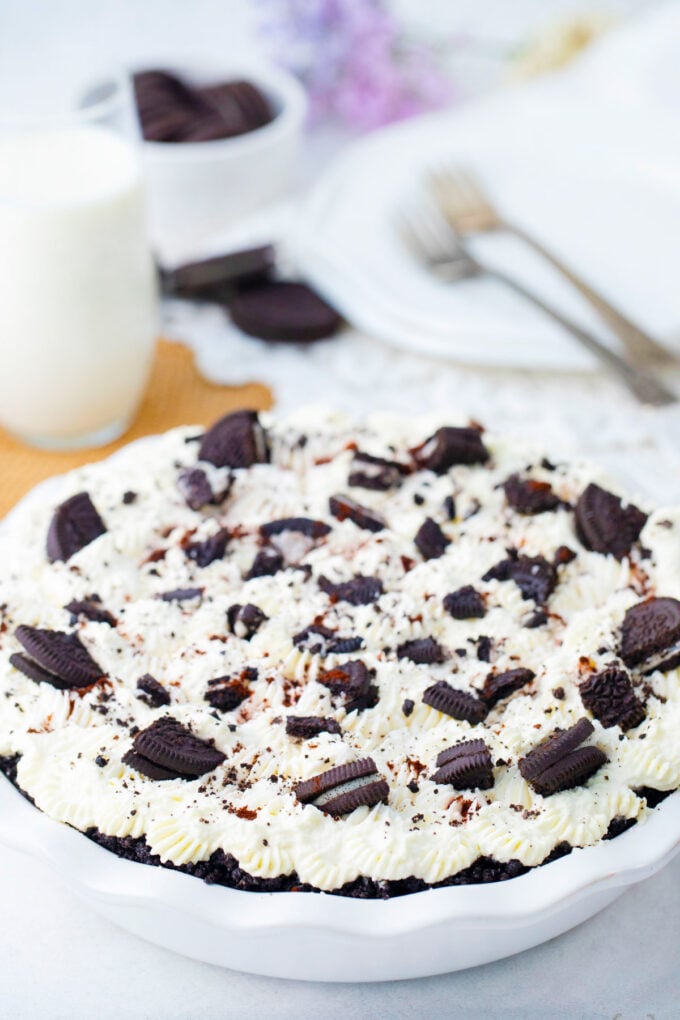
Make the topping: I whip 1 cup of heavy cream with the powdered sugar in an electric mixer on high until it holds its shape. Then, I add it to a piping bag fitted with a star tip and use it to decorate the top of the pie. I chop the cookies and place them on top, sprinkling cocoa powder around them.
Chill and serve: After decorating, I let the pie chill for another hour to set before serving.
Expert tip
Everything has the right temperature
Most people already know that cream cheese and mascarpone need to be softened to room temperature so they do not clump when mixing. It is also important to have the heavy cream chilled so the fat is solid, allowing it to trap air more effectively. This is what gives the whipped cream its fluffy texture. But it is also essential to let the chocolate cool before mixing it with the cheese. This prevents the cream cheese from melting and helps avoid seizing.
More tips to consider:
- Put the bowl and beaters in the freezer for 15 minutes before using them to whip the heavy cream.
- Be sure to chill the crust long enough so the filling stays firm. If you’re in a hurry, put it in the freezer for 20 to 30 minutes.
- The easiest way to press the crust into the pan is with your fingers, but using a measuring cup or the bottom of a glass will also work.
- Use high-quality chopped chocolate rather than chocolate chips, as it melts better. Chips have an added ingredient to help them hold their shape.
- Make sure the mascarpone cheese is softened to room temperature, the butter is melted but cooled, and the heavy cream is cold.
- Use a sharp knife dipped in hot water (and wiped dry) to cut the pie for clean slices.
Recipe variations and add-ins:
- Different crust: This pie can also be made with other crusts, like graham crackers or vanilla wafers.
- Other cookie flavors: Oreo has so many cookie flavors; this pie can also be made in dozens of different crusts. Try it with mint, peanut butter, birthday cake, dark chocolate, or golden.
- Easy pudding pie: Instead of making your own chocolate filling, make this pie even faster and easier by using 1 (5.9oz) box of instant chocolate pudding and 2 cups of cold milk or cream.
- Caramel sauce: I love topping this chocolate pie with my rich, thick caramel sauce. It is easy to make in 10 minutes with just 3 ingredients.
- Fruit topping: Another way to top this pie is with a bit of fruit, such as my homemade strawberry sauce, which takes just 5 ingredients.
- Peanut butter pie: Sometimes I add creamy peanut butter to the filling, swirling it to make a chocolate peanut butter pie.
Serving suggestions:
This chocolate pie is something I have served at potlucks, parties, for brunch, and just for dessert any day of the week with the family. My kids love it as do I because we are all chocolate lovers! It goes just as good with a glass of cold milk as it does with this Grown-Up Baileys S’mores milkshake made with chocolate ice cream and Irish booze. It also pairs nicely with a cup of hot chocolate or a London Fog latte.
My kids enjoy it with a dollop of Oreo ice cream on the side, and lots of chocolate sauce. On the other side, I like mine with chocolate whipped cream and fresh berries. The creamy chocolate filling pairs so well with fresh tart raspberries. I always serve the pie chilled, and for ideal slices, I clean the knife after each slice, run it under hot water, wipe it dry, then cut another one.
How to store leftovers:
- Refrigerate: Leftover pie can be refrigerated for up to 5 days in a sealed container.
- Freezing: To freeze leftovers, I wrap them tightly in aluminum foil or plastic wrap, then place them in a heavy-duty freezer bag. Properly stored, they will maintain the best quality for about 3 months.
- Defrost: To serve, I just thaw leftovers overnight in the fridge.
Frequently asked questions
It may just need to be chilled longer. Try putting it back in the refrigerator for a few more hours. If that does not work, it could be that the chocolate was too hot when mixed with the mascarpone, causing it to melt and become runny. Another problem may be that the mascarpone was low-fat, or that the cream lacked enough fat. Be sure to get full-fat mascarpone and heavy cream with at least 36% milkfat.
If it was chilled for at least an hour before adding the filling, there should not be a problem. Also, be sure the cookies are finely ground and that the crust is firmly set in the pan with no cracks. It needs to be sealed so the filling does not seep into the crust. This is also important for getting good slices. Pay extra attention to the sides to ensure a firm structure there as well.
First, I make sure the heavy cream is at least 36% milkfat and keep it refrigerated until I am ready to use it. It has to be super cold for the fat to make the air bubbles. Also, I keep the bowl and beaters in the freezer until I’m ready to whip it up, so everything is nice and cold. Any kind of heat will melt the milk fat and let the air bubbles escape.
Make sure the ingredients are all at the right temperature. The mascarpone should be softened to room temperature, the heavy cream chilled, and the butter melted and cooled to room temperature. Also, be sure to let the chocolate cool before mixing it with the mascarpone, or it will cause the mixture to seize, making the filling grainy.
More pies to try:


Loved this recipe? I’d love to hear from you! 💛 Leave a 5-star rating ⭐️ in the recipe card below and share your thoughts in the comments – I read and appreciate every single one!
Let’s stay connected! Follow me on Facebook, Instagram, Pinterest, and YouTube for more delicious, sweet and savory recipes. Have a question? Ask in the comments, and I’ll be happy to help! 😊 with love Catalina!

No Bake Chocolate Pie
Ingredients
No Bake Oreo Crust:
- 3 cups oreo crumbs
- 6 tbsp butter melted
No Bake Chocolate Pie Filling:
- 1½ cups heavy whipping cream cold
- 1/2 cup powdered sugar
- 1 teaspoon vanilla extract
- 1 teaspoon espresso powder
- 16 oz semi sweet chocolate chopped
- 1/2 cup unsalted butter melted (plus 1 more tablespoon for greasing the pan)
- 10 oz mascarpone cheese room temperature
Garnish:
- 1 cup heavy whipping cream
- 2 tablespoons powdered sugar
- 5 Oreo cookies
- 1 teaspoon unsweetened cocoa powder
Instructions
- Grease a 9½ inch pie pan with butter or baking spray. Set aside.
No Bake Oreo Crust:
- In a medium-size bowl, combine melted butter with Oreo cookie crumbs and mix until fully combined.
- Firmly press the cookie crumbs mixture into the bottom and up the sides of the pie pan. Use a measuring cup to shape the cookie crumbs into the pie pan. Place it in the refrigerator to allow the crust to harden.
No Bake Chocolate Pie Filling:
- Add 1 cup of heavy whipping cream, the powdered sugar, and vanilla extract into the bowl of an electric mixer and whip on high until it begins to thicken and holds its shape. Set aside.
- Add the chocolate, the remaining ½ cup of heavy cream, and butter to a microwave-safe bowl. Microwave for 1 minute, stir with a spatula, and then microwave for another minute, until the mixture starts to boil.
- Add espresso powder and stir until the chocolate is fully melted and the mixture is smooth and shiny.
- Whisk in the mascarpone cheese into the chocolate mixture until fully combined and smooth.
- Fold the whipped cream into the chocolate mixture with a spatula, and stir until fully combined.
- Pour the chocolate mixture evenly into the chilled pie crust.
Garnish:
- Add 1 cup of heavy whipping cream and the powdered sugar into the bowl of an electric mixer and whip on high until it begins to thicken and holds its shape.
- Add whipped cream to a piping bag with a star tip, and pipe it onto the pie.
- Top with Oreo cookies, if desired, and sprinkle with cocoa powder.
- Chill for 4-6 hours or overnight. Enjoy!
Notes
Everything has the right temperature
Most people already know that cream cheese and mascarpone need to be softened to room temperature so they do not clump when mixing. It is also important to have the heavy cream chilled so the fat is solid, allowing it to trap air more effectively. This is what gives the whipped cream its fluffy texture. But it is also essential to let the chocolate cool before mixing it with the cheese. This prevents the cream cheese from melting and helps avoid seizing.More tips to consider:
- Put the bowl and beaters in the freezer for 15 minutes before using them to whip the heavy cream.
- Be sure to chill the crust long enough so the filling stays firm. If you’re in a hurry, put it in the freezer for 20 to 30 minutes.
- The easiest way to press the crust into the pan is with your fingers, but using a measuring cup or the bottom of a glass will also work.
- Use high-quality chopped chocolate rather than chocolate chips, as it melts better. Chips have an added ingredient to help them hold their shape.
- Make sure the mascarpone cheese is softened to room temperature, the butter is melted but cooled, and the heavy cream is cold.
- Use a sharp knife dipped in hot water (and wiped dry) to cut the pie for clean slices.
Chocolate overload! This looks so delightful and I love that Oreo crust!
That crust looks sooo tasty! I also love the added espresso!
This looks utterly rich and delicious. I’m going to print your recipe and try it for myself just as soon as I can!
As a chocoholic, I am DROOLING over this pie. It looks incredibly delicious!
This. Looks. Freaking. Amazing. I want a big slice right now!
Oh my gosh, this looks amazing! That rich chocolate filling has me swooning!
Oh wow…it looks so rich and decadent! I’m in love!
Oh my goodness! This pie looks incredible! I wish I had a slice right now. Or two!!
Can you use cream cheese instead of mascarpone? Just wondering. Looks so GOOD!
Yes, cream cheese will work too, use full fat and make sure its room temperature.
We love OREOs are my house and no-bake pies are my favorite summertime desserts. Your pie looks so yummy and will be the perfect dessert for my next gathering.
No bake pies are the best kind of pies, especially during summer. I can’t wait to try this recipe over the weekend.
I always love no bake desserts. This is one I’ll be trying for sure. Chocolate is my jam 😉
Now that looks AMAZING! I think I need to make this ASAP! My family would wolf this down so quickly!
Now that is my kind of dessert. Chocolate pies are a staple dessert at our table.
I am drooling all over the place right now. It’s a good thing summer is about over and I can indulge in these scrumptious treats while hiding behind a baggy sweater lol. Oreo is my weakness!
This no-bake chocolate pie looks absolutely delicious. I love the idea of making this for a delicious dessert on a special occasion. I will be bookmarking this!
Hmmm yum! This pie is really mouth watering. The crust, the filling and the toppings..they all look so perfect together!
Yum! Yum! Anything with chocolate is always a hit over here. And I love the fact that it is a no-bake pie.
Wow, this looks amazing. My youngest loves Oreos and I bet she would love this. Going to have to make this for her.
This is my kind of dessert! I love Oreo and chocolate so I think it’s a perfect treat for me. And it’s no bake so I think it’s easy to make!
oh, my goodness! what a yummy treat. I would love to try this one of these days. Thanks for sharing!
This looks incredible! I need to try and make this as soon as possible!
This cake looks amazing! I can have it right now, I love chocolate flavor!
I have to save this recipe. It looks delicious and will be gluten free!
I love no bake recipes! I will have to try this! My husband loves chocolate, and I love Oreo’s so this will be a great mix
I love no bake pie in the summer! This recipe for no bake chocolate pie certainly looks delicious and easy to make! I will have to give it a try for our next family dinner. That crust looks divine!
I was a bit skeptical about this recipe at first, mostly because people had reviewed the pie without even making it… (I don’t get why people do that..?? 😂) but it is awesome! My husband made it for a pie contest at his work and won! We could not find espresso powder, however, so he substituted about 1/4 C of good quality prepared coffee. Topped with fresh raspberries instead of Oreos. Prepared Oreo crust works great in a pinch. We will definitely make this recipe again. Highly recommend!
Can you add the cream just before serving or is it better for it to set up with the filling?
sure
I put this in a chocolate peppermint cookie crust. I am waiting impatiently for it to chill. I had extra though and put it in little dessert cups with whipped cream on top. Yum!
Yuuuum!
I made it today and will try it tomorrow. I omitted espresso as I didn’t have any. I also had to use reddi-wip in the filling and topper as using half-n-half wasn’t setting. And lastly I ended up using cream cheese as that’s what I had on hand. Hopefully these variations doesn’t take away from the flavor.
Turned out delicious – even with the few variations. I think Reddi-wip will be my go to in this recipe as it made it easier to make. This will definitely be devoured again.
If I want to use Cool Whip instead of making it, how much would I use for the chocolate filling?