No-Churn Pineapple Ice Cream
Ice cream season is here, and my No-Churn Pineapple Ice Cream is one of the most refreshing and easy desserts to make! I love that I don’t have to spend summer days baking, and with just six ingredients, this treat has quickly become my favorite. It’s creamy, sweet, and packed with tropical flavor and the best part is, no ice cream maker needed!
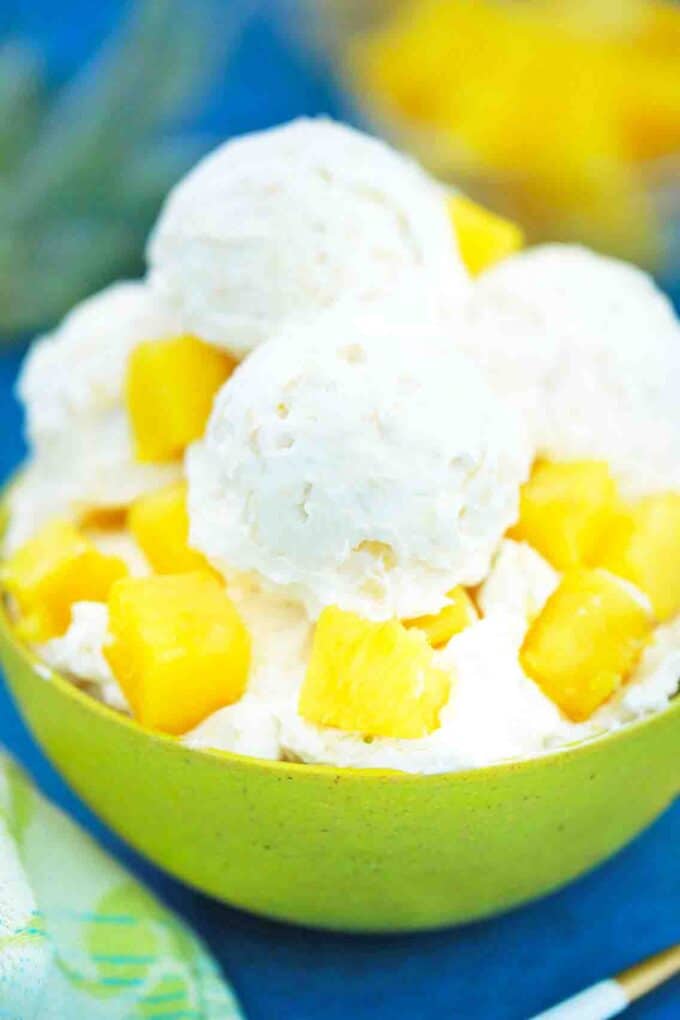
My kids love pineapple, so it’s an easy way to get them excited about dinner or dessert. I always keep a bag of frozen pineapple in the freezer, just in case. And the fun part is, when I’m trying out new recipes, tossing in pineapple is my way of sneaking in a tropical vibe. Why not? It’s like a mini vacation in every bite, whether it’s creamy no-churn ice cream like I’m about to show you today, a quick pineapple smoothie, or even a juicy one pan pineapple pork chops.
Table of contents
My homemade pineapple ice cream is so easy, you can make at home and have it ready to eat in less than eight hours. Yep, you “heard” that right! The prep only takes about 20 minutes, and there’s no need to run to the store or hunt down an ice cream shop. Honestly, I usually end up with more than one big bowl because it’s sooo good. No ice cream maker needed; just mix, chill, and enjoy. Let’s get started!
Why you will love this recipe
- You don’t need a ice cream machine for this: I don’t use an ice cream maker. Just mix sweetened condensed milk, heavy cream, crushed pineapple, and a splash of vanilla in a bowl. Freeze it, and that’s it!
- Quick to mix, then forget it in the freezer: I can prep this in about 20 minutes with just one bowl (yes, one bowl!) and a spatula. Then I freeze it while I run errands, hang with the kids, or get dinner ready.
- Tropical vibe in a bowl: The combination of pineapple and vanilla… yum, gives this ice cream the sweetest tropical flavor. It’s fruity, creamy, and so refreshing after a long hot day.
- Kid-friendly: When my kids actually ask for something by name, I know it’s a winner. I make this for pool days or movie nights when their friends are over.
What you will need
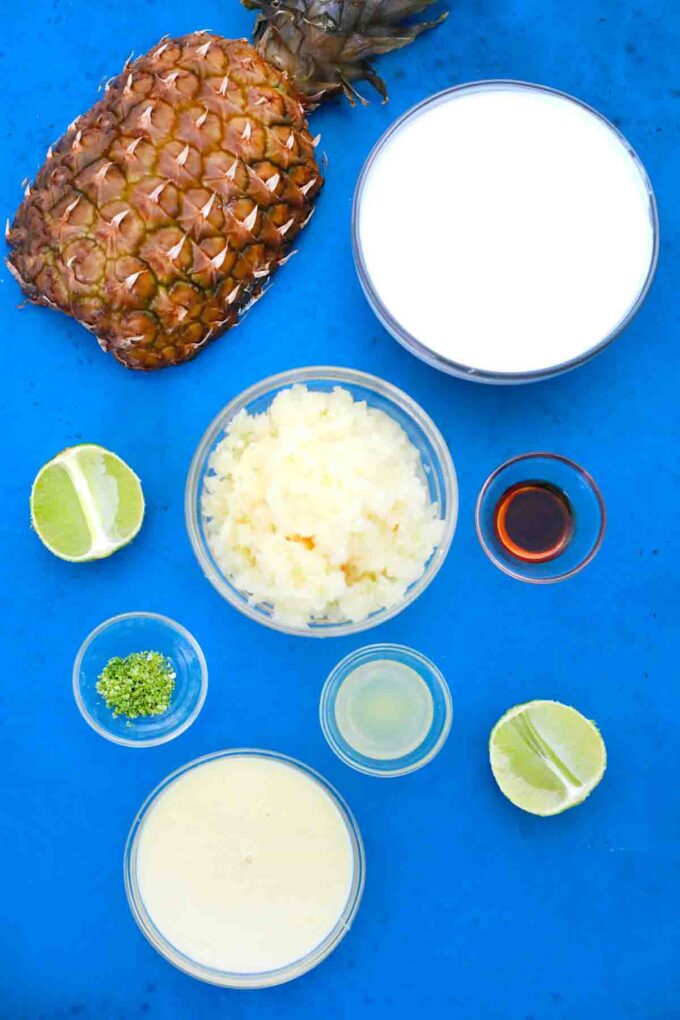
- Crushed pineapple: I use canned crushed pineapple and make sure to drain it well before mixing.
- Heavy cream: I whip up some heavy cream until it’s nice and fluffy to get a creamy texture just the way I like it.
- Sweetened condensed milk: I always double-check that I grab the sweetened kind, not evaporated milk. This is key!
- Vanilla extract: A splash of pure vanilla adds that extra layer of flavor.
- Lime juice and zest: I mix in both the juice and zest to brighten everything up with a little tang.
How to make
1. Whip the heavy cream: I pour the heavy whipping cream into a mixing bowl and beat it on medium speed with my hand mixer until it forms soft peaks. It usually takes me about three to five minutes.
2. Add the rest: I mix in the vanilla, lime juice, lime zest, and sweetened condensed milk. Then I beat everything together until it’s creamy.
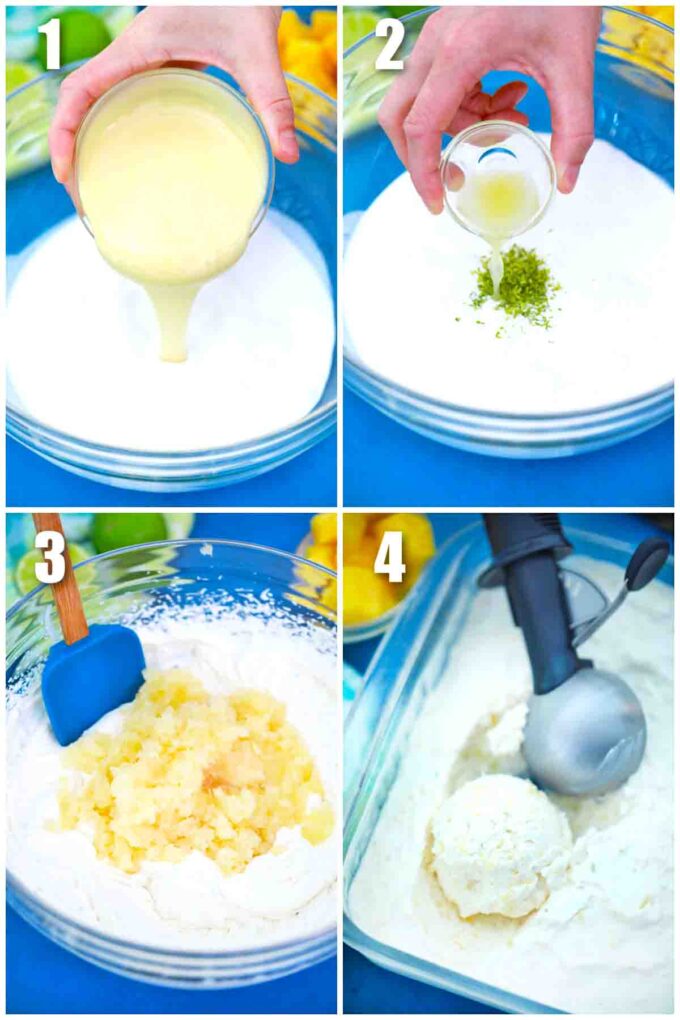
3. Stir in the pineapple: I gently fold in the crushed pineapple with a rubber spatula, adding it little by little so everything mixes evenly without deflating the cream.
4. Freeze the homemade ice cream: I pour the mixture into a freezer-safe container, cover it, and pop it in the freezer for about six to eight hours until it’s nice and firm.
Expert tip
Keep ice crystals away
One little trick I always do to keep my no-churn pineapple ice cream extra creamy is pressing a piece of plastic wrap or wax paper right on top of the mixture before sealing it with the lid. It helps keep those icy bits from forming at the top, which means every scoop stays smooth and delicious. It’s such a simple step but makes a big difference, especially when the kids go digging in for leftovers the next day.
More tips to consider:
- Too much liquid will make the ice cream icy instead of creamy. I let my crushed pineapple sit in a strainer for a few minutes before adding it in.
- If you pop your mixing bowl in the fridge for 10 minutes before whipping the cream, it helps it fluff up faster and hold its shape better.
- When you’re ready to serve, let the ice cream sit out for about 5 minutes so it’s easier to scoop and even creamier.
- Remember that your ice cream will only be as good as the ingredients you put in it. Try to get the highest quality milk, cream, pineapple, and flavorings.
- Scooping ice cream is easier if you dip your scoop or spoon in hot water for every scoop.
- Be careful not to overwhip the cream or it will be too hard. If this happens, just add more cream.
Recipe variations and add-ins:
- Coconut pineapple: I swap half the heavy cream for canned full-fat coconut milk. It gives the ice cream a creamy tropical vibe, almost like a frozen piña colada.
- Pineapple mango swirl: I blend 1 cup of ripe mango and swirl it in after mixing. The combo of mango and pineapple is so refreshing and perfect for warm days.
- Pineapple cherry delight: I chop up some maraschino cherries (about ½ cup) and fold them in for a fun color pop and little bites of sweet cherry in every scoop.
- Spiced pineapple: I add ½ teaspoon of cinnamon and a pinch of nutmeg to the mix. It’s cozy and different, especially if you’re making this for a holiday or fall gathering.
- Make it crunchy: Add crushed pecans, walnuts, or almonds to your ice cream mixture before freezing to add some crunchiness.
Serving suggestions
This pineapple ice cream has become a must in our house for summer birthdays and BBQ weekends. Last week, while testing the recipe, I served it after a backyard dinner where we had grilled chimichurri chicken and my slow cooker peach pork, and the kids were literally lined up waiting with their bowls.
When we had friends over for movie night on the patio, I set out little cups of this pineapple ice cream next to a bowl of caramel popcorn and crispy air fryer potato chip tenders. It was a favorite with both the grown-ups and the kids, and now everyone asks if I’m making “the pineapple stuff” again whenever we host something.
How to store leftovers:
- Store: Obviously, since this is ice cream, you want to keep it in the freezer. It is best to eat it within one month, but it will last six to eight weeks if you have not opened it several times. Remember, the more you open it and let air in, the more ice crystals will form.
Frequently asked questions
Yes, you definitely can! I’ve used both depending on what I have on hand. Fresh pineapple gives the ice cream a super tropical taste that I love. Just make sure to chop it really small and drain the juice well so your ice cream doesn’t end up too watery. It’s a bit more work than opening a can, but it’s totally worth it when the fruit is in season
Yes, and I’ve had a lot of fun switching things up! Mango is amazing for a tropical twist, strawberries make it super sweet and pretty, and peaches give it a summery flavor. Just make sure to chop the fruit small and drain off any extra liquid. You can follow the same basic recipe and try whatever fruit your family loves.
Yes, whipping the cream is super important. It’s what gives the ice cream that creamy, airy texture without needing a fancy machine. I just use a hand mixer and beat it for a few minutes until soft peaks form. Once that’s ready, I mix in the rest and the base comes together so easily.
More no bake recipes:
Loved this recipe? I’d love to hear from you! 💛 Leave a 5-star rating ⭐️ in the recipe card below and share your thoughts in the comments – I read and appreciate every single one!
Let’s stay connected! Follow me on Facebook, Instagram, Pinterest, and YouTube for more delicious, sweet and savory recipes. Have a question? Ask in the comments, and I’ll be happy to help! 😊 with love Catalina!
No-Churn Pineapple Ice Cream
Ingredients
- 2 cups heavy whipping cream cold
- 1 can 14 oz. sweetened condensed milk
- 1 teaspoon vanilla extract
- 1 tablespoon lime juice
- 1 teaspoon lime zest
- 1 can 16 oz. canned crushed pineapple drained
Instructions
- In a large bowl, add the whipping cream, and using a hand or stand mixer, beat on medium speed until soft peaks form, about 3-5 minutes.
- Next, add sweetened condensed milk, zest, juice, and vanilla. Beat on medium speed until fully combined, stop to scrape the sides and bottom of the bowl a few times.
- Using a rubber spatula, fold in the crushed pineapple.
- Pour the ice cream mixture into a freezer-safe dish, and cover with plastic wrap or a lid if available.
- Freeze for 6 to 8 hours or overnight.
Video
Notes
Keep ice crystals away
One little trick I always do to keep my no-churn pineapple ice cream extra creamy is pressing a piece of plastic wrap or wax paper right on top of the mixture before sealing it with the lid. It helps keep those icy bits from forming at the top, which means every scoop stays smooth and delicious. It’s such a simple step but makes a big difference, especially when the kids go digging in for leftovers the next day.More tips to consider:
- Too much liquid will make the ice cream icy instead of creamy. I let my crushed pineapple sit in a strainer for a few minutes before adding it in.
- If you pop your mixing bowl in the fridge for 10 minutes before whipping the cream, it helps it fluff up faster and hold its shape better.
- When you’re ready to serve, let the ice cream sit out for about 5 minutes so it’s easier to scoop and even creamier.
- Remember that your ice cream will only be as good as the ingredients you put in it. Try to get the highest quality milk, cream, pineapple, and flavorings.
- Scooping ice cream is easier if you dip your scoop or spoon in hot water for every scoop.
- Be careful not to overwhip the cream or it will be too hard. If this happens, just add more cream.

