Chocolate Mousse Brownies or Best Brownies EVER!
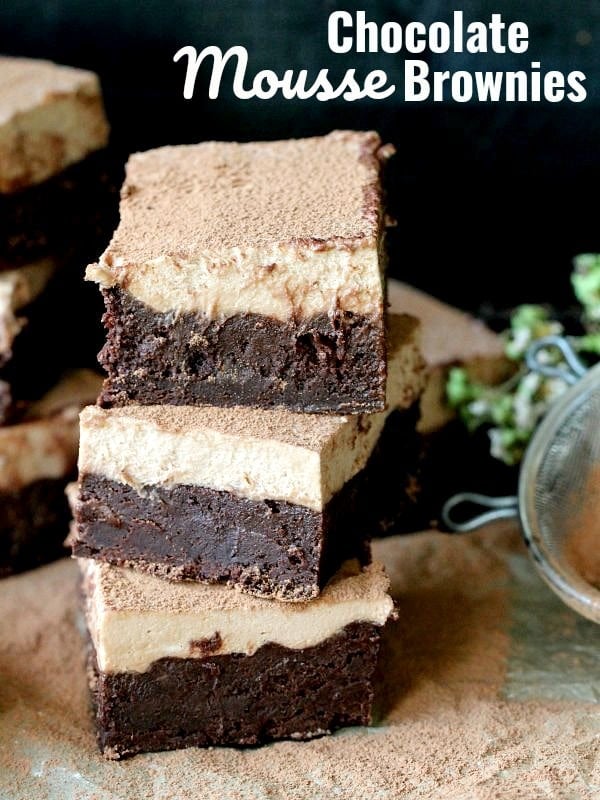
If you are looking for a dessert to impress, than my Chocolate Mousse Brownies are the perfect choice. Combining two of the best desserts, they are creamy, indulgent, and loaded with chocolate, making them a chocolate lover’s dream come true.
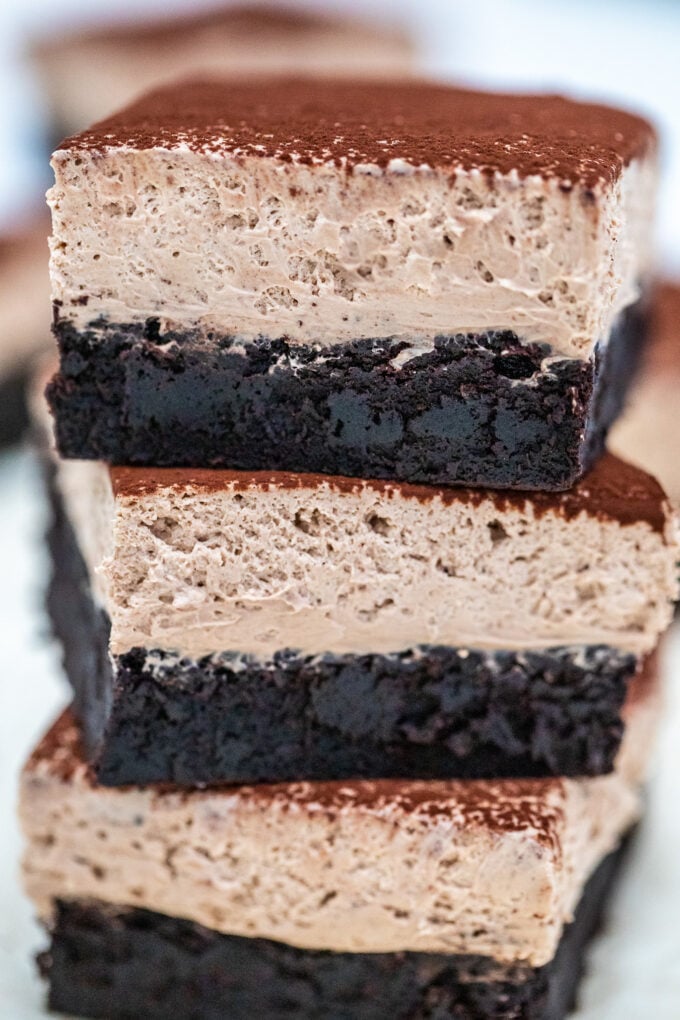
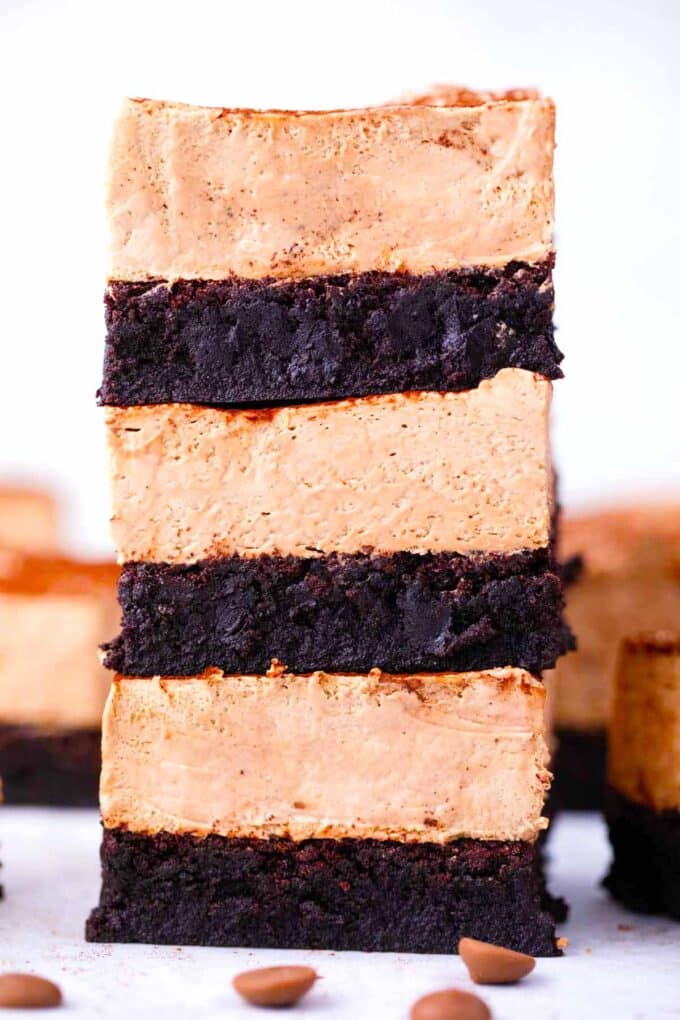
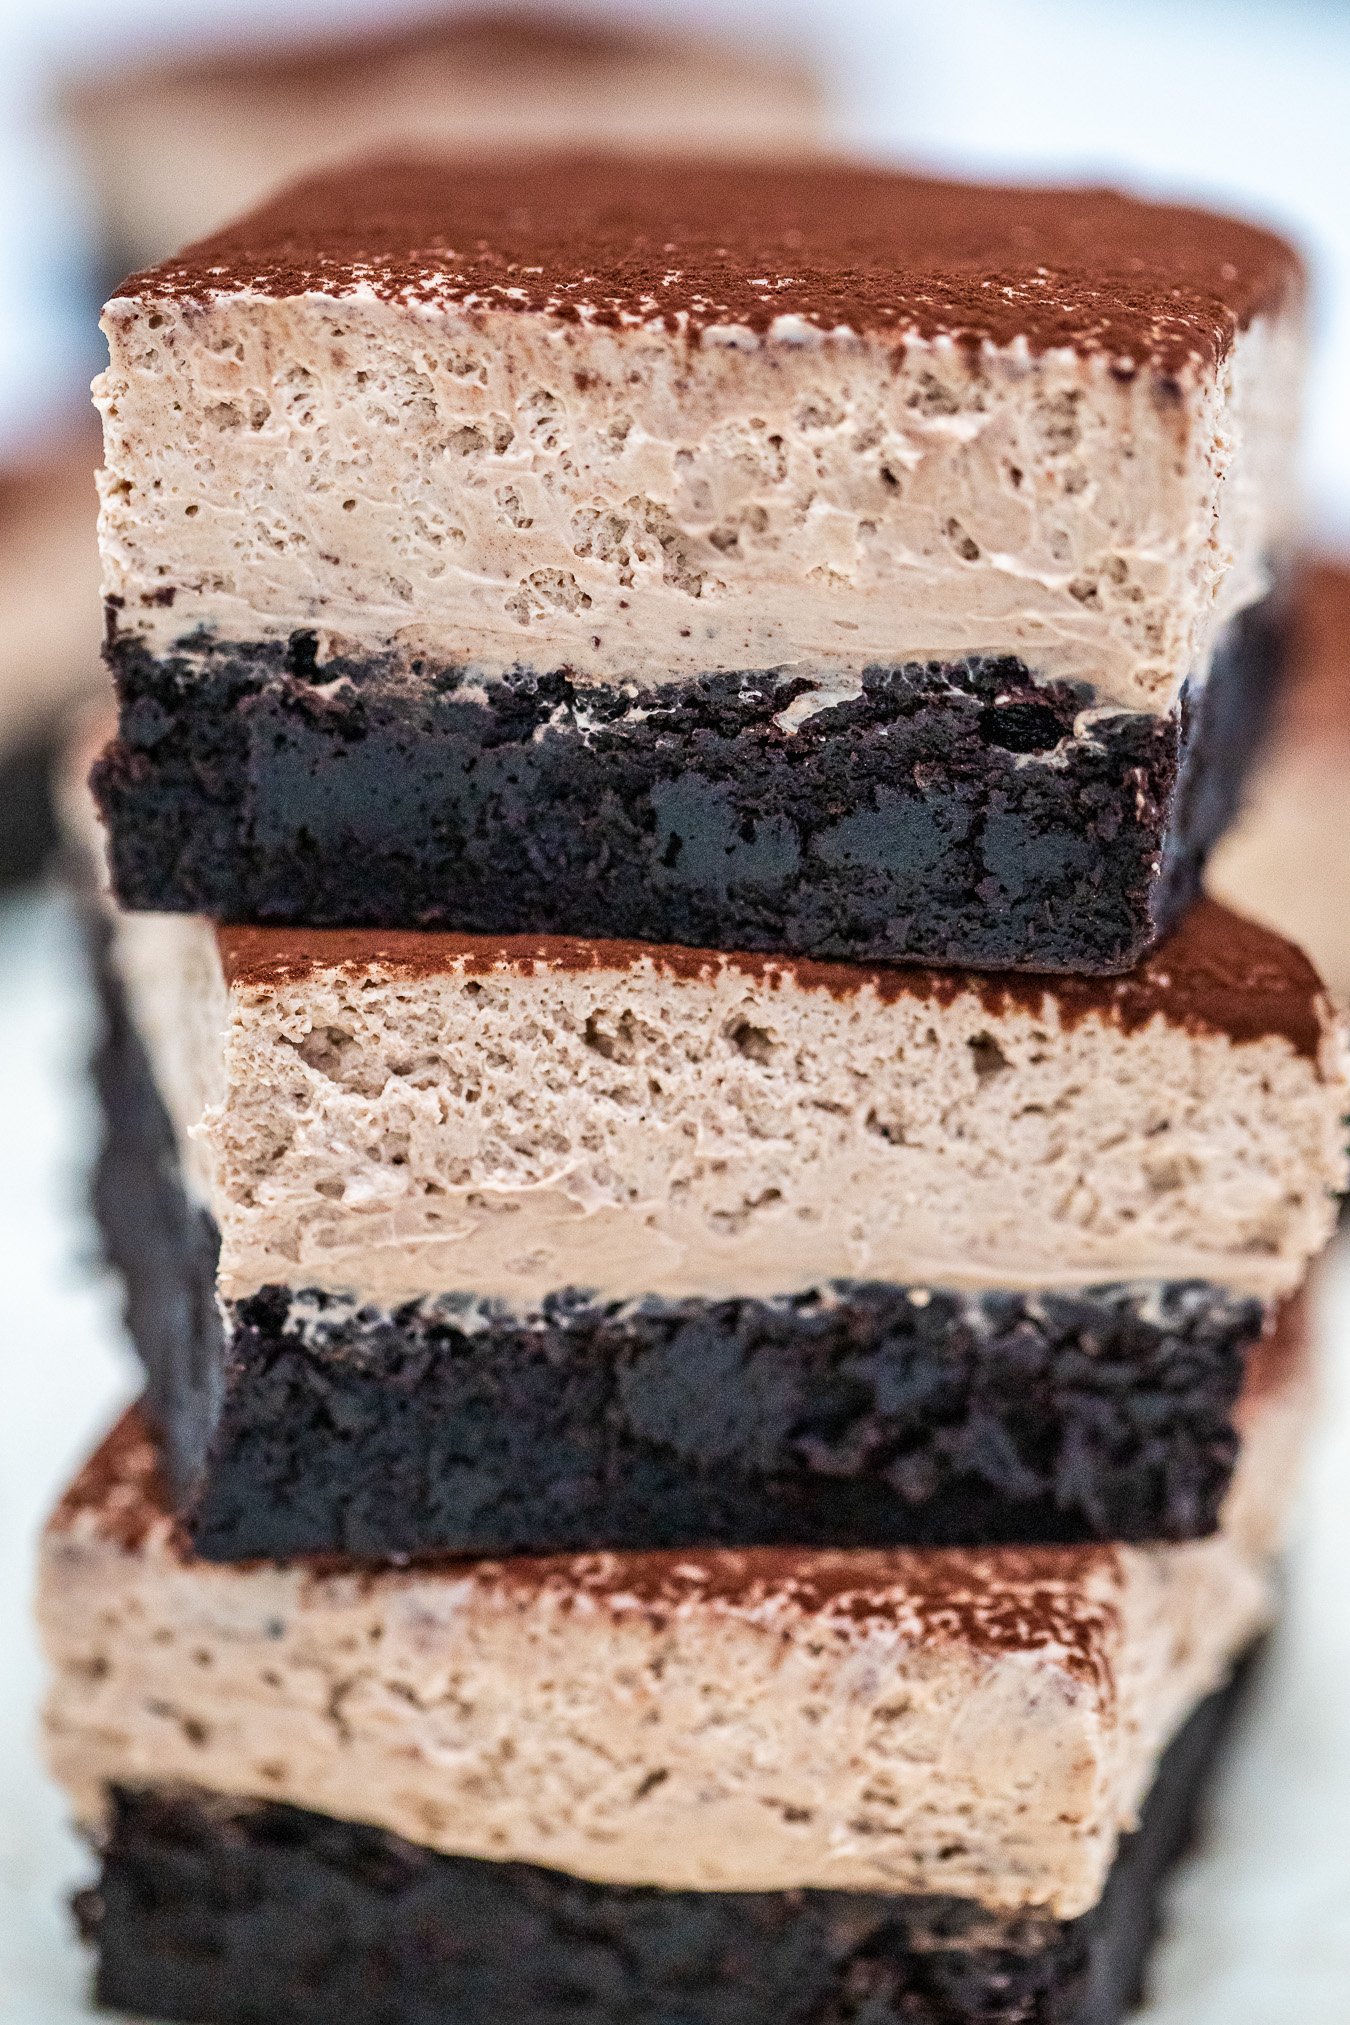
These Chocolate Mousse Brownies are one of the BEST brownies I have ever made. Combining two desserts into one, is one of my things. The brownie layer is fantastic, fudgy, chocolaty, and very rich, with just the right level of chewiness. If you are a big fan of chocolate desserts, you must try my delicious Baileys Poke Cake!
Table of contents
I topped the brownies with a light, airy, and creamy milk chocolate mousse. I know many people are afraid of trying their hands at making mousse, but believe me, my recipe is easy and fool-proof, so give it a try!
This is such an elegant dessert, it takes regular brownies to a whole new level. I also like that they are perfect for making in advance because they need to chill anyway. When you serve this dessert, it will easily become the star of the show!
Why you will love this recipe
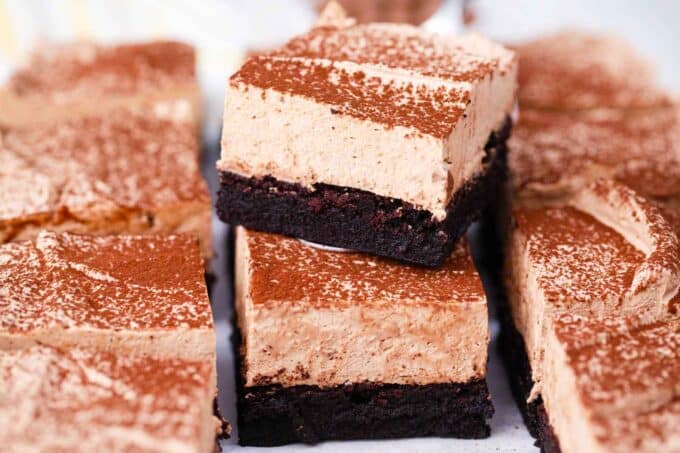
- It is two desserts in one: Yes, this is two desserts in one, and they are both chocolate! I am a chocolate lover so having two different tastes and textures of chocolate in one dessert is like a dream come true. Light and fluffy milk chocolate mousse on top of thick and rich chocolate brownies is just perfect for a chocoholic like me.
- They are pretty enough for a party: Having a dinner party or throwing a birthday celebration? Whatever the occasion, these mousse brownies are sophisticated and fancy enough to be shown off on any dessert table. Add some sprinkles, candy decorations, glitter sugar, or just serve it as is.
- Make it in advance: This delicious treat can be made several days in advance and kept in the fridge since it has to chill anyway. Or freeze it for up to three months. It is a scrumptious dessert anyway it is served.
- It only takes minutes to make: In just 30 minutes, this whole dessert is finished and ready to chill. I recommend making it the night before since it has to chill for at least six hours.
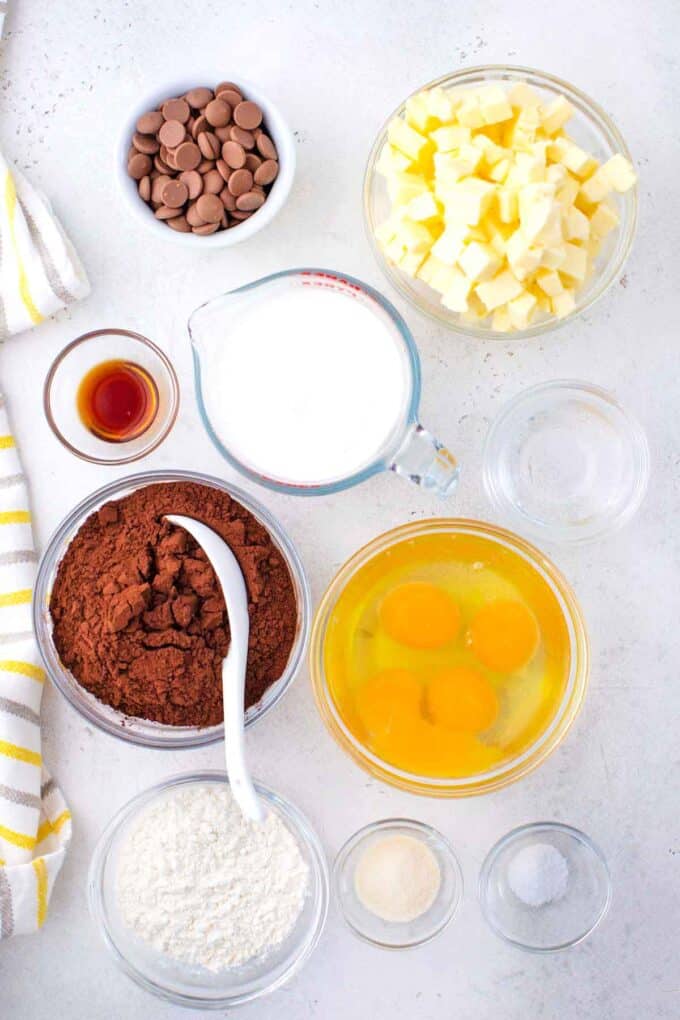
What you’ll need to make chocolate mousse brownies
Ingredients
For the brownie layer:
- Large eggs – I recommend letting the eggs come to room temperature before mixing them to help the batter mix smoothly.
- White granulated sugar – For the sweet taste and added moisture that granulated sugar offers.
- Melted unsalted butter – Melted butter makes brownies denser with a fudgier texture. If the butter is too warm, it will create air pockets and make the brownies lighter and airier.
- Sifted cocoa powder – Sifting the cocoa powder prevents lumps and ensures accurate measuring. Also, I prefer Dutch-process cocoa because it has a richer, more chocolatey taste.
- Pure vanilla extract – I only use pure vanilla extract because it gives the batter a more realistic buttery vanilla taste.
- All-purpose flour – Provides just enough gluten for firmness without overdoing it. The brownies come out both soft and chewy with a bit of crispiness where needed.
For the mousse layer:
- Milk chocolate – Ghirardelli’s milk chocolate baking chocolate. It has the richest flavor and melts quickly, staying melted longer than chocolate chips do.
- Chilled whipping cream – Use regular whipping cream instead of heavy whipping cream. Regular whipping cream only has 30% milk fat while heavy cream has at least 36% but sometimes more.
- Gelatin – One envelope of Knox gelatin is all I used.
How to make chocolate mousse brownies?
- Preheat the oven and prepare the pan: First, I preheat the oven to 325 degrees F and butter a 9×13-inch baking pan before placing a sheet of parchment paper in it to help with brownie removal.
- Make the brownie layer: Then, I use my mixer to beat the eggs at medium speed until they are light and fluffy. The sugar goes in next before mixing in the rest of the ingredients.
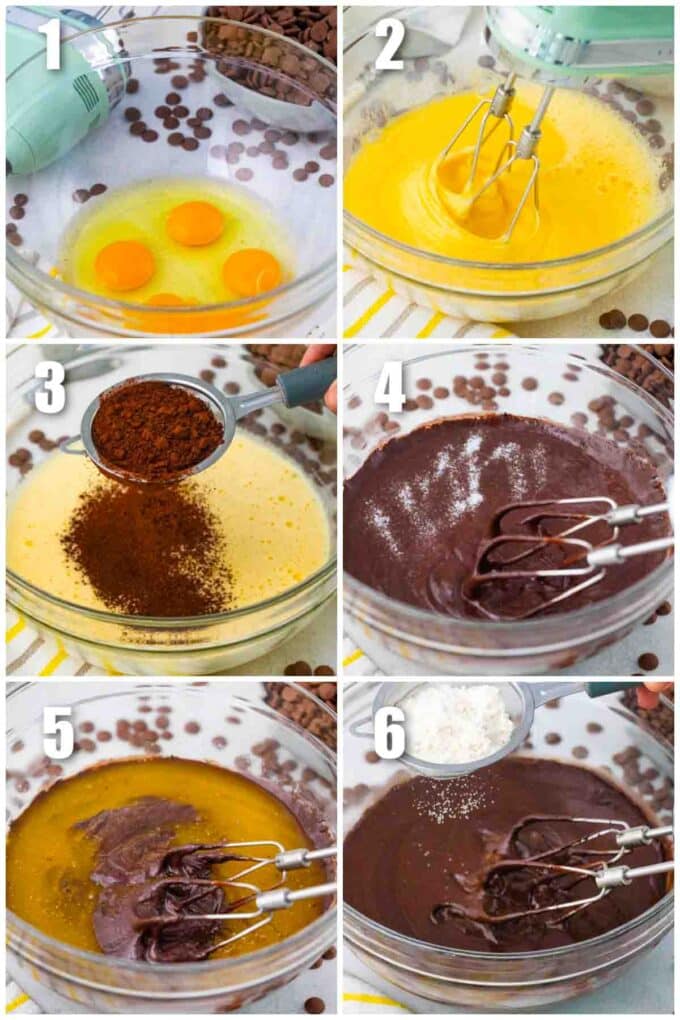
- Bake: I pour it into the prepared pan and bake it for 25 to 30 minutes. It will be done when a toothpick comes out with wet crumbs on it. Then, it goes onto a cooling rack to cool completely.
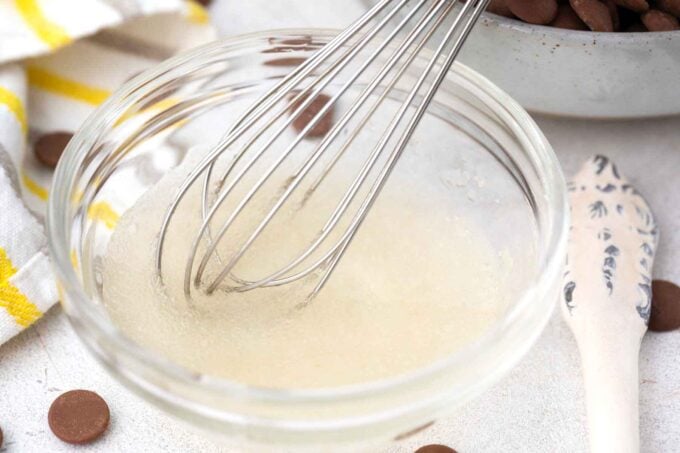
- Bloom the gelatin: Once the brownies are completely cool, I bloom the gelatin in a bowl with the water and let it sit for 10 minutes.
- Heat the cream: In the meantime, I bring half a cup of cream to a boil in a medium saucepan and add the gelatin mixture to it, stirring to fully incorporate it before removing it from the heat.
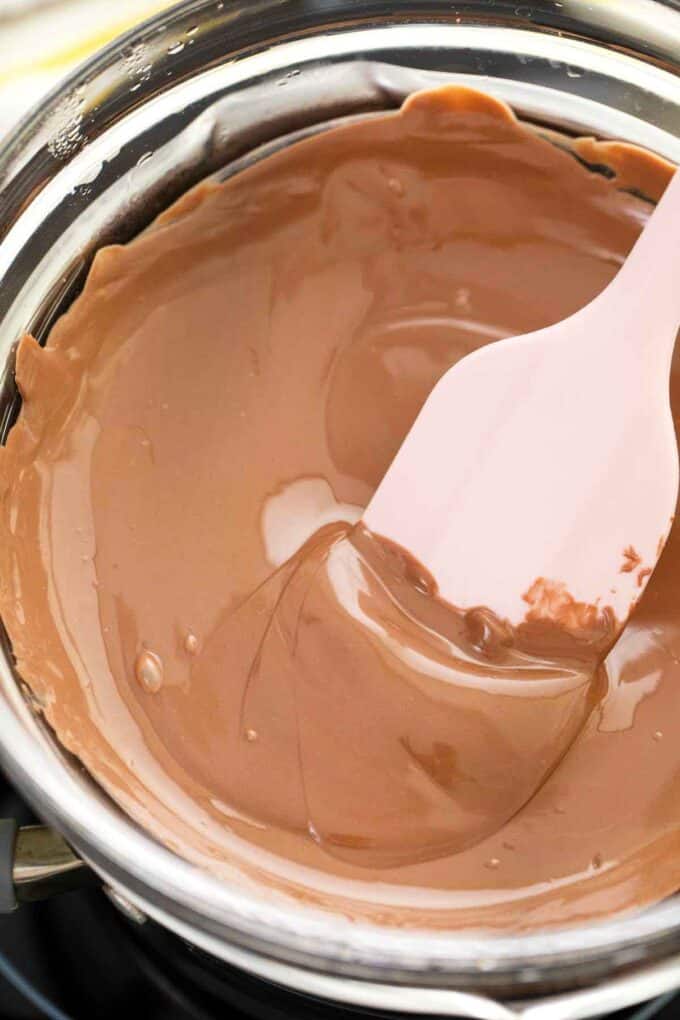
- Melt the chocolate: While the cream is boiling, I melt the chocolate. To do that, I bring a pot of water to a boil and place the chocolate in a heatproof bowl over the top, stirring until smooth.
- Add cream: Then, I add half the cream to the chocolate and beat until combined before adding the rest, and stirring until smooth and shiny.
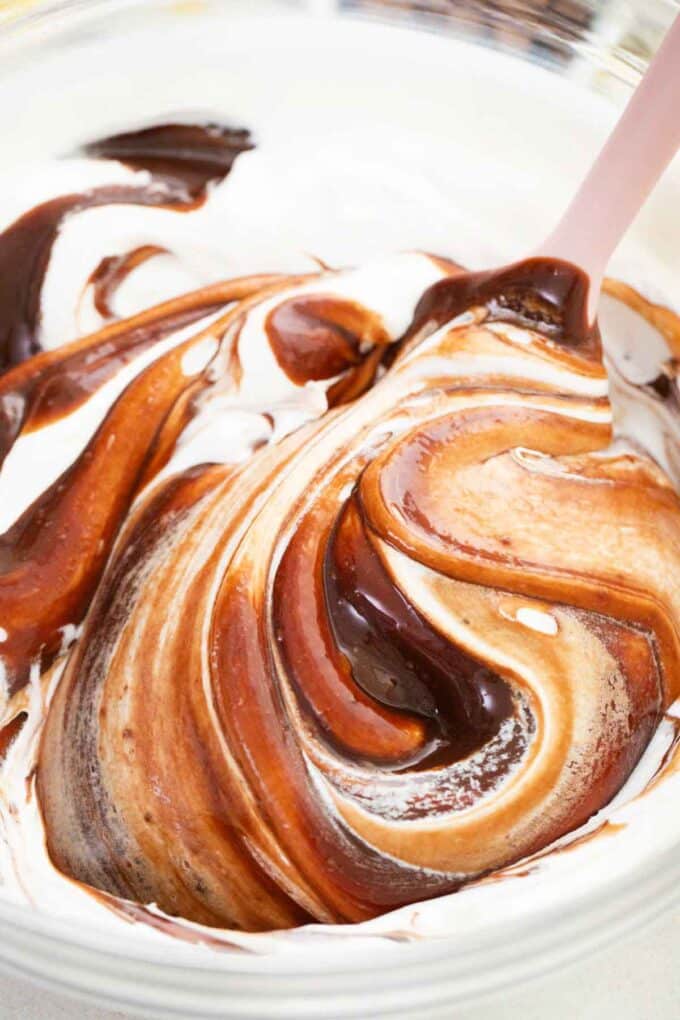
- Add the mousse: Now, I beat two cups of cream until soft peaks form. When the chocolate has cooled to room temperature, I fold in the cream carefully with a spatula.
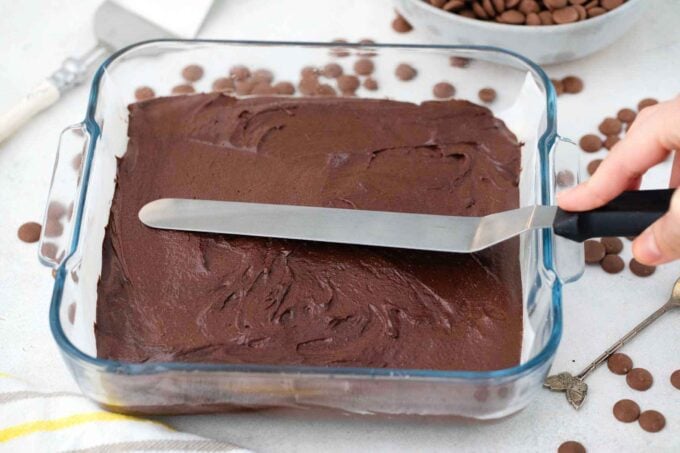
- Top the brownies: I gently spoon it on top of the brownies and level the surface.
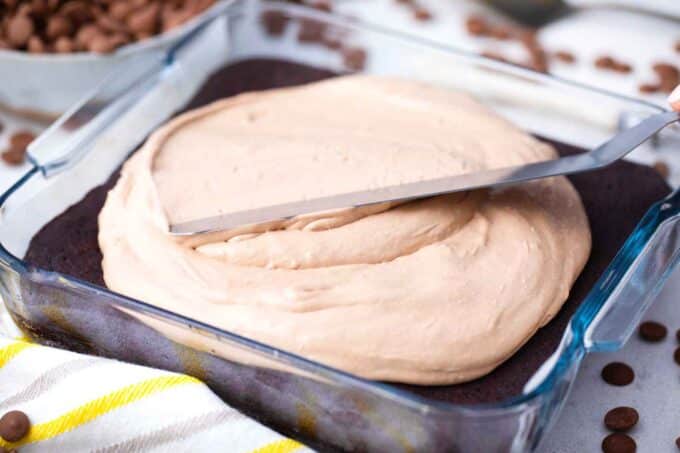
- Chill and serve: Finally, it gets chilled for at least six hours, but I usually let it chill overnight before serving.
Expert tip
The role of temperatures
There are different recipes for making mousse, my recipe calls for chocolate, cream, and gelatin, so there are three steps to make it. First of all, the whipping cream should be chilled after it is finished being whipped. Let it cool for about an hour. Also, the temperature of the chocolate has a lot to do with the texture of the mousse.
Be sure the chocolate is at room temperature and chopped into small strips or pieces so it will melt properly. Then, put it in the double boiler and let it melt as you stir it. When introducing it into the whipped cream, it has to be between 90 and 100 degrees F, or it will cause it to be grainy. To set, mousse brownies have to reach a temperature of about 80 degrees F, which is why it has to go into the refrigerator to chill.
More tips to consider
- Be sure not to overbake the brownie layer. It should still be gooey. A toothpick should come out with wet crumbs on it.
- Also, be sure to completely cool the brownies before adding the mousse layer. I like to make my brownies the night before.
- Save all kinds of time. Use a store-bought brownie mix instead of making them from scratch.
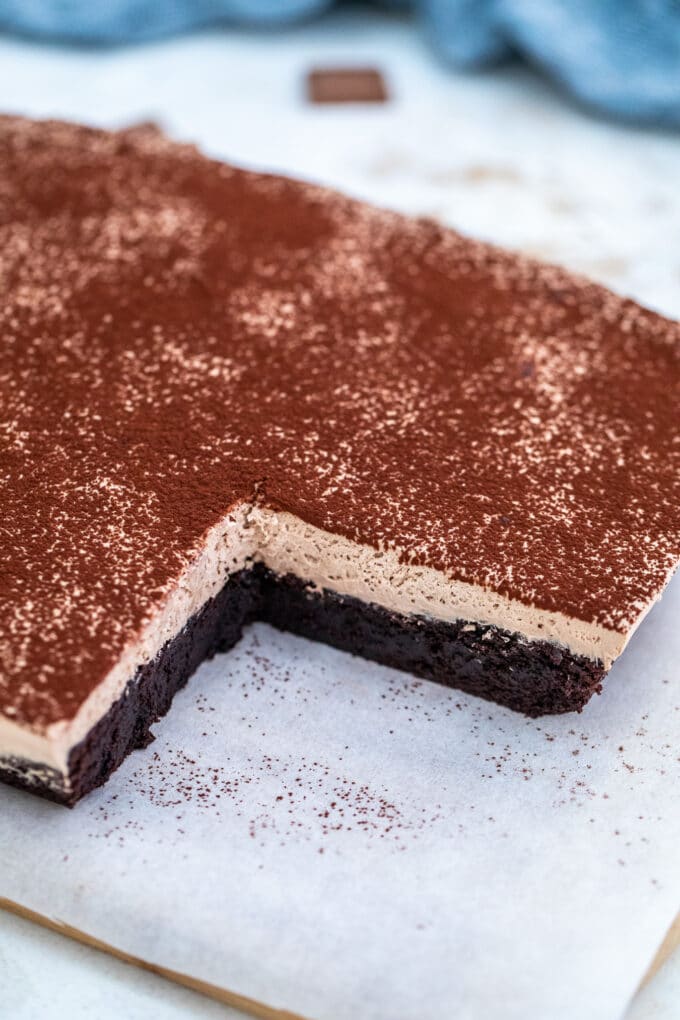
- Do not skip the chill time. Mousse has to chill for at least six hours to be firm enough to slice and serve.
- Adding parchment paper to the pan makes it much easier to remove the delicate brownies for serving.
- Use the best chocolate for this recipe is important for both texture and taste.
- Temperature is important. Use an instant-read thermometer to check the temperature of the chocolate to help make sure it is not too hot or too cold.
- Use the right kind of cream for the perfect density of the mousse as well.
Recipe variations and add-ins:
- Why not add nuts: This delicious brownie dessert can also be a scrumptious nutty dessert by adding some chopped nuts to the brownies.
- Chocolate: Sometimes for extra chocolate flavor I add a handful of chocolate chips or chopped chocolate to the brownie batter.
- Add some fruit: To make this dessert even more incredible, put a piece of fruit on top. Try sliced strawberry or a layer of raspberries before adding the mousse.
- Make them minty: Drop a half teaspoon of peppermint extract into the mousse for chocolate mint mousse.
- Citrusy: Chocolate and citrus go hand in hand, I like to add a bit of orange zest to the brownie layer, and some orange flavor to the mousse layer.
Serving suggestions:
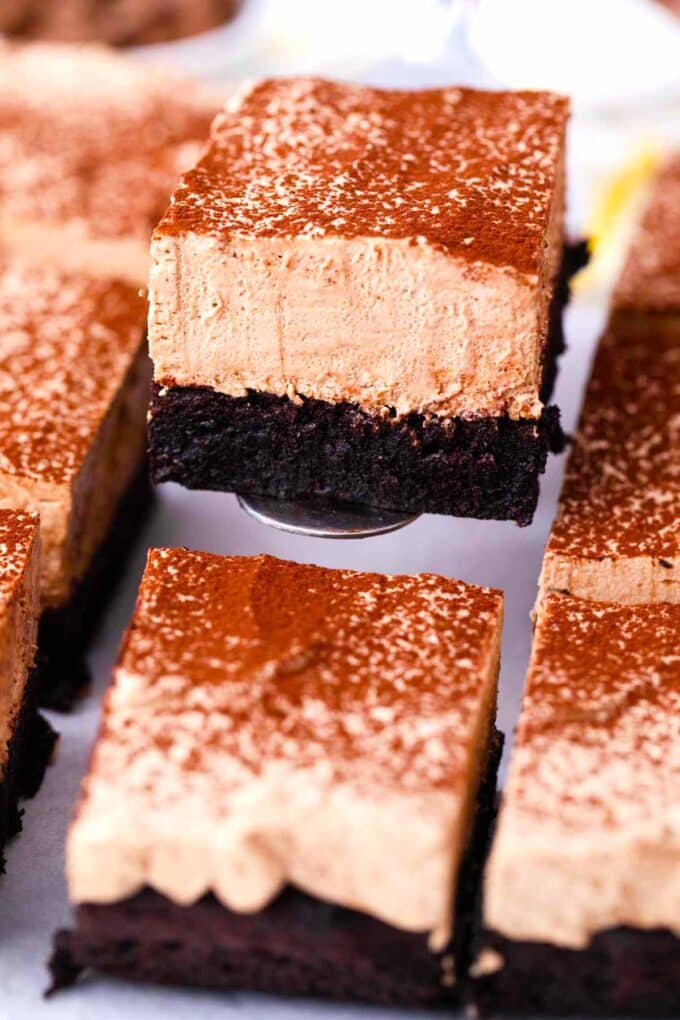
Try some of my great serving ideas for these delicious brownies.
- I served these at a ladies’ brunch with my grown-up Bailey’s s’mores milkshakes and everyone loved them.
- For the best wine with brownies, I usually serve Cabernet Sauvignon or Merlot because they accentuate the chocolate flavor.
- The kids can enjoy these with a glass of ice-cold milk or some hot chocolate.
- On the side, add a scoop of this easy-to-make Oreo ice cream. It only has three ingredients!
- Serve these brownies as dessert after a decadent meal of sirloin steaks and baked potatoes for your sweetheart.
How to store:
- Refrigerate: Chocolate mousse brownies can be kept in the fridge for up to five days in an airtight container.
- Freezing: They also freeze well. Place them in a freezer-safe container (I do not recommend freezer bags because of the delicate mousse texture) and they will stay fresh for several months.
- Defrost: To defrost, place them in the refrigerator overnight and eat within 24 hours.
Frequently asked questions
It could be from not using the best quality of chocolate. Some types of chocolate have water or oil in them as fillers to make production cheaper. The quality of chocolate makes a big difference as the best ones have the most cocoa butter.
Not letting the mousse set long enough can also cause it to be runny. It has to be chilled for at least six hours. If it has been in the fridge for six hours and is still runny, leave it for another few hours.
How do I prevent grainy mousse?
Temperature can greatly impact the texture of mousse. The chocolate must not be too cool when adding the whipped cream, or it will harden into small grains, causing it to feel grainy. It should be 90 to 100 degrees F on an instant-read thermometer.
Burning it can also cause grainy mousse, so do not let it go over 100 degrees F. Also, do not overwhip the cream. When the cream is just starting to make soft peaks, stop whipping.
The most common reason for this is too much fat in the recipe, which gives the mouse a heavy texture. This recipe calls for whipping cream, not heavy cream. Regular whipping cream has less milk fat (30%) than heavy cream (36%), so be sure to get what the recipe calls for. Otherwise, it will affect the density of the mousse. Also, if the eggs are beaten too much, the mousse can be too thick and heavy.
How do I make my brownies cakier?
This recipe is for gooey, fudgy brownies, so it has more fat than flour. In fact, it has two sticks of butter (one cup) and only a third of a cup of flour mixed with one and a quarter cups of cocoa powder. To make them cakier, use three-quarters of a cup of butter and a half cup of flour with one and a half cups of cocoa powder. Also, add one teaspoon of baking powder for that extra lift and lightness.
More Brownie recipes:
Loved this recipe? I’d love to hear from you! 💛 Leave a 5-star rating ⭐️ in the recipe card below and share your thoughts in the comments – I read and appreciate every single one!
Let’s stay connected! Follow me on Facebook, Instagram, Pinterest, and YouTube for more delicious, sweet and savory recipes. Have a question? Ask in the comments, and I’ll be happy to help! 😊 with love Catalina!
Chocolate Mousse Brownies
Ingredients
For the Brownie Layer:
- 2 tablespoons unsalted butter, softened for greasing the pan
- 4 large eggs room temperature
- 2 cups white granulated sugar
- 8 ounces unsalted butter, melted 2 sticks
- 1 1/4 cups unsweetened cocoa powder sifted
- 1 teaspoon vanilla extract
- 1/3 cup flour sifted
- 1/2 teaspoon kosher salt
For Chocolate Mousse:
- 10 ounces milk chocolate finely chopped
- 2 1/2 cups whipping cream chilled
- 7 grams gelatin
- 2 tablespoons water
Instructions
For the Brownie Layer:
- Preheat oven to 325 degrees F.
- Place parchment paper in a 13×9-inch pan so it covers the bottom and two sides (to facilitate the brownie removal). Butter the pan and set aside.
- In a mixer fitted with the wire attachment, beat the eggs at medium speed until fluffy and light yellow. Add the sugar and beat until combined. Add remaining ingredients and mix to combine.
- Pour the batter into the pan and bake for 30-35 minutes. Check for doneness by inserting a toothpick into the center of the pan. It should come out with just a few crumbles attached. 25-30 minutes in my oven for this recipe is perfect timing.
- When done, remove the brownie from the oven and place it on a cooling rack; do not remove it from the pan.
For Chocolate Mousse:
- Bring a pot of water to boil. Place chocolate in a heatproof bowl and melt over the simmering water. When melted, remove from heat and set aside.
- Place gelatin and water in a small bowl. Allow the gelatin to bloom, then let it sit for 10 minutes.
- In the meantime, bring 1/2 cup of cream to a boil in a saucepan. Add the gelatin mixture to the cream and stir to incorporate the gelatin fully. Remove from heat.
- Pour about half of the cream mixture into the chocolate and whisk quickly. Add the rest of the chocolate and whisk until well combined. The mixture will be very smooth and shiny.
- Place the remaining 2 cups of cream in the bowl of a stand mixer fitted with the wire attachment and whisk until soft peaks form.
- When the chocolate mixture has cooled to room temperature, fold in the whipped cream manually using a spatula.
- Pour on top of the completely cooled brownie pan and level the top layer. Place in the fridge overnight or for at least 6 hours.
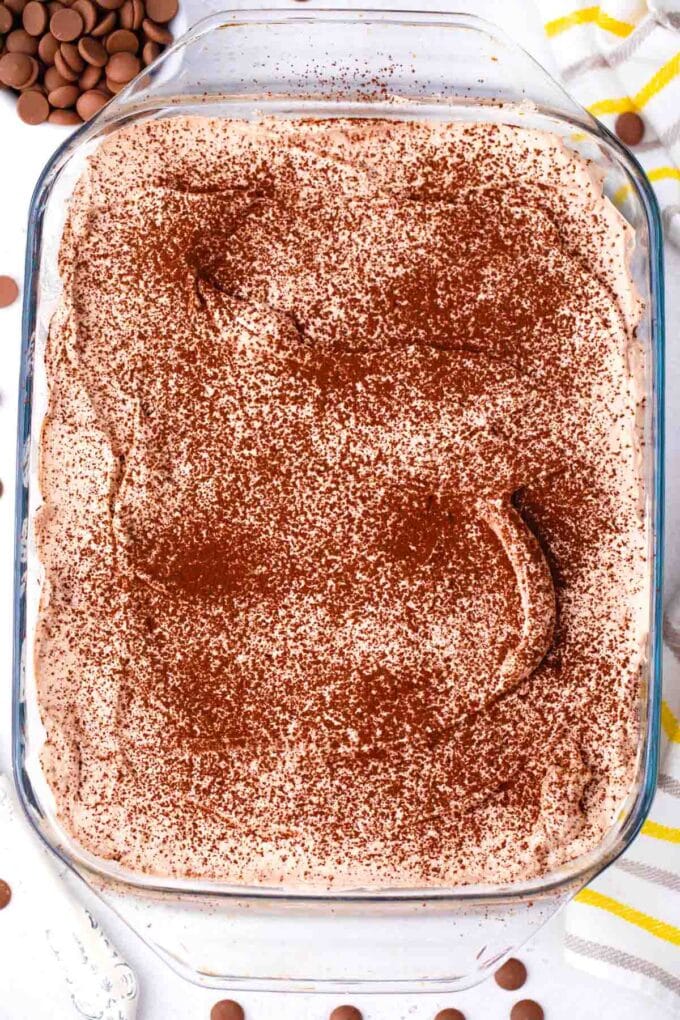
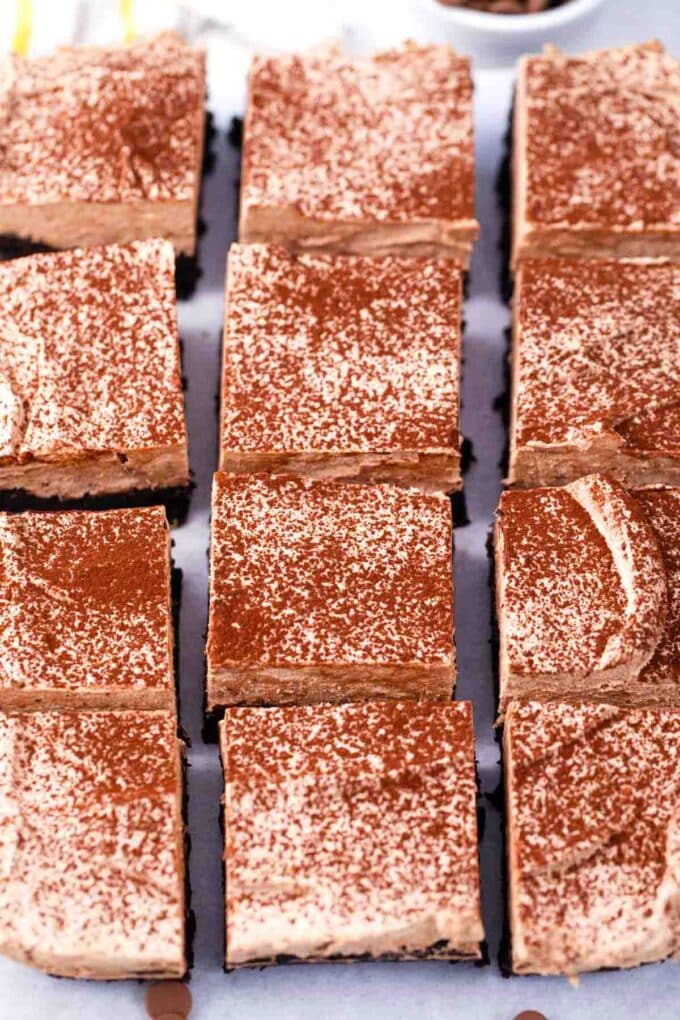
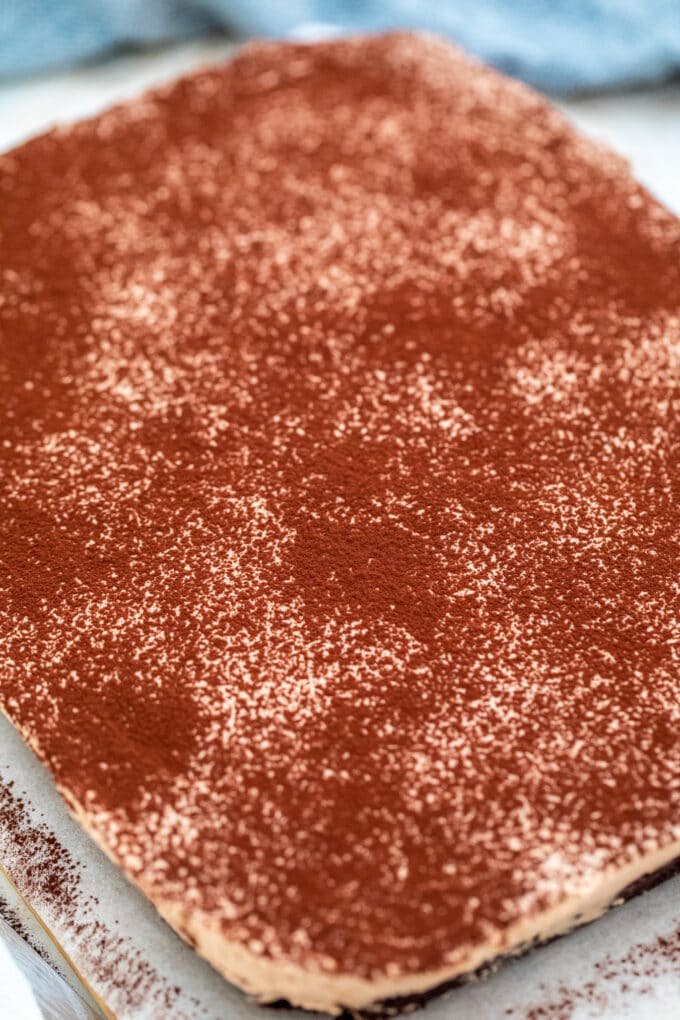
- Before serving, remove the mousse brownies from the fridge, lift them from the pan using the parchment paper edges, sprinkle with cocoa powder, run a knife through cold water, and cut into square bars.
Video
Nutrition

looks amazing, and should taste even better!!!
Thank you Alina!
Oh I would love one of these! Pinned.
Thanks Sarah!
Oh my goodness. How dense and rich these look. Can I have one.. or two.. or maybe three? 😀 Pinned it!
Mult succes, blogul tau e super 🙂
You can have all of them 🙂
Merci mult Oana, al tau ma inspira mult, ma bucur ca l-am gasit!
It’s so nice to have great people in your life who can give you recipe feedback 🙂 These brownies look amazing and I love chocolate mousse, but with the unsweetened cocoa it sounds like everything complements each other really well!
Yes, their feedback is greatly appreciated 🙂 thanks for stopping by!
The topping looks SO GOOD. These could be dangerous 🙂
They are Meredith haha
I love brownies. These ones look wonderful and the topping… Well, we might just have to have some of these here. Yum!
You have to try them Chris, they are to die for!
Okay, these really do look like the best brownies ever!
They are Tonia!
I concur! Everything tastes better with chocolate – ye ha! Sharing!
Many thanks Nagi!
That’s the best looking brownie I’ve seen in a long time and I’m a lover of brownies. Well done!
Thank you Maureen!
Mousse and brownie..wow..double delicious and decadent!
Yes Angie, double deliciousness!
These brownies look so decadent and amazing! I can see why your husband declared them the best 🙂 Love the chocolate mousse layer!
Thanks girl!
These look delicious! I love the brownie combined with chocolate mousse – cannot wait to make them!
You will love them Kathryn!
These brownies look so totally dense and fudgy — the only way to eat brownies! Perfection!
Thanks Ashley!
Whenever I try to make desserts fancier, my boyfriend thinks they are too sweet (boo).
But these brownies look amazing! I have still never tried mousse before, but I would love to try it.
Cathleen, my creations are also sometimes hit or misses, but you have to try mousse, its so easy to make and its delicious!
I could definitely believe these are the best brownies ever, they look amazing! My dream dessert, so decadent and chocolatey, Pinned!!! 🙂
Many thanks Sam!
This brownie looks divine! I love the idea of topping it with the chocolate mousse. The brownie does sound nicely balanced—rich but not too rich; sweet but not too sweet. Nice!
That you are so right, you described the flavors perfectly!
Oh wow!
That looks absolutely amazing!
I know if I made this I would never stop eating it!
Julie
Gourmet Getaways.
We couldn’t stop eating them too, lol!
Everything is better with mousse on top! These look fantastic!
Thank you!
These are a brownie I couldn’t say NO to!!
These certainly do look like some amazingly fudgy brownies! The mousse looks so light and fluffy.
These, my friend, are what ALL brownies should look like 😉 Thanks for sharing, Katalina! 😀
These look absolutely to die for. I’ve never thought about putting a mousse layer over brownies, but it’s brilliant!
Thanks Chrissie!
What a great idea to top with mousse! I’m a brownie addict, too and so is my brother. I have GOT to try these.
Yes, this must be tried, you won’t regret!
Oh my, these sound (and look), totally decadent and delicious! Cant have enough chocolate 🙂
Thanks Donna!
Wow, brownies PLUS mousse?! Can’t say no to that! I agree with you about brownies with frosting – too rich. These look perfect, though!
Thanks girl!
When you say for the sugar to be sifted, is that regular sugar or powered sugar? Many thanks!!
regular sugar, but its ok if you don’t sift.
Hi..your brownies looks amazing and I can’t wait to try making them.
But just wondering, since vanilla beans are really hard to find here and and very expensive, can I substitute it with vanilla essence instead? If yes, how much do you reckon I should use?
Thank you for sharing these!
Hi – I am very glad you want to give them a try, yes you can substitute, please use 1/2 teaspoon of vanilla extract.
I haven’t had brownies in forever (shame on me!) and these are calling my name!! These look amazing!
Totally my kind of brownies! That mousse topping looks fabulous!
I love them both individually…but together they’re TO DIE FOR!!!
This is my kind of dessert!
That chocolate mousse topping looks incredible! So decadent! 🙂
Now, these are my kinda brownies and that mousse layer is to die for!
Oh my, I need a big piece of this right now!
These brownies are fantastic!
How many tbsp is 7 grams of gelatin?
4.2 grams in a teaspoon, so in this case 1 1/2
These were amazing – a big hit with the family. Thank you for sharing the recipe
I love how light and airy this turned out! Perfectly sweet and rich; loved it!
LOVED this dessert! So easy and delicious; perfect cure for my sweet tooth!
These are perfect for chocolate lovers! Love the different layers!
These would disappear in our house!
I’m not sure if someone asked and I dont mean to create a fubar by asking but can I just use box brownies for the brownie part…I know it wont be fully homemade but I have a box and I kinda wanna use it lol
Sure you can! It will taste great and save you some time!
This is such a fantastic dessert!
Thanks for sharing! I bet it could easily be made gluten free too!
So good. Take some time to make but so worth the wait.
where can i buy gelatin? never baked with it. not sure even where to look. thank you.
any grocery store usually
Having 2 cups of sugar, isn’t it too sweet? Has anyone actually made this using the actual measurements? Please advise. Thanks.
they are great!
I have access to Dr Oetker’s instatized gelatin— just sprinkle over the cream, stir in a bit, then whip as usual. Thinking that might be adequate. Since using this product, do not have to fiddle with softening gelatin. Pint would need 2packs.
This mousse would be good over that very easy chocolate cake (vinegar, mix in a bowel etc )
These are absolutely incredible! No way 12 servings. Soooo rich. Probably 36 servings. Just make them!!!
Hello. Just want to clarify. is the butter be on the pan or on the parchment paper? because i got confused bcoz parchment paper was said first then you said put butter. thanks
I usually put some on the pan as well, it helps the parchment paper stick to the bottom and it doesn’t move when you add the brownie batter.
This mousse brownie is decadent! I took it to my small group and everyone went back for seconds. I consider myself an intermediate cook but i felt there was a little confusion of how much gelatin to add. The recipe said 7g and you responded to someone else’s question about the gelatin and said it was about a teaspoon and a half but I actually weighed it on my electronic scale and 7 g ends up being less than 1 tablespoon. So I ended up using about a tablespoon and a quarter and I felt it wasn’t light/fluffy enough. The taste was incredible though! Next time I will stay with seven true grams. Also I did use a 9 x 13 pan and I felt if I’d had a smaller pan the brownie would’ve been a little higher. I did double up on the mousse which I was glad I did because the brownie is so rich. I used a rectangle doily and sprinkled the cocoa through it which made a nice design!!
How many gelatin packets equals 7 grams?
Made this for my NYE party, what a hit! Tastes like Olive Garden’s Black Tie Mousse Cake. Definitely a keeper!
Yum!
Michele
Made this for my NYE party, huge hit! Tastes like Olive Gardens black tie mousse cake. Definitely a keeper!
Happy New Year!
They “look” like they taste incredible. I’m going to serve them to our book club tomorrow, so I’m making a double batch. The brownies are cooling as I type and the chocolate is melting. I was confused because I suspected there was a typo in the recipe.
“Pour about half of the cream mixture into the chocolate and whisk quickly, add the rest of the chocolate and whisk until well combined. The mixture will be very smooth and shiny.”
After viewing the video, it confirmed that the above should read …
“… add the rest of the CREAM MIXTURE and whisk until well combined.”
Not sure if I will be able to wait until tomorrow afternoon to have a taste!!!
Let me know how they turned out!
It says 8 oz butter (2sticks)……isn’t that 16 oz….going to make this tonight
one stick butter has 4oz.
Hello. I saw some confusion in previous comments, so I just wanted to gain clarity before making – what is the correct conversion for 7 grams of gelatin, whether tsp or TBSP, what would it be? Thanks so much!
its 2 teaspoons
Hey…lovely and delicious they are looking👍 Can you plz give the measurements in grams as well?
I found a simpler way to make the Chocolate Mousse. Buy the Chocolate Mousse at your local supermarket. Its located in the jell-o and pudding section. One package of mix and one bottle of 16oz heavy cream. Mix the two together and when the mixture starts to thicken it ready. Spread on the Brownies. Less work and less ingredients. This mixture last longer the whipping cream or cool whip.
That is a great shortcut 🙂
Looking forward to making these tomorrow! Planning on making them in cupcake form. Was wondering if you had any experience making them that way and had a suggestion for baking time.
Just pulled brownie base outta the oven. Topping is setting. Making these to bring over to a dinner tonight, just realized they have to cool for 6 hours. Shame on me for not reading thoroughly. Oh well looks like it’ll be brownies and ice cream!
I’m really not a fan of using gelatine in my baking. I might find a way to not use that, my mousse will probably be heavier but as a Belgian person for us there are many ways to much choc mousse without gelatine. I will see how it turns out!
It looks delicious tho!
Looks delicious.
I am about to shop for ingredients and converting ounces to grams. How come the gelatine is in grams?
The sooner the whole world converts to metric measurements the easier our lives will be.
Thanks for the recipe. Hope it tastes as good as it looks.
I made these for
My son birthday. They were a hit. Everyone loved them.
What kind of gelatin do I use?
regular unflavored gelatin
Can you use boxed brownies?
Yes!! it works great!
great overall! Mousse was pretty hard to get perfect texture but other than that great!
Sweet and savory you have made me a believer! This recipe is one for the books. So delicious! An instant hit for the whole family, including my husband who does not like chocolate desserts much. I do not have the best track record with brownies but your recipe was easy to follow and tastes outstanding. The moose was also fantastic, even though my chocolate didn’t completely desolve in the whipped cream. Again must try, will make again and THANK YOU for such a crowd pleasing recipe. My family thinks I’m a master baker when it’s all because of this great recipe.
I did the same thing as well. Mostly because when I read the recipe, it says at the very beginning the total time is 1 hour 20 minutes. When really, it should clarify there is a 6 hour refrigeration period. It’s misleading.
Best dessert I’ve made to date. Everyone loved it and I shared recipe with two others!
I don’t have gelatin. Is there any substitute I can use?
You need gelatin for this recipe.
Is there a way to make this vegetarian w/out gelatin? Fruit pectin maybe?
I haven’t tried it without gelatin, sorry.
Hi, can you please confirm for the brownie is it self raising or plain flour and is the butter salted or unsalted?
Also, using the quantities in the recipe will I get the fudgy type or the more cake type of brownie?
Thanks a lot
Hi, the flour used is all-purpose and the butter is unsalted. The texture is more on the fudgy, dense type.
I followed the recipe and these tasted delicious but in making the mousse, the chocolate/gelatin clumped up and did not incorporate smoothly into the whipped cream. The result was not as expected and not as appealing as this photo. What did I do wrong?
Made this for a second time “blooming “ the gelatin which made the mousse smoother without chocolate clumps. Also added a teaspoon of espresso instant coffee to the brownie base which made them taste even more chocolatey. These are the best brownies I’ve ever had!
I didn’t even make the mouse. The brownie was so incredible I covered it with ganache and went to town. Best brownie ever.
This looks so good! What a great way to enjoy the best of 2 desserts!
Thanks for sharing! Does it keep long?
Sounds delicious !
Are these used with a fork or can you hold?
Making for a party
with a fork
IMO you should edit the recipe and state that the butter is unsalted. I just used salted butter and I hope they turn out.
Thank you for pointing this out! I have updated it.
This looks so good! What a great combination of flavors!
Thanks for sharing! How far ahead of time can I make it?