
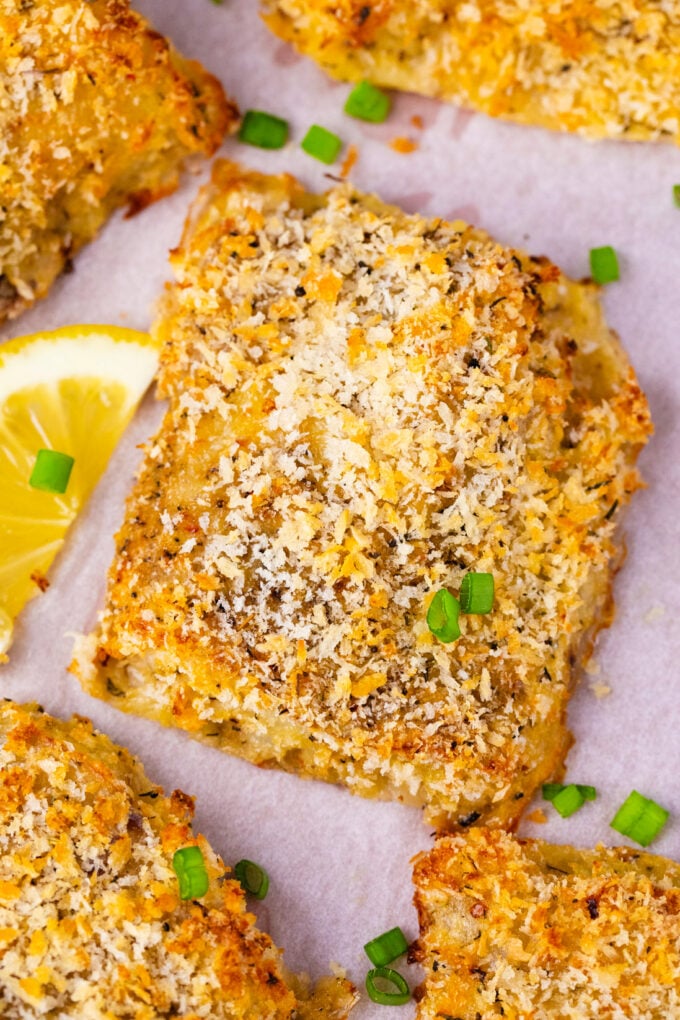
Crispy Oven Baked Tilapia
I want to share with you my go-to recipe for when I crave mouthwatering, crispy fish. This crispy oven-baked tilapia takes just 15 minutes to cook, and it’s perfect for a wholesome yet comforting weeknight dinner. The fillets are soaked in buttermilk and covered with a crunchy shell that’s satisfying to bite into, revealing a flaky, tender interior. Served with homemade creamy lemon aioli, for the ultimate dining experience.

If you want to deviate a bit from a traditional meat meal, this Baked Tilapia is the perfect candidate. It is a quick and easy dinner option, and can be served with a simple cucumber, tomato, and avocado salad or with creamy scalloped potatoes on special occasions. For healthier, more nutrient-dense options, I pair it with oven-roasted bok choy or roasted Brussels sprouts.
Table of contents
Prior to baking, I soaked the tilapia filet in buttermilk and then coated it with Panko breadcrumbs. This mixture gives the fish a juicy, buttery interior and a crispy coating. Also, the breadcrumbs coating turns golden brown when baked. The lemon aioli is the ideal creamy and zesty finish, and it’s that touch that elevates the dish. This is an easy, fuss-free dinner that resembles a restaurant meal when plated. Any leftovers can be turned into wraps or fish sandwiches, making meal planning for the next day much easier.

Why you will love this recipe
- Because it is easy: With just a few steps, this recipe is simple enough for anyone to make and always turns out fantastic. While the tilapia fillets cook, I quickly make the aioli and a smashed chickpea salad for a wholesome, hearty dinner.
- It is so fast: I can make this whole recipe in under 30 minutes, including prep time, and it feeds my family. I usually add a few extra fillets to make fish sandwiches the next day.
- It’s economical: This recipe serves 6 for less than $20. Being budget-friendly and easy to make, it’s a great choice for a fuss-free homemade fish dinner.
- The sauce is amazing: The homemade lemon aioli is delicious and takes just 5 minutes to make from scratch. The refreshing flavor and creamy texture complement the crispy fish.
What you will need
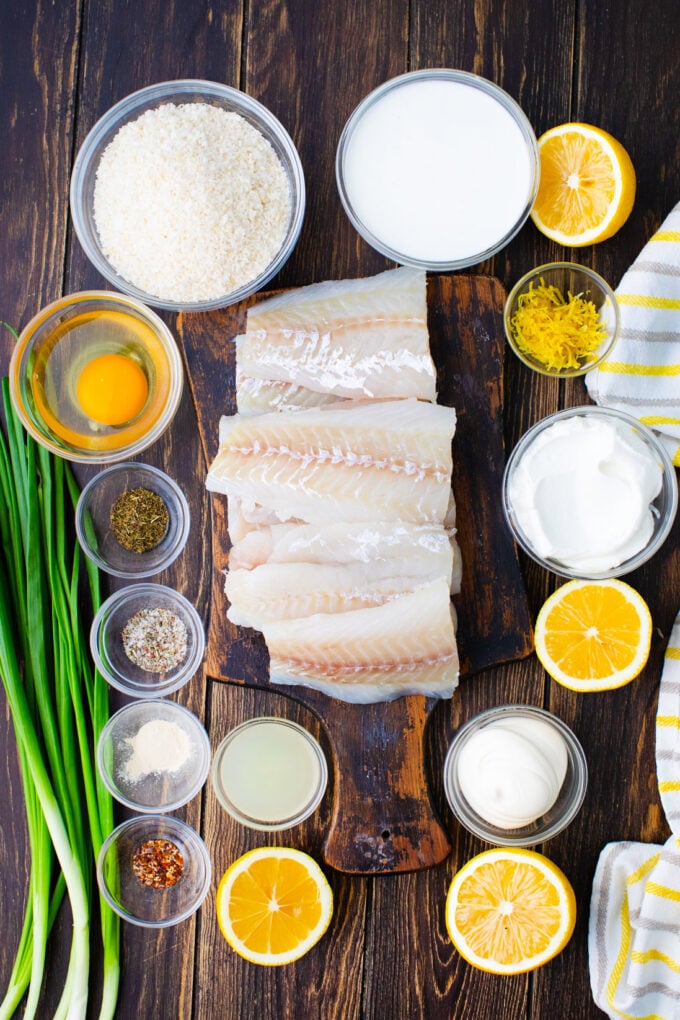
- Fish: I use 6 organic fresh tilapia fillets.
- Wet ingredients: I dip my tilapia in an egg-and-buttermilk wash first. The egg serves as a binder, keeping the fish moist, and the buttermilk tenderizes it while giving it a subtle, tangy flavor.
- Dry ingredients: I also dip the fish in panko for a light and crunchy crust that absorbs less grease.
- Seasonings: Along with the panko, I mix in my homemade Italian seasoning, plus salt and pepper. Garlic powder is also added for a burst of garlicky flavor without the moisture, dried basil for a slightly sweet note, paprika for a smoky hint, and red pepper flakes for a touch of depth and heat.
For the lemon aioli
- Wet ingredients: Light mayonnaise is my base for a lower-fat, lower-calorie sauce with plenty of flavor. I also added some Greek yogurt for a creamier texture and a richer taste. Lemon juice adds a bright taste to perk it up.
- Dry ingredients: Chopped green onions provide a mild, slightly sweet onion flavor, perfect for seafood.
- Seasonings: Lemon zest gives this aioli its intense lemon taste and bright fragrance. Salt balances the lemon juice’s high acidity and enhances the savory garlic flavor. Pepper adds depth and a hint of heat.
How to cook it
Preheat the oven: First, I preheat the oven to 400 degrees F, then add parchment paper to a large, rimmed baking sheet.
Mix the egg dip ingredients: Next, I whisk the buttermilk and egg in a large, shallow bowl and set it aside.

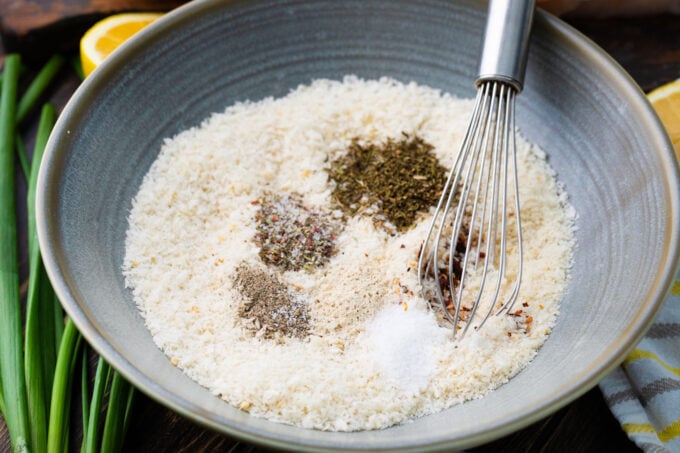
Mix the coating ingredients: In another bowl, I combine the breadcrumbs with the Italian seasoning, red pepper flakes, paprika, garlic powder, basil, salt, and pepper, then set it aside.
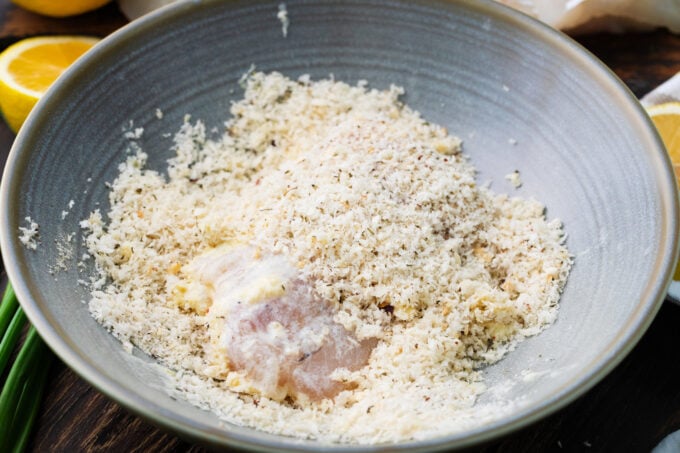
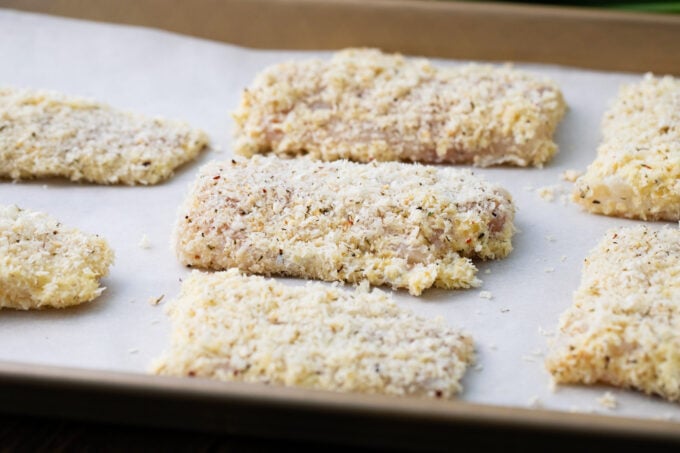
Coat the fish: I pat the fish fillets dry, dip them one at a time into the egg mixture, then into the panko mixture. Then, I place them onto the prepared baking sheet.
Bake the fish: When they are finished, I bake them for 12 to 15 minutes, or until they are fork-tender.
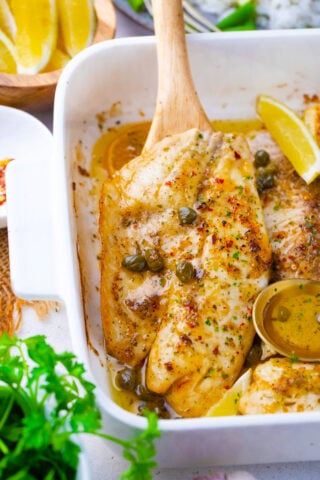
Make the sauce: To make the lemon aioli, mix all the ingredients in a medium bowl until combined. Then, I taste it and adjust it by adding more salt, pepper, or lemon juice.

Remove and serve: After I remove them from the oven, I serve them with lemon aioli.

Expert tip
Choosing a fresh tilapia fillet
A fresh fillet is light pink or white, moist, and has almost no odor. A whole fish is shiny and has clear, bright eyes. Some are green, others are yellow, while many are multicolored, brown, black, and white. They are similar to a seabass or sunfish. They are caught in Taiwan, Indonesia, and Colombia, but are also farmed in China and other countries. Look for a firm fish with red gills and shiny skin.
More tips to consider:
- For a thicker coating, dip each fish filet into the buttermilk and breadcrumb mixtures again. In that case, double the quantity of the panko mixture.
- Shake the fillets to let any excess moisture drip off before dipping them in breadcrumbs.
- Make sure the breadcrumb mixture is not wet after tossing the first fillets. If it is, add more panko breadcrumbs.
- For an even crispier crunch, toast the breadcrumbs before using them.
- To make the fish darker brown and shiny, lightly spritz it with a bit of cooking spray.

Recipe variations and add-ins:
- Other fish: Feel free to use a different fish, like cod, catfish, grouper, Mahi-Mahi, or snapper. Any white, mild fish will work for this recipe.
- Spicy fish: Make this dish spicier by adding twice the amount of red pepper flakes or cayenne pepper to the mixture.
- Ranch tilapia: My kids love it when I add some of my homemade ranch seasoning to the coating.
- Parmesan: For extra flavor and cheesiness, I sometimes substitute half the panko for finely shredded parmesan cheese.
- Different sauce: Although I prefer lemon aioli, some people don’t like lemon. It can be changed to lime or orange. Another option is to use a completely different sauce. Try my creamy bearnaise sauce for a tangy, rich taste.

Serving suggestions:
This delicate fish dinner is perfect for any weeknight because I can make it in under 30 minutes, and I always have all the ingredients on hand. It’s versatile enough to go with a variety of side dishes, such as my gluten-free macaroni and cheese, which is so cheesy and creamy and complements the dish’s crunchiness. These homemade tater tots are also a favorite side dish around my house.
For something more basic, I like to make this Instant Pot rice, which takes just 20 minutes and requires 1 ingredient. I like to add a little butter and salt for flavor, cook it for 15 minutes, and that’s all there is to it! I usually make a double batch at the start of the week, and we use it with different mains. Another great side that everyone loves is my loaded stuffed butternut squash. On special occasions, I pick a Chardonnay, Sauvignon Blanc, or Pinot Noir, as these wines have good acidity that pairs nicely with tilapia.
How to store leftovers:
- Refrigerate: It is best to eat this fish right away, but it can be kept in the fridge for up to 3 days in an airtight container.
- Freezing: It can also be wrapped in plastic and frozen in freezer bags for up to 3 months. However, it will not be as crispy when thawed.
- Defrost: I let mine thaw overnight in the fridge
- Reheating: To reheat, I put mine in the air fryer for 2 to 3 minutes at 400 degrees F, or in the oven for 5 to 10 minutes at 400 degrees F.
Frequently asked questions
When buying tilapia, it is important to know what to look for, as many retailers may try to sell unsuspecting customers lower-quality fish. The main thing to note is that tilapia should never smell fishy. It may have an earthy scent, but it should not have a strong, unpleasant fish-like odor. If your tilapia smells or tastes fishy, it was handled improperly and may be starting to spoil.
This can start with the quality of the fish itself. I like to get my fish from a trusted butcher or farmer’s market. Then feel it to make sure it is firm before purchasing. Also, if using frozen fish, be sure it is completely thawed and well-dried before coating it. Too much moisture in the fish will also cause it to become mushy. I don’t typically use frozen, but if I do, it has to be a high-quality brand like Regal Springs.
The most important thing is dry tilapia fillets. Make sure each piece of fish is completely dry. I place mine on a clean kitchen towel and pat them dry with paper towels one at a time, then place them on their own dry paper towels. The next thing to consider is a hot, preheated oven. I turn my oven to 400 degrees F and let it heat up completely before placing the fish in to cook.
Don’t concentrate so hard on getting the outside crispy that you forget about the tender meat on the inside. It shouldn’t be cooked for too long, or it will dry out and turn into shoe leather. Tilapia is a thin, delicate fish that overcooks easily, so it needs careful monitoring. I usually check mine for doneness after about 10 minutes. I use an internal meat thermometer and remove it when it reads 145°F.

More fish recipes to try:


Loved this recipe? I’d love to hear from you! 💛 Leave a 5-star rating ⭐️ in the recipe card below and share your thoughts in the comments – I read and appreciate every single one!
Let’s stay connected! Follow me on Facebook, Instagram, Pinterest, and YouTube for more delicious, sweet and savory recipes. Have a question? Ask in the comments, and I’ll be happy to help! 😊 with love Catalina!

Crispy Oven Baked Tilapia
Ingredients
- 6 tilapia filets thawed and pat dry
- 1 egg
- 1 cup buttermilk
- 1 1/2 cups Panko bread crumbs
- 1 teaspoon Italian seasoning dried herbs
- 1 teaspoon dried basil
- 1 teaspoon garlic powder
- 1/2 teaspoon paprika
- 1/4 teaspoon red pepper flakes
- 1/4 teaspoon salt & pepper or to taste
Homemade Light Lemon Aioli:
- 3 tablespoons light mayo
- 1/2 cup plain Greek yogurt
- zest of 1 lemon
- 2 tablespoons lemon juice
- 2 tablespoons chopped green onions
- salt and pepper to taste
Instructions
- Preheat oven to 400 degrees Fahrenheit.
- Add parchment paper to a large rimmed baking sheet. Set aside.
- Whisk together the egg and the buttermilk in a large, shallow bowl. Set aside.
- Add panko breadcrumbs to a large shallow bowl, then mix with the remaining ingredients: Italian seasoning mix, dried basil, garlic powder, paprika, red pepper flakes, salt, and pepper. Stir well to combine.
- Pat the fish filets dry. Using tongs or your hands, take a fish fillet, dip it in the buttermilk mixture, then toss it in the breadcrumb mixture. Place the coated filets on the prepared baking sheet and repeat with the remaining filets.
- Ensure the breadcrumb mixture is not soggy or wet after tossing the first filets, if needed add more panko breadcrumbs. For a thicker coating, after the first round of dipping, dip each fish fillet again into the buttermilk mixture and thebreadcrumbs mixture. In that case, the panko breadcrumb quantity should be doubled.
- Bake for 12 to 15 minutes, or until the coating is golden brown and the fish is fork-tender. Spray with cooking spray midway through baking for a shiny, golden brown coating.
- Remove the fish filets from the oven, lightly squeeze some lemon juice over them, and garnish with parsley. Serve with lemon aioli and lemon wedges on the side.
Homemade Lemon Aioli:
- Add all the ingredients to a medium bowl and stir until fully combined. Taste and adjust for salt, pepper, or lemon juice.
Video
Notes
Choosing a fresh tilapia fillet
A fresh fillet is light pink or white, moist, and has almost no odor. A whole fish is shiny and has clear, bright eyes. Some are green, others are yellow, while many are multicolored, brown, black, and white. They are similar to a seabass or sunfish. They are caught in Taiwan, Indonesia, and Colombia, but are also farmed in China and other countries. Look for a firm fish with red gills and shiny skin.More tips to consider:
- For a thicker coating, dip each fish filet into the buttermilk and breadcrumb mixtures again. In that case, double the quantity of the panko mixture.
- Shake the fillets to let any excess moisture drip off before dipping them in breadcrumbs.
- Make sure the breadcrumb mixture is not wet after tossing the first fillets. If it is, add more panko breadcrumbs.
- For an even crispier crunch, toast the breadcrumbs before using them.
- To make the fish darker brown and shiny, lightly spritz it with a bit of cooking spray.
Nutrition

This looks so delicious! It would be such an incredible meal. I will have to try this some day for sure.
Tilapia is a wonderful white meat fish to fix and enjoy. Cooks fast and is delicious.
I love trying new fish recipes for my family. This recipe looks so yummy. Looking forward to giving this recipe a try.
This looks delicious! And thanks for the tips about how to make baked fish crispy. Our always tend to be on the soggy side.
Tilapia is my favorite fish because it is so mild. This looks delicious, especially with the aioli!
I’ve tried tilapia once before, but I don’t think I cooked it very good. I’m going to try to use your recipe and see if it tastes better than the last time I tried to make tilapia.
Fish is one of my favorite things! I am always looking for new ways to prepare it. My family will love this recipe!
You make tilapia look good! That crispy skin looks so good. I wonder how it would work in the air fryer?
Yum!! Don’t laugh at me, but I’ve actually never madenfish at home…! I’m too nervous! Love the idea of baking it though. Sounds yummy and easy!
I have never tried tilapia but after reading your post and recipe I think I’m going to give it a try! Thanks for the recipe!
Wow! I love to try this one and it looks so yummy. I never tried it before but it’s quite interesting!
I love fish dishes. This tilapia looks delicious. I can almost smell the aroma from over here, yum!
This looks so crispy and delicious! Sounds like a great recipe, and I like how easy it is to make. I am in a cooking rut and will have to give this a try.
Okay, I just printed your recipe because we so love tilapia over here and we love it crispy too. Bet this is so good. Thanks!
We love tilapia and this recipe looks delicious. I’ve never had lemon aioli, but it looks really good.
I love crispy coatings on my meat. This looks so delicious and I can’t wait to get it in the oven.
Oh, that looks so tasty. I tried something similar to this recipe and air fried the fish instead. I would love to try this version. Thanks for sharing!
This oven-baked tilapia looks so delicious! I’ve just now added your recipe to next week’s meal plan and pinned it to Pinterest. Yum. Yum!
This oven-baked tilapia looks really good. Will have to bookmark this on Pinterest for future reference.
This came out so delicious, I followed it to the t even the Homemade Light Lemon Aioli. Thank you, this will be a favorite.
I just had it for dinner tonight.No oil and I tipped it in egg and coated it with panko.Was crispy and the wife loved it.
Glad you loved it Bud! Thanks for visiting