
Apple Tart from Scratch
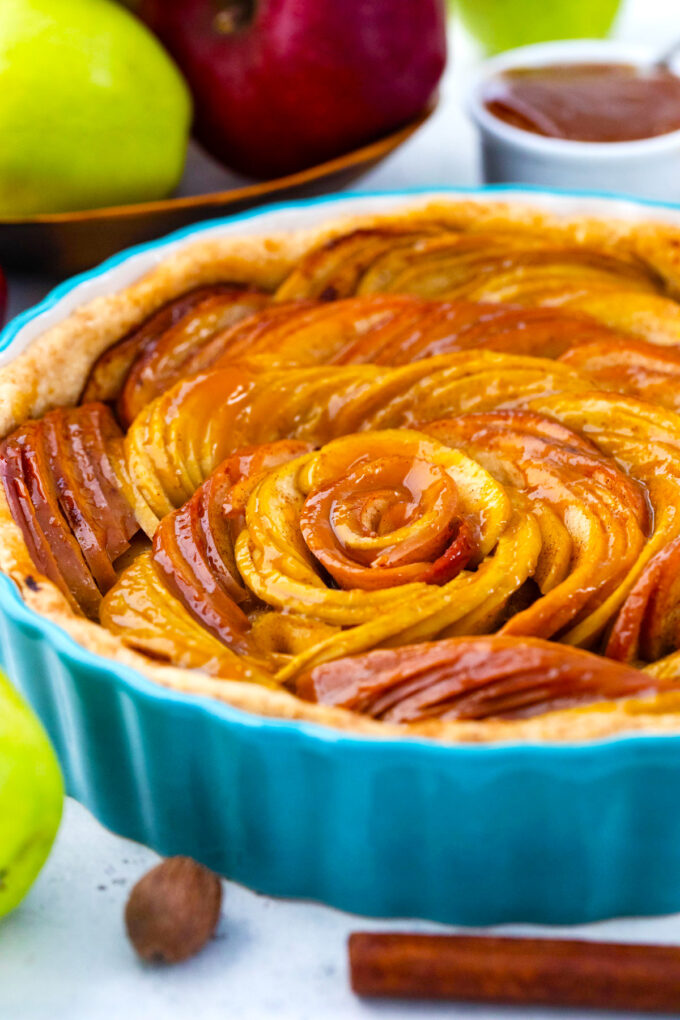
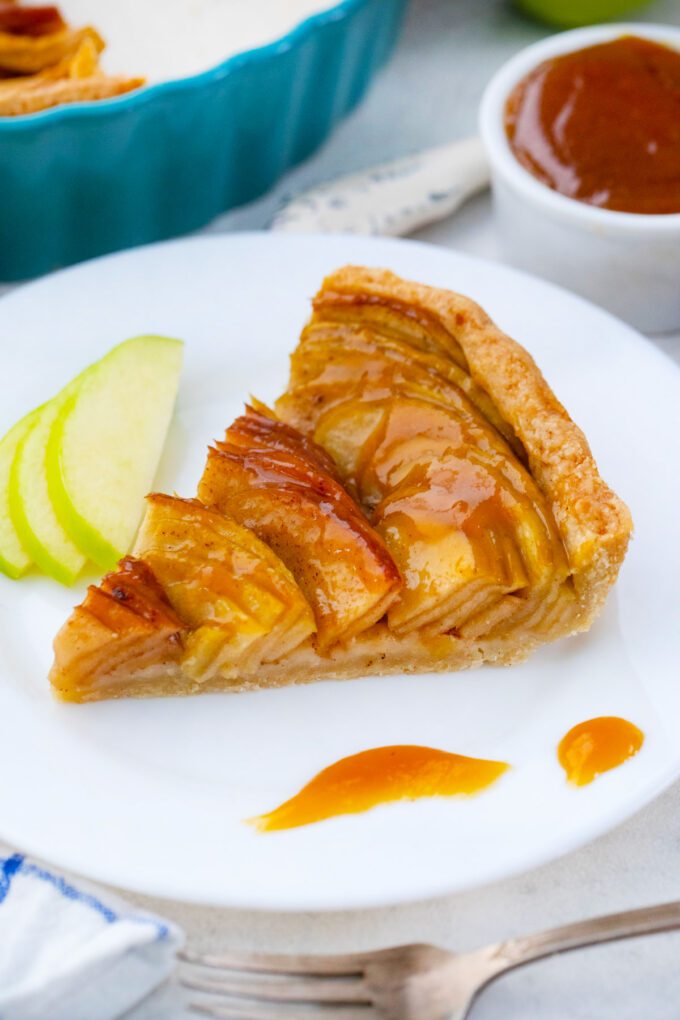
Anytime I need a showstopper dessert, I rely on my homemade apple tart recipe. I use thinly sliced apples in different colors to give the illusion of a floral arrangement. But the way it looks is nothing compared to how it tastes. It is luscious and delectable… mouthwatering. Full of tangy apples covered in a sweet and sticky apricot glaze in a flaky crust flavored with brown sugar and fall spices.
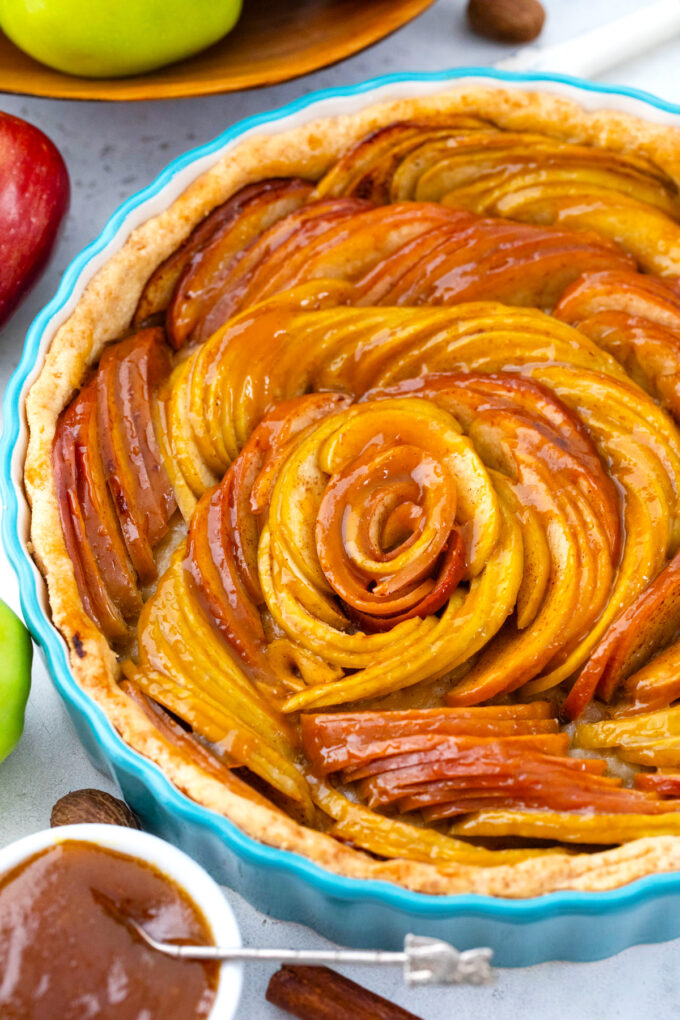
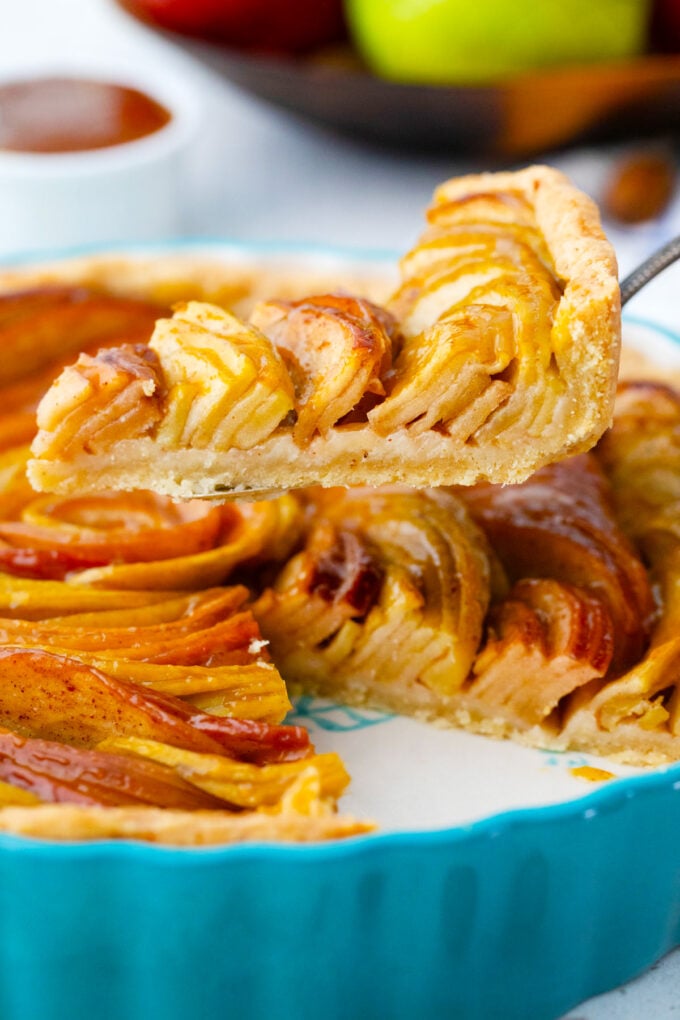
This is a dessert that is simple to make but wonderful to eat. This is one of the prettiest tarts I have ever seen. The best part is that it’s easy to make in just minutes. Simply by slicing, stacking the apples, and spreading them out like a fan is all that’s required. Nothing fancy, but it looks so stunning. I like adding this tart to our Thanksgiving or Christmas celebration, along with sweet potato pie and pecan pie cheesecake.
Table of contents
There is something magical about fall; it’s one of my favorite seasons, and as a family, we look forward to apple picking. Making this classic tart is incredibly satisfying; the kids love helping with the dough and arranging the apple slices, which have been flavored with lemon zest, brown sugar, and spices. The kitchen smells heavenly, of sweet cinnamon and nutmeg. We all eagerly wait for the tart to be baked so that we can enjoy it with large dollops of vanilla bean ice cream!
Why you will love this recipe
- Because it is so simple: With my easy recipe, I make the crust, arrange the fresh apple slices, bake the tart, and serve. How much easier could it be? Even the chopping of the apples is simple because with a mandoline, you can do it in just a few minutes.
- It is so fast: Speaking of fast, this whole dessert can be ready to eat in an hour—a homemade baked apple tart from scratch in about 60 minutes.
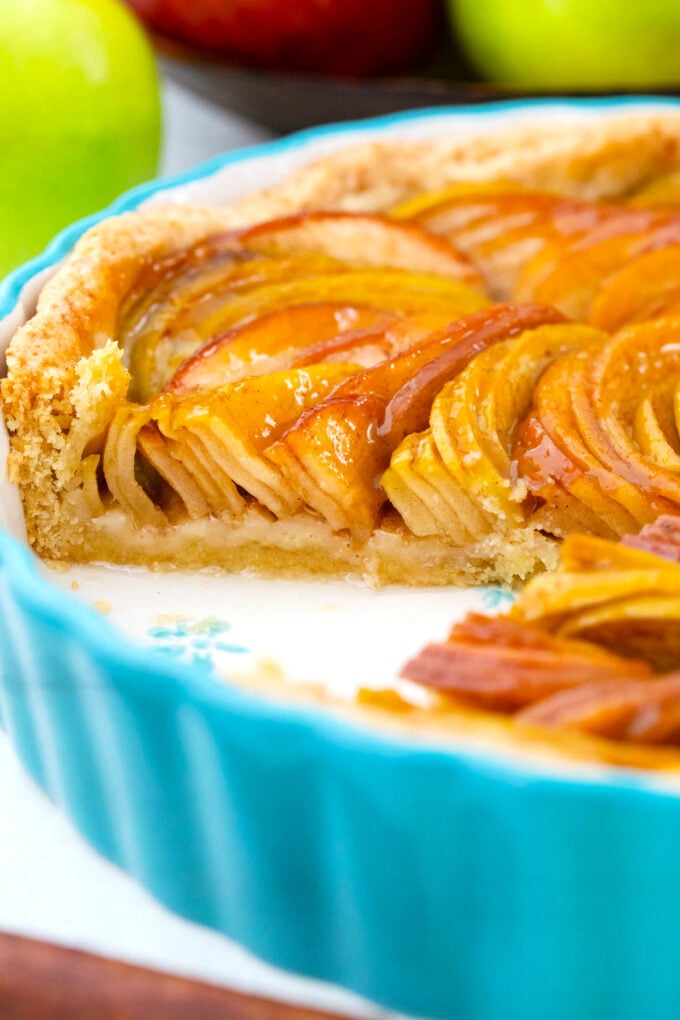
- Fresh ingredients: I use real apples, not canned apple pie filling, and a homemade pie crust. It’s made with all fresh ingredients, so it tastes incredible, and my house smells fantastic.
- Gorgeous presentation: What makes this so amazing is how it looks. Without even doing anything special, you can make this tart look professional. Be sure to take pictures to post on social media!
What you will need
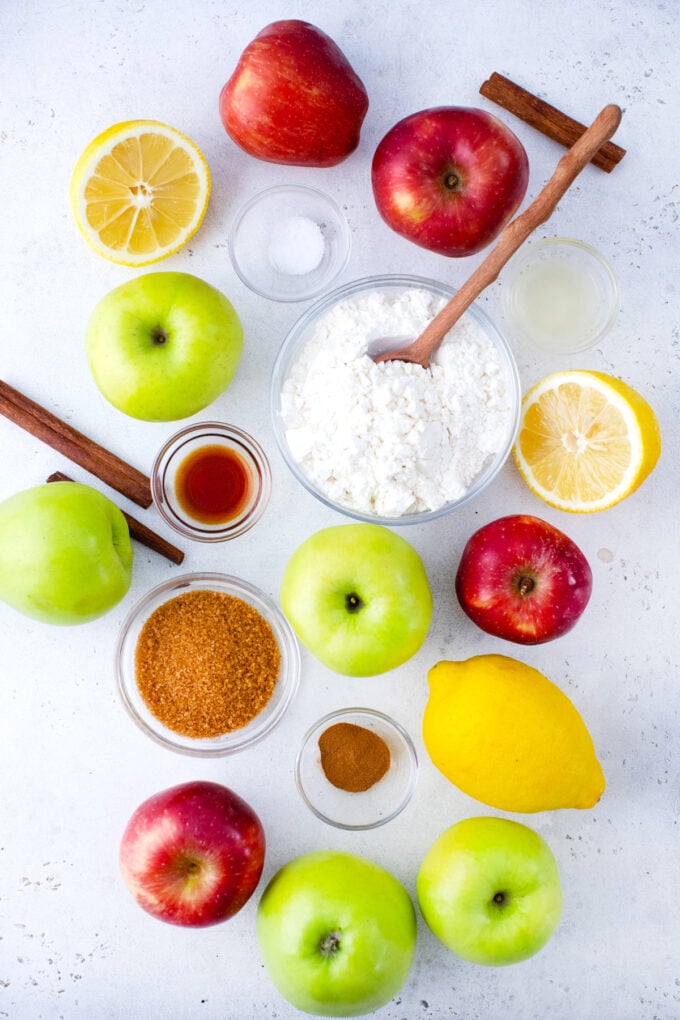
Crust: I always pay attention to the most minor details, so in this buttery crust, besides flour, salt, and unsalted butter, I also add brown sugar and warm spices like nutmeg and cinnamon.
For the filling: The filling is made of thinly sliced tart apples arranged to resemble a floral composition. I flavor the apples with brown sugar, vanilla extract, lemon juice and zest, nutmeg, ground ginger, and ground cinnamon, so every bite is filled with fall aromas.
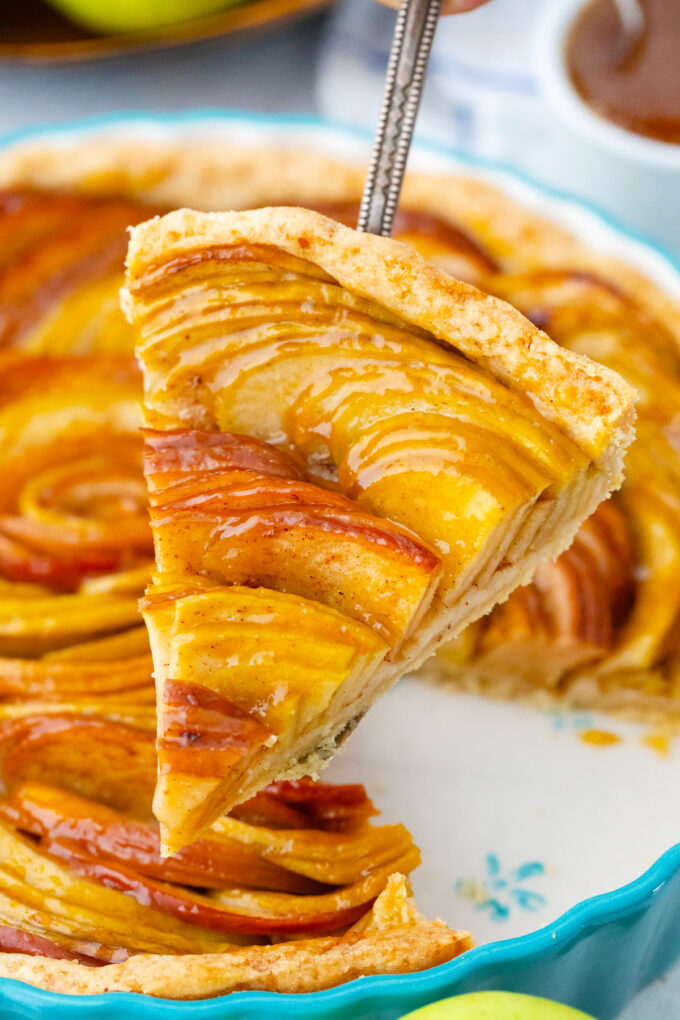
Topping: I brush the apples with a mixture of unsalted butter, sugar, and apricot preserves.
How to make an apple tart?
Preheat the oven: First, I preheat the oven to 350 degrees and grease a 10-inch tart pan with oil.
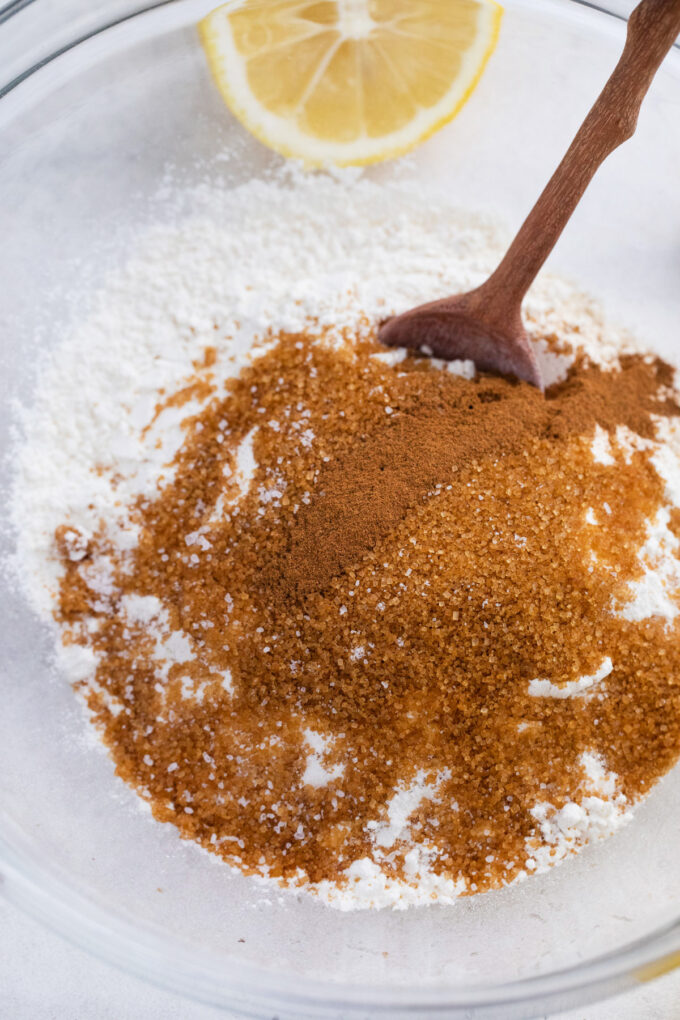
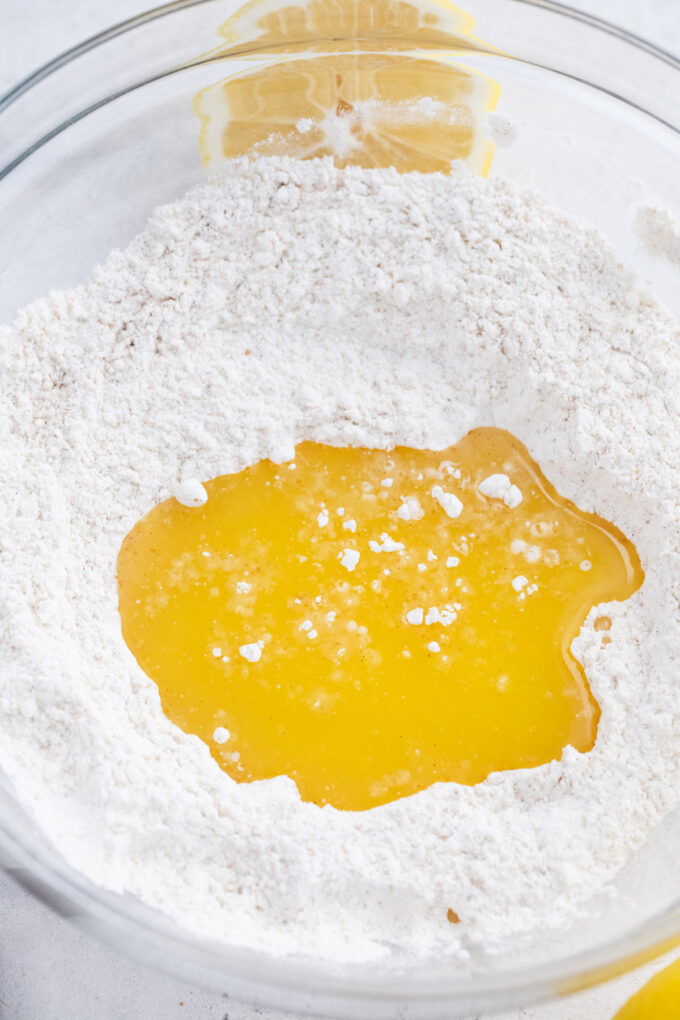
Make the crust: In a large bowl, I whisk together the flour, cinnamon, nutmeg, salt, and sugar.
Form the dough: Then, I add in the melted butter and stir until the dough forms.
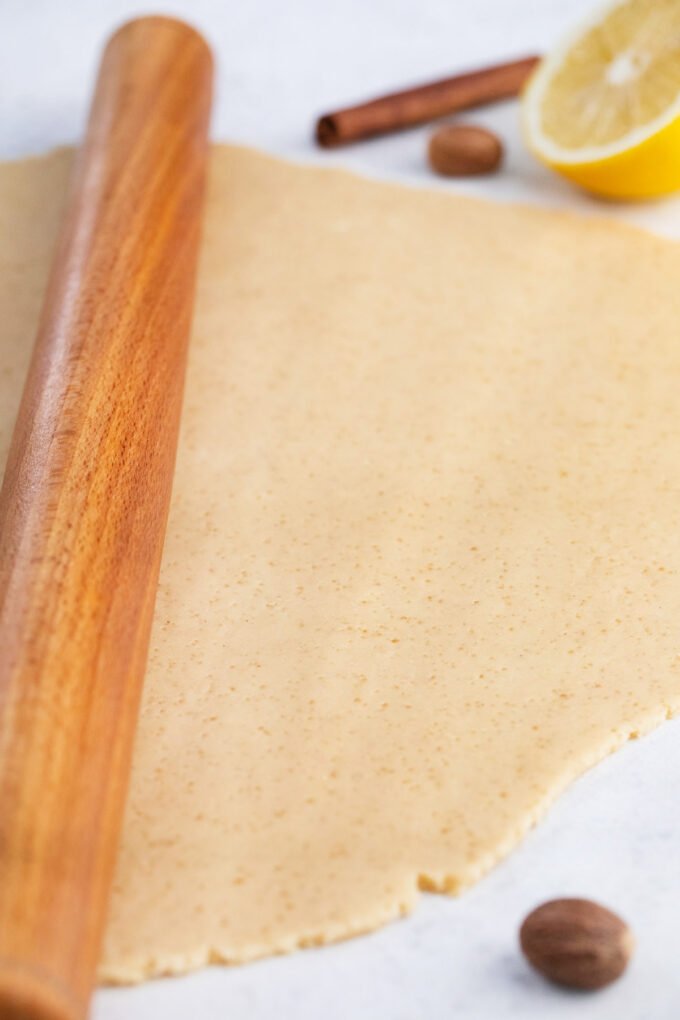
Roll: I roll and press it into the tart pan until it is smooth and even.
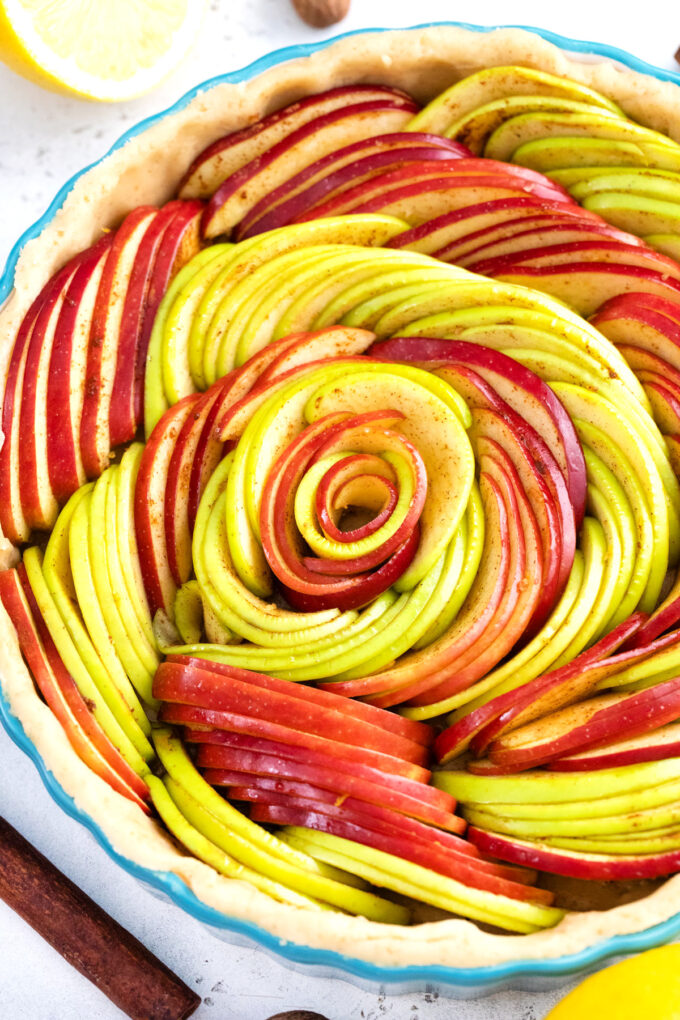
Assemble: Then, in another bowl, I mix the apple slices with lemon zest, juice, brown sugar, vanilla, nutmeg, cinnamon, ginger, and salt. I arrange the apples over the crust as shown in the video.
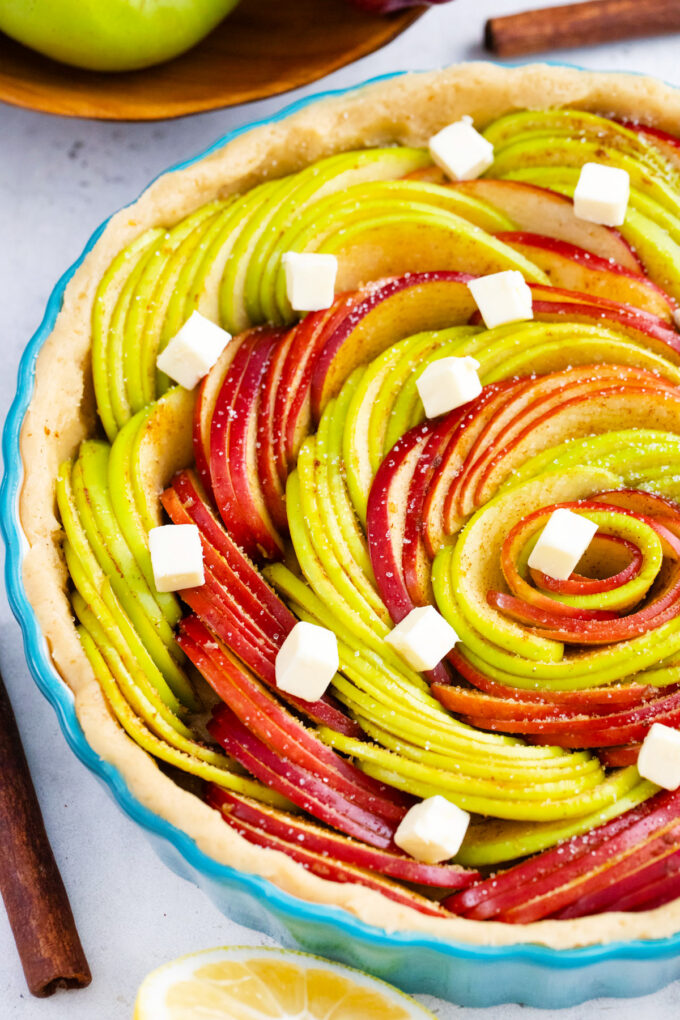
Bake: I sprinkle them with sugar and dot them with small cubes of butter. It cooks for about one hour, until the crust is golden, and the apples are tender.
Cool and serve: Finally, I brush the apples with melted apricot preserves and let it cool slightly before slicing and serving.
Expert tip
The right kind of tart pan
There are many different types of tart pans, commonly seen in stainless steel, glass, and ceramic. However, glass and ceramic pans do not typically have removable bottoms. The removable bottoms are the best part about tart pans, in my opinion. After baking, being able to push up the bottom to release the ring is better than a springform pan. Pure magic!
Therefore, I recommend a 10-inch stainless steel tart pan with a removable bottom for this recipe. It is durable, has excellent heat distribution, and works well for removing the tart without damaging anything. Even a newbie can make a tart look perfect! Anodized aluminum is another fantastic choice, but it is often difficult to find and typically costs more. For those who prefer to use a standard tart pan, I suggest using parchment paper and non-stick baking spray.
More tips to consider
- My favorite apples for this dessert are Granny Smith, but I also like Fuji, Pink Lady, Ambrosia, Braeburn, and Honey Crisp.
- The apples that I would avoid are Golden Delicious, McIntosh, Cortland, Gala, and Red Delicious because they are too soft.
- I use a mandoline to get neat, thin slices.
- Prebaking can prevent the tart crust from being soggy.
- Apple juice is sticky and can leave a mess on the pan. I suggest using parchment paper or greasing the tart pan well.
Recipe variations and add-ins:
- Caramel apple tart: For a totally decadent tart that everyone will fall in love with, drizzle some of my caramel sauce on top of the apples instead of apricot preserves. It is easy to make in 10 minutes and only needs three ingredients.
- Different fruit glaze: Rather than glazing the apples with apricots, I have also used peach, persimmon, and pear preserves. They all taste incredible.
- Other crust: Instead of making the crust in the recipe, use a store-bought pie crust or puff pastry.
- Add more fruit: I have added other fruits to this tart to mix things up, too. My family’s favorite was when I added Bing cherries. The sweet and tangy mixture was perfect together.
- Toasted coconut: To give this tart a tropical theme, I sprinkle some toasted coconut on top, and everyone loves it.
Serving suggestions:
Everyone knows that vanilla ice cream goes with apple pie, but it also goes wonderfully with this apple tart, especially when drizzled with some homemade caramel sauce. I really love serving this dessert at my ladies’ brunch with my famous apple cider mimosas. If it is a wine list you’re looking for, I like dry Marsala, Chardonnay, Tawny Port, and Sauvignon Blanc with this apple tart.
Cheese is great to serve with apple desserts too—any cheese, but I especially like Gouda, Brie, Cheddar, and Camembert. This would be an excellent dessert to serve after a meal of apple cinnamon pork chops. This is also a wonderful dessert for the Thanksgiving table, served with a seasonal pumpkin spice latte.
Storage:
- Refrigerate: I place my leftover tart in an airtight container in the fridge for up to three days.
- Freezing: To freeze, I wrap it in plastic and then place it in a freezer bag. It will stay fresh for up to three months.
- Defrost: Thaw overnight in the refrigerator for the best flavor.
Frequently asked questions
I prefer Granny Smith apples for most of my apple dessert dishes because they are both sweet and tart with a clean and crisp bite. They hold their shape when they are baked, too, and will not turn to mush. Fuji, Pink Lady, Ambrosia, Braeburn, and Honey Crisp are my other favorites. I tend to avoid Golden Delicious, McIntosh, Cortland, Gala, and Red Delicious because they are soft.
When slicing a large number of apples that I need to look nice for a dessert like this, I usually use my food processor because it can be set to a specific thickness, ensuring precision. Then, I can feed the slot, and it will make perfect slices every time. A mandoline will also do the work well, but not as quickly or as precisely.
A soggy crust can be from the filling being too wet and soaking into the raw dough before it is set. One way to prevent this is to parbake the crust. Just chill the crust for 10 minutes and then fill it with pie weights before baking it for 10 minutes. Also, bake it on a hot baking sheet. Heat a pizza pan in the oven before placing the tart pan in it, and the tart will cook up crisp and set quickly.
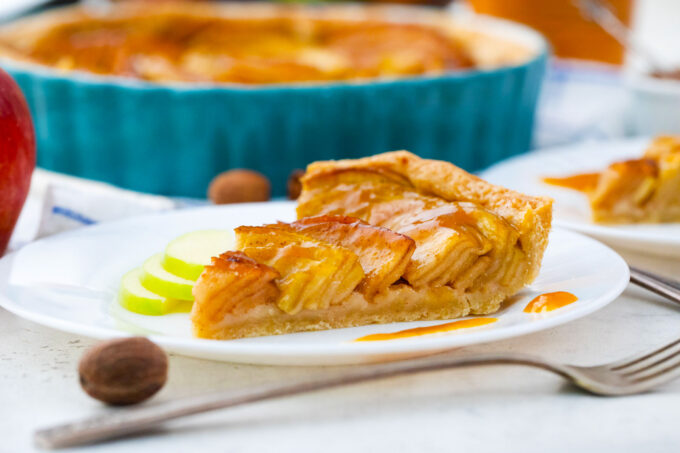
I prefer my apples peeled just for the smoothness of this dessert. However, if you like the peeling on the apples, that is fine too. Especially if the apples are cut thin, it will not be an issue. The apples will soften as the tart cooks anyway. However, I feel that since it’s a tart, the apples should be sleek and smooth.
More pies and tarts to try:


Loved this recipe? I’d love to hear from you! 💛 Leave a 5-star rating ⭐️ in the recipe card below and share your thoughts in the comments – I read and appreciate every single one!
Let’s stay connected! Follow me on Facebook, Instagram, Pinterest, and YouTube for more delicious, sweet and savory recipes. Have a question? Ask in the comments, and I’ll be happy to help! 😊 with love Catalina!

Apple Tart from Scratch
Ingredients
For the filling:
- 5 apples cored, and thinly sliced – I use a mix of red and green tart apples
- 1/3 cup packed brown sugar
- 1/2 lemon juiced
- 1 teaspoon lemon zest
- 1 tablespoon freshly grated ginger
- 1 teaspoon ground cinnamon
- 1/4 teaspoon nutmeg
- 1 teaspoon pure vanilla extract
For the crust:
- 1 1/3 cups all-purpose flour
- 1/4 cup packed brown sugar
- 1/2 teaspoon kosher salt
- 1/4 teaspoon ground cinnamon
- 1/4 teaspoon ground nutmeg
- 10 tablespoon unsalted butter melted
Finishing touches:
- 1 tablespoon granulated sugar or brown sugar
- 2 tablespoons cold unsalted butter cut into small cubes
- 1/4 cup peach preserves or apricot preserves – melted
Instructions
- Preheat the oven to 350 degrees Fahrenheit.
Filling:
- Wash, dry, core, and thinly slice the apples, if possible with a mandoline, so you have slices that are the same thickness.
- In a large bowl, toss the sliced apples with brown sugar, lemon juice, zest, grated ginger, cinnamon, nutmeg, vanilla, and salt together.
Crust:
- In a large bowl, whisk together the flour, brown sugar, salt, cinnamon, and nutmeg. Next, add the melted butter and stir until a dough forms.
- Roll the mixture out on a lightly floured surface, then press it into a 10-inch or 11-inch tart pan with a removable bottom, ensuring the dough is smooth. If you are using a pan without a removable bottom, place parchment paper at the bottom before adding the dough.
Assemble:
- Arrange the apple slices on the crust in a fan or rose pattern, packing them tightly. Sprinkle granulated sugar over the filling and dot with small pieces of butter.
- Bake the apple tart until the crust is golden and the apples are tender, about 1 hour.
Finishing touches:
- After taking the tart from the oven, brush the top with melted preserves and let it cool slightly before slicing and serving.
Notes
The right kind of tart pan
There are many different types of tart pans, commonly seen in stainless steel, glass, and ceramic. However, glass and ceramic pans do not typically have removable bottoms. The removable bottoms are the best part about tart pans, in my opinion. After baking, being able to push up the bottom to release the ring is better than a springform pan. Pure magic! Therefore, I recommend a 10-inch stainless steel tart pan with a removable bottom for this recipe. It is durable, has excellent heat distribution, and works well for removing the tart without damaging anything. Even a newbie can make a tart look perfect! Anodized aluminum is another fantastic choice, but it is often difficult to find and typically costs more. For those who prefer to use a standard tart pan, I suggest using parchment paper and non-stick baking spray.More tips to consider
- My favorite apples for this dessert are Granny Smith, but I also like Fuji, Pink Lady, Ambrosia, Braeburn, and Honey Crisp.
- The apples that I would avoid are Golden Delicious, McIntosh, Cortland, Gala, and Red Delicious because they are too soft.
- I use a mandoline to get neat, thin slices.
- Prebaking can prevent the tart crust from being soggy.
- Apple juice is sticky and can leave a mess on the pan. I suggest using parchment paper or greasing the tart pan well.
This is so pretty, and it’s so good! I also love the extra texture and rustic feel leaving the peel on gives the tart.
What a beautiful dessert! I also love that it looks delicious, easy to make, and just perfect for an afternoon pick me up.
Maureen | http://www.littlemisscasual.com
I have never made a tart this pretty before! The flavor is so perfect, and it was easy to make it look like yours.
I am so in love with this tart! It’s so good and so easy to make, but it makes me LOOK like a pastry chef. LOl.
I have actually never eaten or made an apple tart! I can’t wait to give this recipe a try! I just know it’s going to be good!
Absolutely stunning! The rose-like apple arrangement makes this tart look like art! The apricot glaze and flaky crust sound divine. I can’t wait to try this for the holidays.
I made this for dessert and it looked so pretty on the table. The apples baked perfectly and the flavor was wonderful!
I love how this recipe makes the apple tart feel both elegant and completely doable — the rose-patterned apples and warm spice glaze are beautiful touches that make it look like a baker’s work, even if you’re just starting out.
Apple tarts are lovely even more so when you have made your own crust from scratch. This is so beautifully presented. It’s a lovely autumnal dessert.
This is stunning! The way the apples are layered makes it almost too pretty to eat… almost. I bet the smell of cinnamon and baked apples fills the whole house — total fall vibes right there.
OMG! This is so delicious. We tried the recipe yesterday and it was so good. I am going to include this in our thanksgiving spread. Thank you for so much for the recipe. By the way, I need to work on the arrangement of the apple slices to make a better “floral” illusion.