
Rosette Cookies Recipe
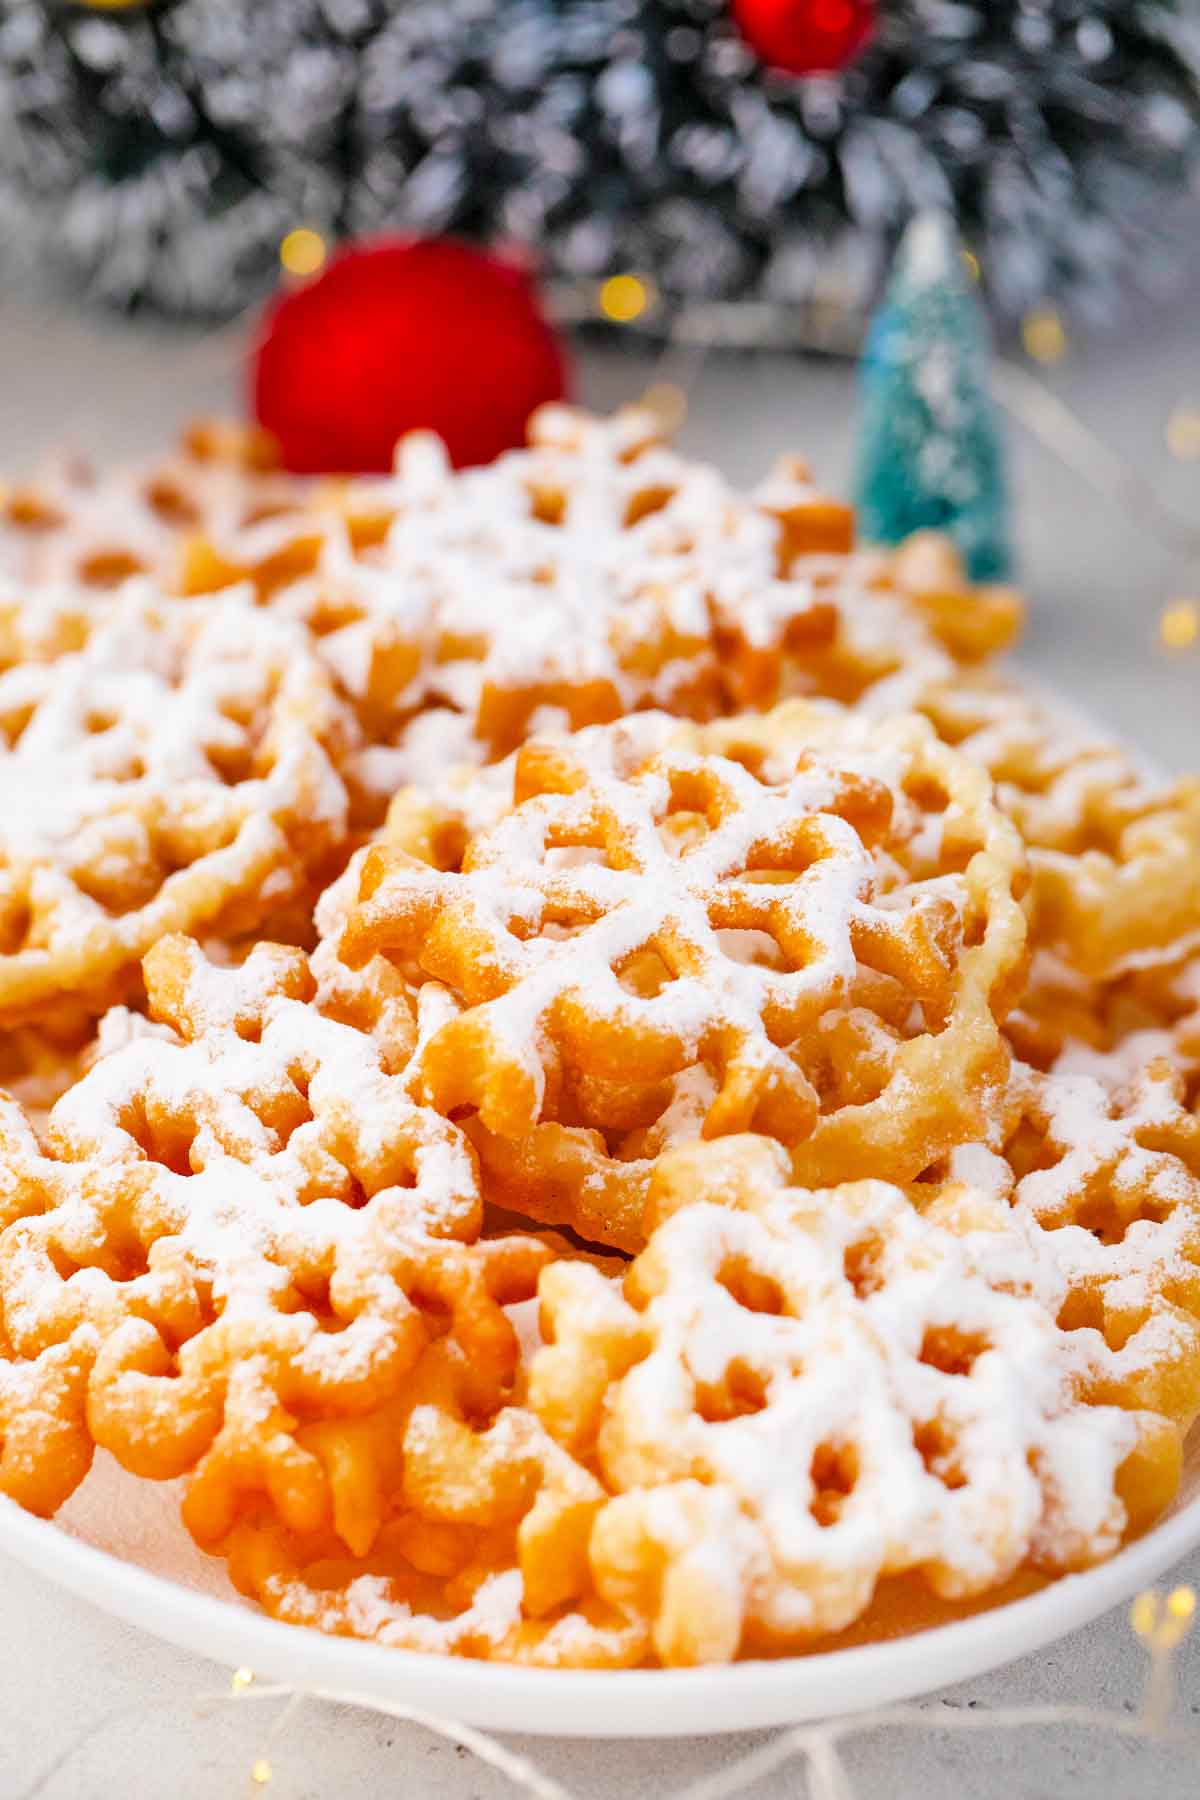
These 30 minute Rosette Cookies are the most festive treats to make this holiday season. They are a crisp fried treat coated in powdered sugar and one of my family’s favorite recipes for Christmas. With just a few ingredients like flour, eggs, milk, sugar, and vanilla, my recipe is easier than many other holiday desserts and perfect for serving a crowd since it makes 40 cookies.

I love making these Swedish rosette cookies every year because they are light, crisp, and great for snacking while we decorate the Christmas tree, especially alongside my Santa Claus cheese board. These airy cookies fry into delicate patterns and get a sweet dusting of sugar that we look forward to every holiday season. I also enjoy getting the kids involved by letting them decorate the rosettes with colorful royal icing, and they always look extra festive when we pack them up as gifts for family and friends.
Table of contents
To prepare these cookies, I recommend buying a rosette iron mold set with different shapes. I chose one with Christmas tree and snowflake molds because those are my kids favorite shapes. Then I prepare the batter and fry the cookies in a high smoke point oil so they come out crisp and airy. For the fun part, I either dust them with powdered sugar or let everyone decorate them with sprinkles and icing to make them super tasty. With my step by step instructions, I am sure you will nail this recipe, and I really hope you give it a try.
Why you will love this recipe
- 30 minute treat: I love that the batter mixes in minutes and fries up into the lightest crisp cookie. They taste a bit like a delicate funnel cake with a snowy dust of powdered sugar that kids and adults love.
- Best holiday snacking: These cookies are great for Christmas gatherings since they stay light and airy, and everyone grabs one or two while we decorate the tree or finish setting up the table.
- Kid friendly activity: I enjoy handing my kids the icing and sprinkles so they can decorate the cookies after frying. It keeps them happy in the kitchen, and each cookie becomes a little holiday project we enjoy as a family.
- Makes plenty for sharing: This recipe makes about 40 crisp cookies, so it is wonderful for gifting, packing in tins, or adding to a dessert tray. The simple mix of flour, eggs, milk, vanilla, and sugar creates a holiday classic that my crew enjoys.
What you will need

- Dry ingredients: I simply use all purpose flour, granulated sugar, and kosher salt.
- Wet ingredients: I whisk the large eggs, whole milk, and vanilla extract together to create a smooth batter.
- Topping: I dust the warm cookies with powdered sugar to give them a light sweet coating.
- Oil for frying: I like using safflower oil since it has a high smoke point and keeps the cookies crisp.
How to make
Mix wet ingredients: First, I beat the eggs in a medium bowl, then I pour in the milk, sugar, and vanilla extract and mix everything well.
Add in the dry ingredients: Little by little, I whisk in the sifted flour and salt. I keep mixing until everything is combined and the batter has a smooth liquid consistency similar to heavy cream.

Heat the oil and prep: Next, I heat the oil in a deep skillet and set up my draining station by placing two sheets of paper towels next to the stove for drips and more on a cookie sheet for the finished cookies.
Dip and fry: Once the oil is hot, I dip the rosette iron into the oil, then into the batter, and place it right back into the oil to fry.

Deep fry until golden brown: I let the batter release from the hot iron and fry for 2 to 4 seconds on one side, then flip and cook until the edges are golden brown.

Let the excess oil drain and finish: I lift each cookie out as soon as it starts to brown and let the extra oil drip onto the paper towels before setting it on the paper towel covered rack. Then I let the cookies cool for a few seconds and dust them with powdered sugar or add a bit of icing.

Continue frying: I keep going with the remaining batter until the whole bowl is used.

Expert tip
Make sure iron is hot
Keep your rosette iron very hot between each batch. A hot iron helps the batter attach the right way and creates the crisp and airy texture we want. I warm the iron in the oil for a few seconds before dipping it into the batter again, and it is key for perfect rosette cookies, so do not skip this step.
More tips to consider:
- You could also use a deep fryer or electric fryer to make these rosette cookies. Deep fry the same way you would in a pan.
- When I store or freeze them, I place wax paper or parchment between each cookie so they stay crisp and do not stick.
- I like to use a candy thermometer to make sure the oil stays hot enough because cool oil will not let the batter stick to the iron.
- I always make sure my batter is thin and smooth like heavy cream so it coats the iron the right way.
- When a rosette holds on to the iron, I gently slide it off with a table knife so it stays in one piece.
- I never dip the iron too deep into the batter since going over the top will keep it from releasing in the oil.
Recipe variations and add-ins:
- Sweet cinnamon sugar: I mix 2 tablespoons of sugar with 1 teaspoon of cinnamon and dust the warm cookies. This adds a sweet holiday touch my kids enjoys.
- Chocolate dip: I dip half of each rosette into about 1 cup of melted chocolate. Then I add sprinkles for a cute finish.
- Colorful icing day: I drizzle about 2 tablespoons of royal icing on each cookie and use different colors for holiday patterns. My kids always jump in to help.
- Bright citrus glaze: I whisk 1 cup of powdered sugar with 1 to 2 tablespoons of orange juice and drizzle it on the cooled cookies. This one is my favorite variation!
- Coconut snow look: I sprinkle about 2 tablespoons of shredded coconut on top right after dusting the cookies. It makes them look like little snowflakes.
Serving suggestions:
When I make these rosette cookies for the holidays, I like to set them out with a warm drink so everyone can snack and sip while we decorate or wrap presents. They taste wonderful with my homemade apple cider or a cozy cup of red velvet hot chocolate, the warm spices pair so well with the crisp cookies.
If we are hosting friends, I sometimes add my London Fog latte recipe for the adults and keep a bowl of whipped cream nearby so the kids can top their drinks and cookies. For a little extra sweetness on the table, I love adding my Christmas Oreo Ornaments since they look cute beside the rosettes and fit the Christmas theme perfectly. It all makes a simple holiday experience that is welcoming and lets everyone enjoy a mix of treats.
How to store leftovers:
- Store: I store my delicate rosette cookies loosely covered so they do not break, then place them in an airtight container for up to a week.
- Freeze: I freeze rosettes once they are fully cooled and keep them in a freezer safe container for up to 2 months.
- Thaw: I let the frozen cookies thaw overnight in the fridge so they keep their crisp texture.
- Reheat: I warm the thawed cookies in a low oven before adding a fresh dusting of powdered sugar.

Frequently asked questions
When my batter refuses to stick, it is usually because the iron is not hot enough. I let the iron sit in the oil for a few seconds and once it heats up well, the batter clings right away which makes the whole process smoother and a lot more fun for the kids to watch.
Soggy cookies happen when the oil is too cool so I always check the temperature with a thermometer. Rosette cookies fry best when the oil stays around 350 to 365 degrees F. At this temperature they crisp up fast, keep their delicate shape, and do not absorb extra oil.
These cookies are very delicate, so I lift them carefully with tongs or a fork. I also store them loosely in a container so they are not pressed together and they make it to the cookie table looking just as neat as when I set them down.

More Christmas cookies to try:


Loved this recipe? I’d love to hear from you! 💛 Leave a 5-star rating ⭐️ in the recipe card below and share your thoughts in the comments – I read and appreciate every single one!
Let’s stay connected! Follow me on Facebook, Instagram, Pinterest, and YouTube for more delicious, sweet and savory recipes. Have a question? Ask in the comments, and I’ll be happy to help! 😊 with love Catalina!
Rosette Cookies Recipe
Ingredients
Rosette cookies:
- 2 eggs
- 1 cup all-purpose flour
- 1 tablespoon granulated sugar
- 1/4 teaspoon kosher salt
- 1 cup milk
- dash of vanilla extract
- 2 cups cooking oil
To decorate:
- Royal icing
- Sprinkles
- Powdered sugar
Instructions
For the batter:
- Layer 2 cookie sheets with paper towels and place them next to the stove.
- In a medium bowl, using a hand whisk or electric mixer, beat the eggs, add vanilla, whisk in the sugar and milk. Mix until incorporated.
- Little by little, whisk in the sifted flour and salt. Beat until combined and you have a liquid consistency like heavy cream.
Fry:
- In a deep pan, heat the cooking oil.
- Immerse the mold into the heated oil first and after that dip it in the batter, then back into the oil.
- The batter will pull away from the mold and form a thin cookie. Fry on one side for 2-4 seconds, then flip it and fry it until both sides are golden. Repeat until you finish all the batter.
- Transfer each cookie to the paper towel-lined baking sheets.
- Let the cookies cool dust with confectioners sugar or top with icing and decorate.
Notes
Make sure iron is hot
Keep your rosette iron very hot between each batch. A hot iron helps the batter attach the right way and creates the crisp and airy texture we want. I warm the iron in the oil for a few seconds before dipping it into the batter again, and it is key for perfect rosette cookies, so do not skip this step.More tips to consider:
- You could also use a deep fryer or electric fryer to make these rosette cookies. Deep fry the same way you would in a pan.
- When I store or freeze them, I place wax paper or parchment between each cookie so they stay crisp and do not stick.
- I like to use a candy thermometer to make sure the oil stays hot enough because cool oil will not let the batter stick to the iron.
- I always make sure my batter is thin and smooth like heavy cream so it coats the iron the right way.
- When a rosette holds on to the iron, I gently slide it off with a table knife so it stays in one piece.
- I never dip the iron too deep into the batter since going over the top will keep it from releasing in the oil.
I’ve never tried making these but they look delicious! And I love that the oil is Non-GMO!
These are amazing! They actually seem much easier to make than I would have thought. I’m going to try them.
I have always wanted to make these. They are so good! I’m going to have to try them this year.
I have never seen these kinds of cookies before and they look so cool!
Wow, my niece really loves cookies! She will surely love this. Thank you so much for sharing the step-by-step directions on how to make it!
Looks absolutely delicious! This needs to happen soon!
I absolutely need to try making these Rosette Cookies! Your detailed recipe and tips make it sound like a fun and delicious holiday project.
Perfect for a lighter cookie snack. I love the variety of cookies this time of year.
I appreciate your recommendation for Rosette Cookies and the mention of Oléico Safflower Oil. It’s great to have a delicious and easy holiday recipe that my family will enjoy. Happy holidays to you too!
These are such pretty cookies! I’ve never tried to make these but maybe I should.
I haven’t ever made cookies in this way before. But they look so cute and delicious!
These are really perfect cookies!! My kids enjoyed it! Thanks for the recipe!
They make something very similar for Christmas in many parts of India as well.. and though i have not attempted making them, I am guessing they should taste the same.. your recipe shows that maybe i can try to make them
These colors are so cute and festive. I’m guessing they even taste similar to a funnel cake too. I’ll have to give these a try. I’m going to make cookies tomorrow or on Christmas Day.
This kind of cookies is unique. I didn’t try this kind of cooking for cookies. Thanks for sharing the recipe.
These are so pretty! I love how festive they are.
These were much easier than I thought they would be. So good, too!
I really enjoyed these. They were relatively easy to make, too. The first ones were a little odd looking, but I got the hand of it!
Ooh. These are so good! I made a test run last night, and they’re going on my Christmas table!
These look really good. I’ve already ordered the mold!
I haven’t made these yet, but looking forward to it! They look amazing and very similar to treats my Italian family used to make. So pretty!
These are so delicate and beautiful! I love that they’re a 30-minute, family-favorite holiday tradition. That light, crisp texture with the dusting of powdered sugar sounds absolutely perfect!
These bring back so many fond memories! I haven’t had one in years so I am very excited for this recipe. They look beautiful ^_^