Most VIRAL Limoncello Tiramisu Recipe
Limoncello Tiramisu is a light and creamy Italian dessert that is absolutely delicious, made with refreshing Limoncello and lemon curd. It has layers of sweet and tangy whipped mascarpone limoncello cream sandwiched between soft and lemony ladyfinger cookies dipped in limoncello and fresh lemon juice. It is actually an easy dessert to make and is perfect for summer barbecues or any time of the day.

This classic tiramisu recipe came from Italy. However, the original classic Italian dessert was made by dipping ladyfinger cookies into coffee and layering them with a whipped cream mixture of sugar, eggs, and mascarpone cheese, then flavored with cocoa powder. There are other varieties, but this is the one invented by Alba di Pillo and Roberto Linguanotto in 1969.
If you love lemon-flavored treats, this delicious dessert is definitely one you should try. The mascarpone lemon filling is made with limoncello and lemon juice to give it a sweet flavor with a big kick of tanginess. And all you need are some cookies, lemon curd, lemon juice, mascarpone cheese, vanilla pudding, sugar, and milk.
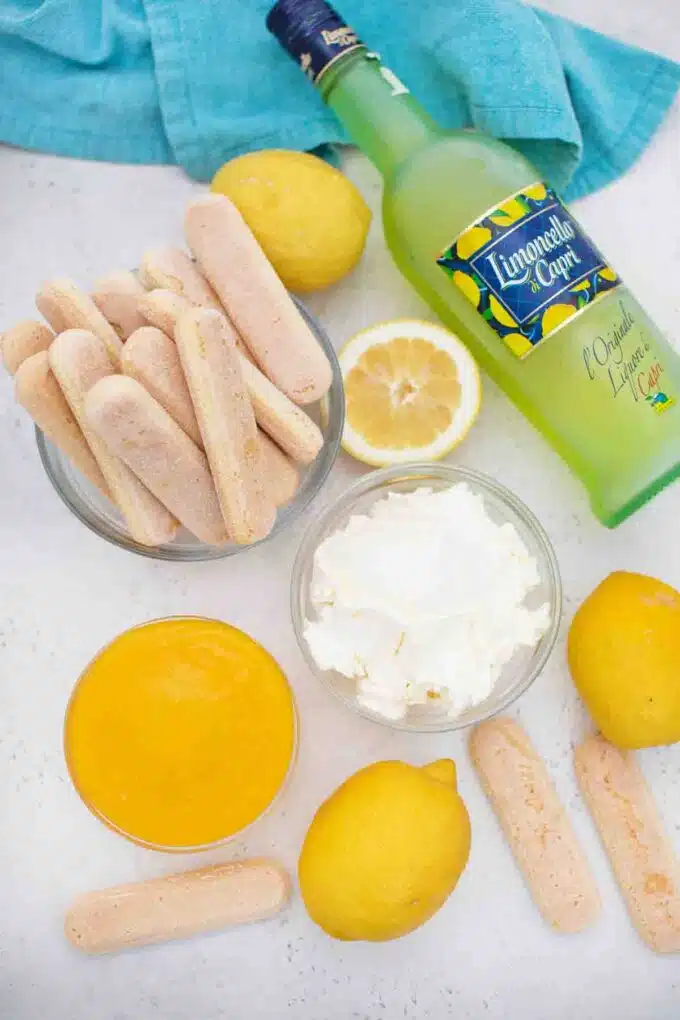
Ingredients needed:
Here are the simple ingredients for this limoncello tiramisu recipe. When you are ready to get started, scroll down to our handy recipe card for complete instructions and measurements.
- Ladyfinger cookies
- Lemon curd
Whipped cream ingredients:
- Mascarpone cheese
- Instant vanilla pudding mix
- Lemon curd
- Powdered sugar
- The juice of one lemon
- Whole milk
Limoncello syrup ingredients:
- The juice of one lemon
- Limoncello liqueur: For less alcohol use half lemonade.
How to make limoncello tiramisu from scratch?
- Beat the pudding: First, beat the instant pudding and milk in the bowl of a stand mixer until it is thick and creamy. This should take about five minutes. Then, stir in the lemon curd and stir to combine. Set aside one and a half cups of lemon curd for topping.
- Make limoncello mascarpone cream: After, in a separate large bowl, whisk the mascarpone and powdered sugar until creamy and combined before adding the lemon juice. Mix thoroughly until stiff peaks form.
- Add pudding: Now, gently fold in the pudding mixture, stirring carefully with a rubber spatula until it is fully combined.
- Assemble the limoncello tiramisu: Then, dip the ladyfingers into the Limoncello mixture one at a time, arranging them on the bottom of a 9×9-inch baking dish to make a single layer of ladyfingers. Spread half of the cream mixture on top and repeat so you have two layers of ladyfingers dipped in lemon mixture.
- Chill and serve: Finally, pour and spread the remaining lemon curd on top of the tiramisu and refrigerate overnight before serving.

Recipe variations:
- Lemon zesty: For even more lemon flavor, add a teaspoon of grated lemon zest to your mascarpone mixture. The juice and zest together create an intense lemon flavor.
- Heavy cream: Instead of pudding, add two cups of heavy whipping cream for a lighter cream filling.
- Egg yolks: For a richer cream filling, use three large egg yolks in the batter.
- No mascarpone: Similarly, you can substitute cream cheese for mascarpone cheese.
- Other substitutes: In fact, you could also try using full-fat sour cream, ricotta cheese, or cream fraiche for the mascarpone filling.
- Virgin limoncello tiramisu: Use frozen lemonade concentrate instead of limoncello for a virgin tiramisu recipe.
- Different cookies: If you do not have any ladyfingers, try other cookies like shortbread, Nilla Wafers, or even madeleines.
- Other flavors: For something unique, switch the vanilla pudding to another flavor. Lemon would be perfect, or you can try lime, orange, or even chocolate.

How to serve:
This lemon tiramisu recipe is an easy no-bake dessert that is perfect for summer. Who wants to turn on the oven when it is 90 degrees outside? Here are some awesome ideas for serving or using one of your own. Share your ideas with us in the comments section at the bottom of the page.
- You can never have too much-whipped cream! Add a dollop of our homemade whipped cream to each slice when serving.
- Want to make your limoncello tiramisu fancier? Put the remaining cream mixture into a pastry bag and pipe dollops of cream flowers and swirls on top of the tiramisu. If you do not have a pastry bag, just put it in a sandwich bag and cut one of the tips off.
- For an even fresher lemony flavor, why not make your own lemon curd? Try this easy recipe for lemon curd made in an instant pot.
- Add thin slices of fresh lemons on top of your cake. Twist the lemon slices to make it even more festive.
- This limoncello tiramisu goes great with a lemon-flavored beverage like lemonade or for a boozy beverage, make this lemonade vodka club soda.
- Another great pairing would be to serve a scoop of vanilla or lemon ice cream with your limoncello tiramisu.

Frequently asked questions
What is limoncello?
Limoncello is an alcoholic beverage with an intense lemon flavor. It is usually made in the Amalfi Coast area where the best Italian lemons are grown. They are full of essential oils and an aroma that cannot be gotten anywhere else. It contains between 25 and 30% alcohol by volume (ABV) and is often served as a drink over ice or used in cakes or cookies.
What is tiramisu?
The name tiramisu actually means “pick me up” in Italian because the original Italian dessert contained enough coffee and cocoa to get a boost of energy. It was first made with ladyfingers soaked in coffee and layered with a sweet cream that is flavored with cocoa powder. The classic tiramisu was served in a glass dessert bowl so you could see its layers.
Can I make this a non-alcoholic drink?
The alcohol content of the limoncello in this cake is minimal and will not get anyone intoxicated. But if you want it to be completely non-alcoholic, you could use lemon syrup or lemon simple syrup and lemon juice instead of limoncello for a virgin drink. Just mix equal parts lemon juice with sugar then cook in a small saucepan on medium heat. Bring sugar and lemon juice to a boil and stir until the sugar is dissolved.

What type of ladyfinger cookies are best?
The traditional ladyfinger cookie is Italian savoiardi, thick and a bit crispy around the edges. The ladyfingers you can get in America are softer and moister, so it is a good idea to make your own or order them online. The three most popular are Gastone Lago, Di Leo, and Vicenzovo.
What are the nutrition facts in this recipe?
For one small serving, you get 210 calories, 7 grams fat, 4 grams of saturated fat, 31 carbs, 27 mg of cholesterol, 120 mg of sodium, and 21 grams of sugar. But there are also some vitamins and minerals including 3 grams of protein, 1 mg of iron, 44 mg of calcium, 2 mg of Vitamin C, 120 units of vitamin A, 1 gram of fiber, 99 mg of potassium, and 3 grams of protein.
How to store leftovers:
- Store: Your leftover limoncello tiramisu can be refrigerated in an airtight container for up to four days.
- Freeze: To keep leftovers longer than that, you can freeze limoncello tiramisu for up to three months. Just wrap them in plastic wrap twice and then put them in a freezer bag.
- Thaw: To thaw, place your frozen tiramisu in the fridge overnight.
More no-bake desserts you should try:
Recipe tips:
- It is important to let your limoncello tiramisu sit in the fridge for at least four hours before serving to let everything soak into the cookies. However, 12 hours or overnight is better.
- To make a thicker limoncello tiramisu with more layers, use a loaf pan. Then, you will probably need three or four layers of both cookies and cream, making a sweet indulgence. My family gave this version 5 stars!
- Before using the mascarpone cheese, let it sit out until it is at room temperature. That will make it softer and easier to mix.
- The same with your eggs. Everything blends better at room temperature.
- If you do not have fresh lemons, you can use one half cup of lemon juice instead.
- Similarly, if you are out of powdered sugar, you can use granulated sugar. The recommended recipe is one cup of granulated sugar for 1 3/4 cups of powdered sugar.
- Although it is best to use a ceramic baking dish, you can substitute it for a baking pan of about the same dimensions
Loved this recipe? I’d love to hear from you! 💛 Leave a 5-star rating ⭐️ in the recipe card below and share your thoughts in the comments - I read and appreciate every single one!
Let’s stay connected! Follow me on Facebook, Instagram, Pinterest, and YouTube for more delicious, sweet and savory recipes. Have a question? Ask in the comments, and I’ll be happy to help! 😊 with love Catalina!

Limoncello Tiramisu
Ingredients
- 1 box of Ladyfinger biscuits you will need about 32
- 1 1/2 cups lemon curd or more - to taste
For the cream:
- 5.1 oz packet of Instant Vanilla Pudding Mix
- 3 cups milk
- 2 cups lemon curd or to taste
- 2 lbs mascarpone cheese room temp
- 1 cup powdered sugar
- Juice of 1 lemon
Dipping mixture for Ladyfinger:
- Juice of 1 lemon
- 1 1/2 cups Limoncello for less alcohol use half lemonade
Instructions
To make the cream:
- Mix instant pudding with milk until thick and creamy, about 5 minutes.
- Stir in the lemon curd, you can add 2-3 cups, depends how lemony you want the cream.
- In a large bowl, using an electric beat mascarpone and powdered sugar until creamy and combined. Add lemon juice and mix. Scrape the sides and bottom of the bowl a few times.
- Fold in the pudding mixture, stirring with a rubber spatula, until fully combined.

Assemble the cake:
- Dip the lady fingers into the Limoncello mixture, and arrange them on the bottom of a 9x9 baking dish. Top with half of the cream mixture. Repeat.

- Pour and spread 1 1/2 cups lemon curd on top of the cake and refrigerate overnight.

- Serve and enjoy!
Nutrition








This looks so good! I love lemon, and I think this is such a great adult version of tiramisu. Fantastic!
Looks impossible to resist! I would love to make this!
This looks really good; I would love to make this for one of my holiday parties’ thanks for sharing.
No doubt why this recipe is viral! It is so good and delicious!
Yes please, I just love lemon desserts. This one looks so good!
That looks so yummy. I’ve never heard of lemon Tiramisu!
I am drooling over the photos. The lemon sounds so delicious.
I’m not a huge fan of tiramisu but I love anything lemon. I’d love to try this!
I really love lemon desserts and this looks absolutely delicious and perfect!
Oh my! I would really love to try this awesome and interesting recipe! It look so good
Love this twist on limoncello! I can’t wait to try this!
What a zesty new twist on tiramisu, I’m not a fan of coffee but this I’ll absolutely do!
I like lemon any time of the year, but especially during the summer months. And yes, to the whipped cream!
oh my! lemon flavors, tiramisu, — you had me at that itself.. i am going to try it this summer for sure (or have my teenager – who loves to bake – try this for us)
That dessert looks so yummy and delicious that I will have to try that soon!
Limoncello sounds so wonderful. What a great citrus recipe. Perfect for a summertime dessert.
This looks so good. I’ll have to make it for dessert one night.
This sounds absolutely divine! I love lemon