
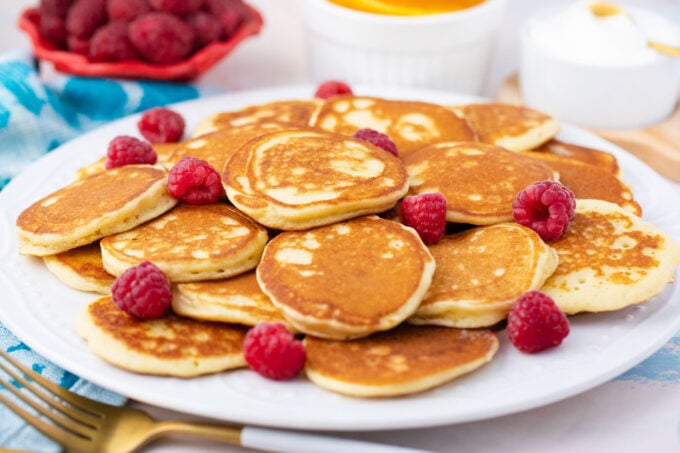
Mini Pancakes or Silver Dollars
I know that when I make these mini pancakes, also known as silver dollars, I am declared the best mom ever. My kids love to find these in their lunch boxes, they are cute, fluffy and tender, and it takes me just 20 minutes to make them. The best part is that they can be served with either sweet or savory toppings.

This recipe is so easy that anyone can make it from scratch. The size of these silver dollars is ideal for a lunchbox meal, and I usually pack them along with favorites like Tuscan Chicken Pinwheels or Spinach Ricotta Stuffed Shells!
Table of contents
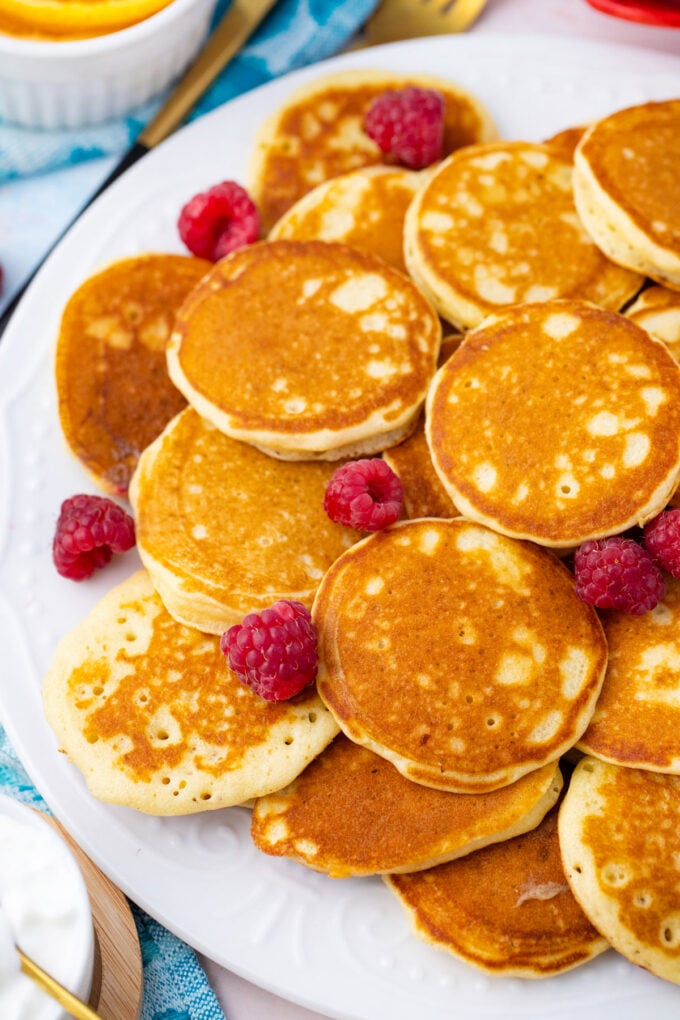
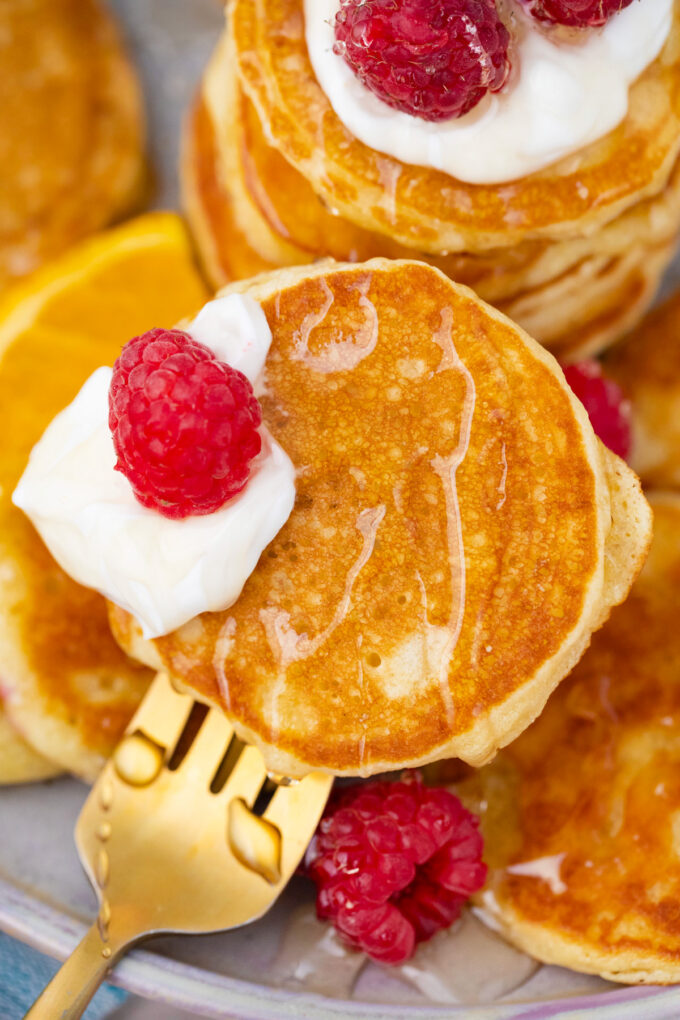
The bite-sized pancakes are like adorable appetizing treats. I love having them for breakfast or serving them as an afternoon snack to the kids, with fresh apple slices, jam, and peanut butter. They freeze well, so I double the recipe and make some extras for later. They also save me when I host last-minute parties, as they can be used to create single-serving appetizers. For example, I spread some herbed cream cheese on the pancakes, topped them with a cooked shrimp or smoked salmon, a slice of a dill pickle, and some hot sauce! In an instant, I have delicious party food ready to serve!
Why you will love this recipe
- They’re perfect for kids: They are the perfect finger food for everyone from toddlers to seniors! It is hard to resist these little cakes, no matter who you are.
- Appetizers and dippers: I like to serve them as appetizers with a variety of dips from sweet to savory. My guests can choose what they want to use. I prefer sweet dips, but some people dip them in hot sauce or ranch dressing!
- Quick and easy: It only takes me 20 minutes and a few ingredients to whip up these pancakes, and I can make enough to serve a whole crowd. I like to make extras and freeze them in small portions to use whenever I want.
- They’re so versatile: they can be customized however I want. Gluten-free, dairy-free, full of fruit, sprinkled with nuts, or even drizzled with caramel or served part of a savory charcuterie board with butter, salmon lox, and caviar.
What you will need
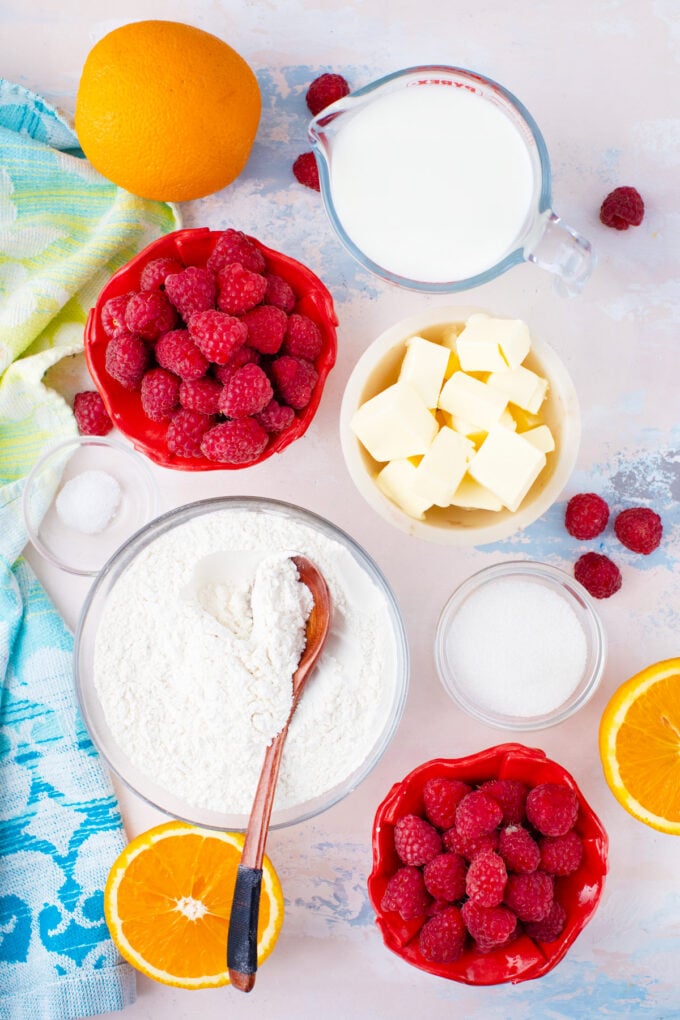
- Dry ingredients: I use all-purpose flour because it has just the right amount of gluten for good structure and light and fluffy texture. Baking powder provides the essential leavening that creates bubbles when mixed and again as it heats, making the pancakes both tall and light.
- Wet ingredients: I use milk to give the pancakes a rich, tender, flavorful, moist batter. It also helps bind the ingredients. The egg provides structure and moisture while helping whip air into the batter. Melted butter makes the batter richer and smoother and helps with browning.
- Seasonings: White granulated sugar allows the edges to become crisp while providing a clean, fresh sweetness. Salt enhances the flavors of the other ingredients, keeping the pancakes from being bland.
How to make
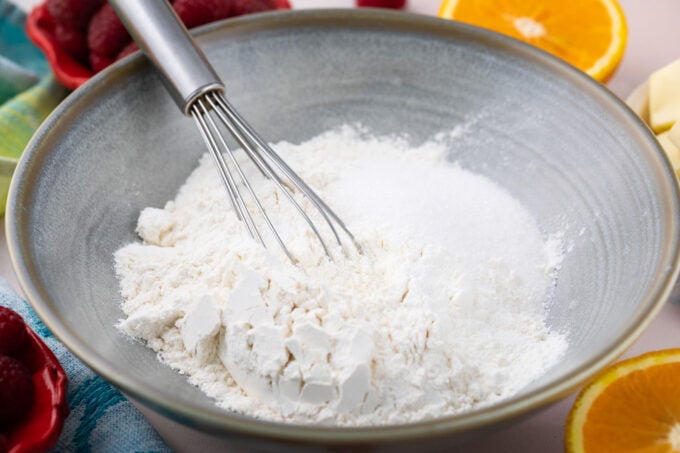
Sift the dry ingredients: First, I sift the flour, baking powder, sugar, and salt together in a large bowl.
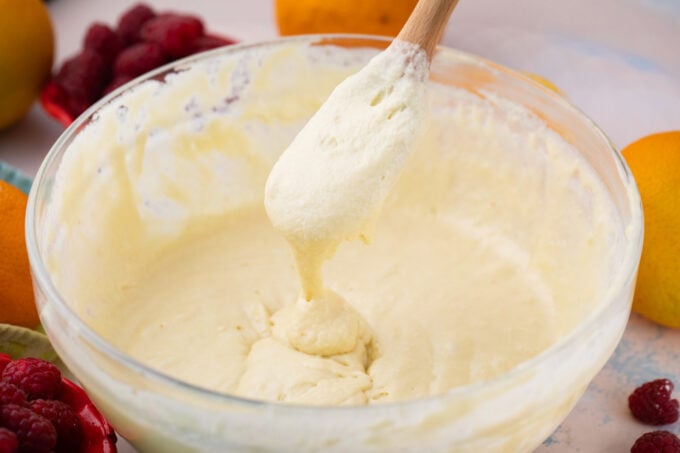
Mix in the wet ingredients: Now, I make a well in the middle and pour in the milk, melted butter, and egg. I whisk this together by hand just until there are no more lumps of dry flour. Then, I let the batter rest for 20 minutes so the flour can hydrate and the baking powder can activate.
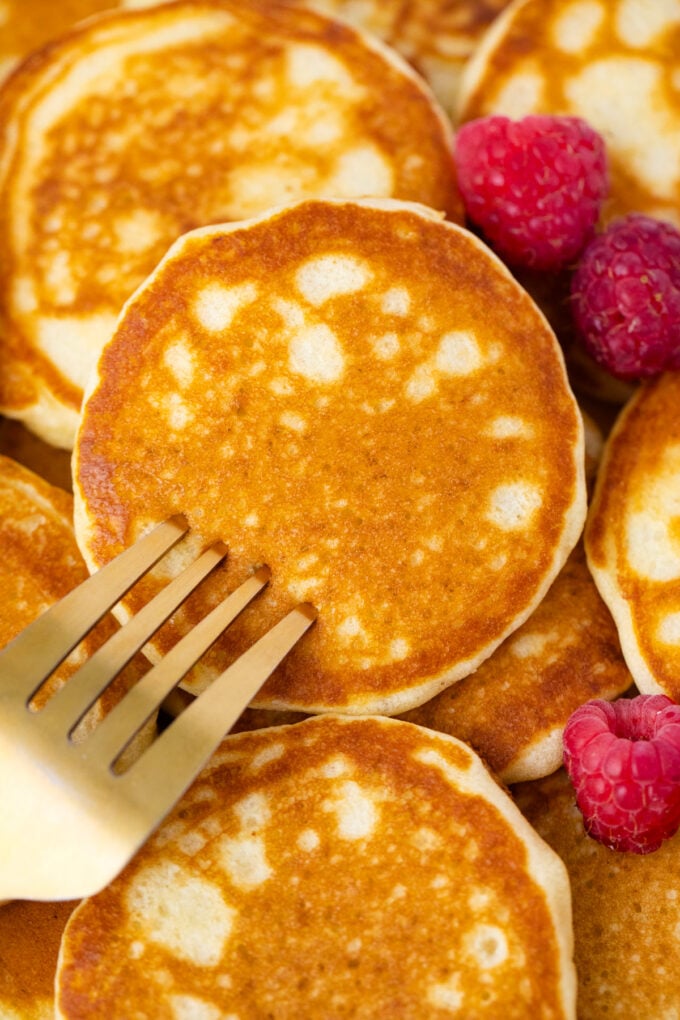
Cook the pancakes: I heat the griddle over medium heat with oil, then scoop out a small amount of batter for each pancake. I use about ¼ cup. I let it cook on one side until the edges are dry and the bubbles on top are popped.
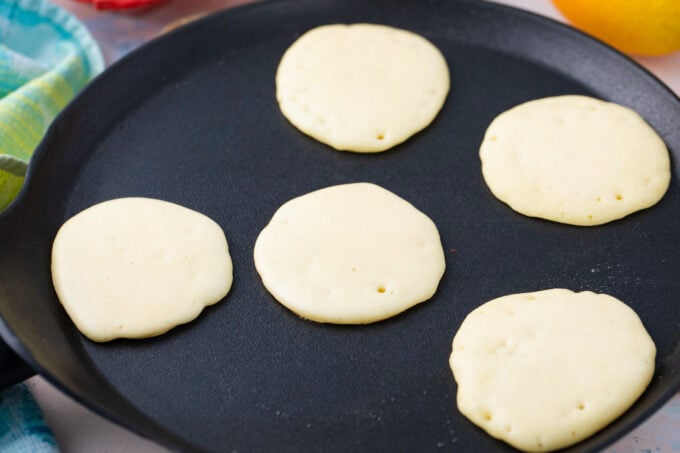
Flip: Then, I flip it and cook for another 20 seconds.
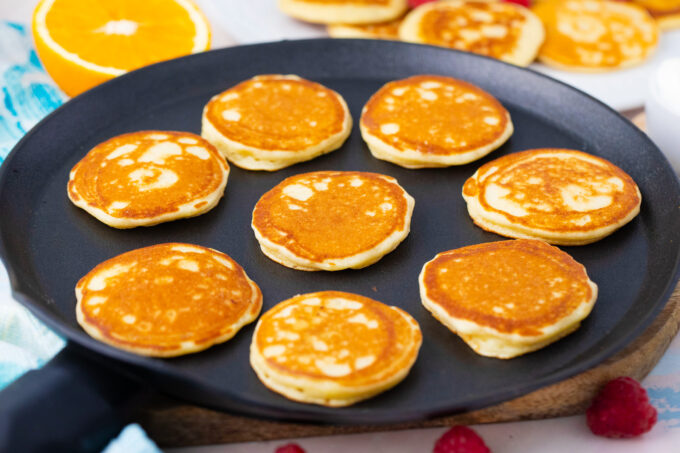
Serve with toppings: Afterward, I remove them and serve them with my favorite toppings.
Expert tip
The best pan for cooking pancakes
The best pan for making pancakes is an electric griddle. Especially if it is made of aluminum or cast iron for even heat distribution. A griddle is great because it is perfectly flat and has low sides, making it easier to flip. Non-stick surfaces are wonderful, but I really like cast-iron skillets. Ceramic is a favorite for most people. But the most important thing to remember is to use enough butter and keep the heat at medium-low so the middle cooks before the edges burn.
More tips to consider:
- Use room temperature eggs and milk to make mixing a breeze.
- Put the batter in a squeeze bottle or a baggie to create the pancakes. It is so much easier.
- Be sure to let the batter rest for about 20 minutes before cooking to let the flour hydrate.
- Flip the cakes when the edges are dry and the air bubbles on top start popping. Then, cook for just 20 more seconds.
- Wipe the pan between batches to prevent the pancakes from turning out dark.
Recipe variations and add-ins:
- Chocolate chips: I always make at least one batch of these with mini-chocolate chips. Because I have a lot of chocolate lovers in my family, including me.
- Berries: Sometimes, I add some blackberries or raspberries. They should be chopped small enough to keep from taking up too much room.
- Go nuts: When I add nuts, I make sure to chop them up well because the pancakes are so small. My favorites are walnuts or pecans.
- Savory silver dollars: Make these savory by adding some spinach, garlic, and cheddar cheese, and topping them with bacon.
- Cajun pancakes: If you’ve ever had pancakes down south, these may have been a favorite. Just add a little Cajun seasoning to the batter, and they have that down-home Cajun flavor.
- Caramel sauce: Who needs syrup when you can just drizzle some of my homemade caramel sauce on top? It is easy to make with only 3 ingredients!
Serving suggestions:
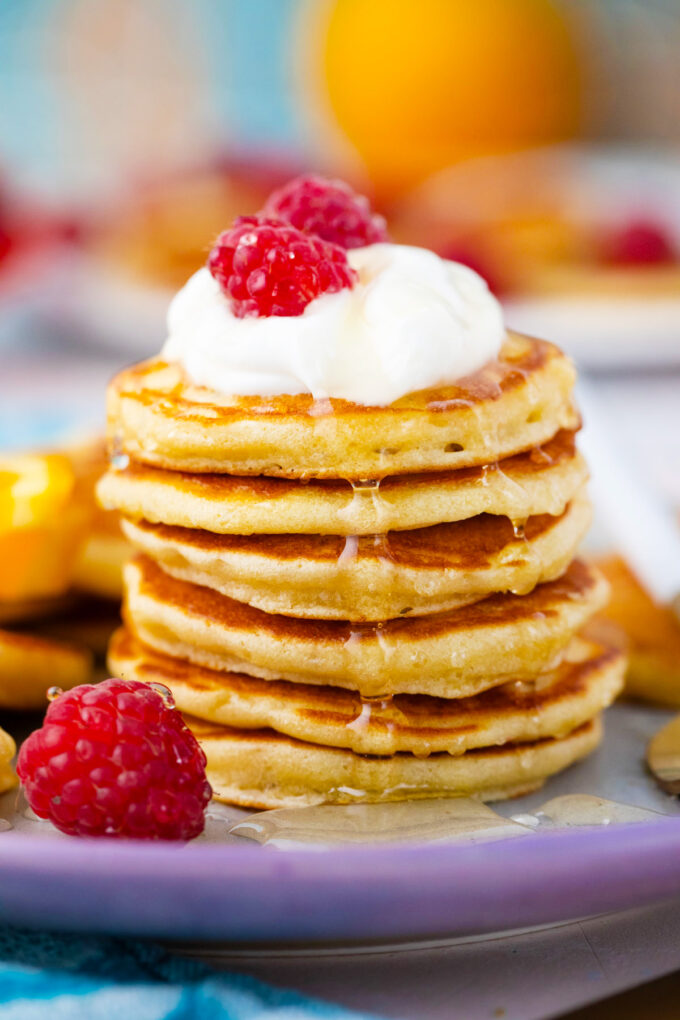
These pancakes are so small and fun that they can be served as appetizers, dippers, and even cereal. I like to put them in my children’s lunches with some Nutella or their favorite jam for a fun lunch surprise to go with some fresh fruit and veggies. They can also be served with maple syrup and butter for a delicious breakfast or brunch. Try them with my sweet whipped strawberry butter or tangy homemade blueberry butter.
When I serve these for breakfast, I often serve them with scrambled eggs and bacon or sausage. This sausage, egg, and cheese breakfast burrito is one easy way to put it all together. I usually make a double batch to have some extra for lunch because they are so delicious. They’re really easy to make in minutes, and the kids can take them on the go. For something sweeter, I have been making this new viral recipe for Dubai chocolate overnight oats. The kids really love it and so do I!
How to store leftovers:
- Refrigerate: I keep leftovers in an airtight container separated by parchment paper, so they don’t stick together. They will stay fresh in the fridge for a week.
- Freezing: I flash-freeze my pancakes on a baking sheet for about an hour, then put them in a freezer bag to keep them from sticking together. They will stay fresh for 3 months in the freezer.
- Defrost: I thaw them overnight in the fridge before reheating.
- Reheating: I reheat them on the stove for just a minute or pop them in the toaster. The microwave makes them chewy.
Frequently asked questions
Pancakes are usually not fluffy because the batter was overmixed. To get the batter just right, mix it just until you can no longer see the flour, but don’t keep mixing until it is smooth. It should be slightly lumpy. But not so lumpy that it still has dry clumps. Not having the pan hot enough is another reason because the batter will spread out too much and not rise fast enough.
One important thing is to make sure the baking powder is not expired. It should be less than 6 months old to make enough gas to lift the batter properly. Also, make sure the batter is thick enough. If it is too thin, it will not rise. Finally, be sure to let the pancake batter rest for 10 to 20 minutes so the flour hydrates and the baking powder activates. This gives the pancakes more rise.
They either have too much flour, or they were mixed too much. First, sift the flour. Then, make sure the flour is measured correctly. I only use the spoon-and-level method. Use a tablespoon to gently spoon the flour into the measuring cup and then level it with the back of a knife. Overmixing is also a problem because it produces too much gluten. Gluten is what causes the chewiness.
The pan’s temperature is key to cooking your pancakes perfectly. They should be cooked over medium-high heat if using a heavy cast-iron pan, or over medium heat for regular non-stick skillets. Keep the heat at a steady low to medium temperature so the middle cooks through before the edges burn. Also, use oil with the butter if the butter starts to burn the edges, because oil has a higher smoking point.
More delicious pancake recipes:


Loved this recipe? I’d love to hear from you! 💛 Leave a 5-star rating ⭐️ in the recipe card below and share your thoughts in the comments – I read and appreciate every single one!
Let’s stay connected! Follow me on Facebook, Instagram, Pinterest, and YouTube for more delicious, sweet and savory recipes. Have a question? Ask in the comments, and I’ll be happy to help! 😊 with love Catalina!
Mini Pancakes or Silver Dollars
Ingredients
- 1 1/2 cups all-purpose flour
- 3 teaspoons baking powder
- 1 teaspoon salt
- 2 tablespoons white granulated sugar
- 1 1/4 cups milk whole
- 1 egg room temperature
- 3 tablespoons butter melted
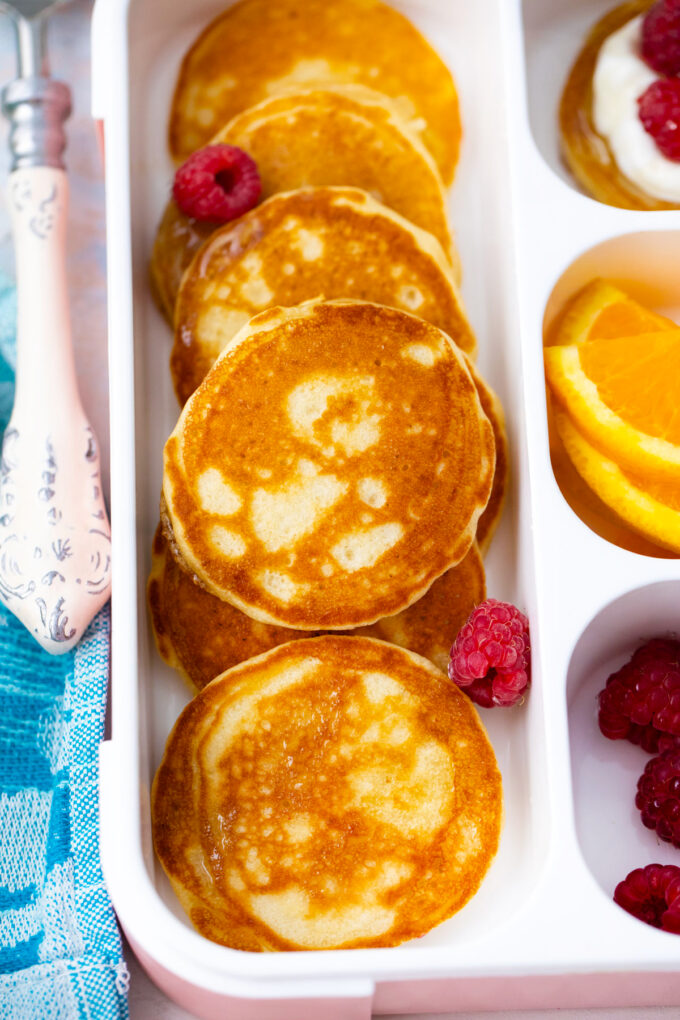
Serve with:
- Berries
- Orange slices
- Yogurt
Instructions
- In a large bowl, sift together the flour, baking powder, salt, and sugar.
- Make a well in the center and pour in the milk, egg, and melted butter. Whisk by hand until smooth.
- Heat a lightly oiled griddle or frying pan over medium-high heat.
- Scoop the batter onto the griddle, about 1/4 cup for each pancake.
- Brown on both sides for just a few minutes.
- Serve hot or pack for later in a lunch box.
- These also freeze well.
Video

Notes
The best pan for cooking pancakes
The best pan for making pancakes is an electric griddle. Especially if it is made of aluminum or cast iron for even heat distribution. A griddle is great because it is perfectly flat and has low sides, making it easier to flip. Non-stick surfaces are wonderful, but I really like cast-iron skillets. Ceramic is a favorite for most people. But the most important thing to remember is to use enough butter and keep the heat at medium-low so the middle cooks before the edges burn.More tips to consider:
- Use room temperature eggs and milk to make mixing a breeze.
- Put the batter in a squeeze bottle or a baggie to create the pancakes. It is so much easier.
- Be sure to let the batter rest for about 20 minutes before cooking to let the flour hydrate.
- Flip the cakes when the edges are dry and the air bubbles on top start popping. Then, cook for just 20 more seconds.
- Wipe the pan between batches to prevent the pancakes from turning out dark.
I could eat 50 of these. Since they are mini that means I could eat more.
Pancakes of any shape or size are one of my favorites for breakfast. These mini pancakes are so cute.
My daughter gets such a kick out of tiny things! She is going to love these silver dollar pancakes!
This is such a great idea! So cute and delicious!
These are so cute and adorable! I can’t wait to make these!
Made these with my kids and they absolutely loved it and had a blast!
These are adorable and such a fun change from regular pancakes. They were easy to make and taste delicious!
These look absolutely delicious! Yummy! My family definitely love these silver dollar pancake!
These mini pancakes are SO adorable! My kids would really LOVE these!!
My kids go crazy for these! Love how tasty they are too!
These are my kids’ new favorite!
Replace whole milk w/ buttermilk.