Last updated on November 18th, 2021 at 02:52 pm
Jump to RecipeCherry Pie Filling Recipe [Video]
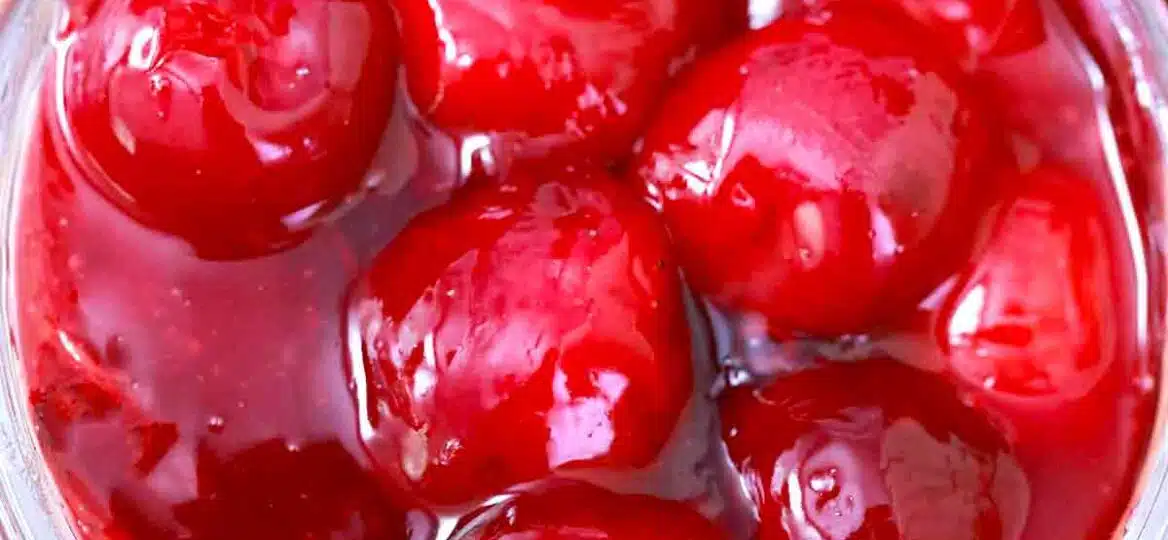
Cherry Pie Filling is prepared with cherries, lemon juice, sugar, cornstarch, and almond extract. It takes 5 ingredients and about 20 minutes to make! Use it to fill pies, cakes, and other desserts.
Whether you are making a cherry pie or some other fantastic dessert dish, this recipe is simple and easy to execute. Use it to make this Lemon Cherry Cheese Danish for breakfast for the family or try making these Cherry Bars with it. You can also include it in this Coffee Cake Recipe to serve at the next picnic or barbecue. This recipe is great to have on hand as it makes a great dessert on its own or used as a topping.

Homemade Cherry Pie Filling
Even if you are not making pie, this filling is an excellent addition to many other treats from sweet to savory. It does not have to be a dessert dish since cherries go well with pork and chicken as well. In fact, this cherry sauce pork chops & cherry salsa recipe would taste even better with a bit of this filling mixed in. Or just spread it on some toast for breakfast on the go.
Not only is this recipe delicious, but it is also super easy with only a few ingredients. And it only takes 15 to 20 minutes tops. This would be a fantastic choice to use on holidays to top cookies and muffins, fill crepes, or offer as a topping for ice cream.
Cherry cheesecake is also a delicious way to sweeten up any meal. We will also provide canning instructions so you can make some for later. Just make a larger batch, and use it whenever you want.
Make the filling from scratch with fresh fruit or with frozen pitted cherries! Actually, if you decide to make it using fresh fruit, make sure to have on hand a cherry pitter.
 Follow us on Pinterest for more delicious recipes!
Ingredients needed:
For the exact measurements, please check the recipe card below. Here is what you will need:
- Fresh cherries: Washed and pitted. Actually, bing and rainier cherries are the best.
- Fresh lemon juice: Squeeze it yourself or if you don’t have fresh on your hands, use store-bought.
- Lemon zest: Or substitute with lemon extract or dried lemon peels.
- Granulated sugar: Use a sugar blend if you want less sugar.
- Cornstarch: If you do not have cornstarch, try potato starch.
- Almond extract: This is optional but if you want some flavor and are out of almond extract, use vanilla instead-but double the amount.
How to make cherry pie filling from scratch?
- Combine: First, use a saucepan on medium heat to blend the cornstarch, sugar, lemon zest, lemon juice, water, and bing cherries.
- Boil: Once the sauce comes to a boil, turn down the heat to low and keep cooking for another 10 minutes. Remember to stir frequently.
- Add: Finally, if you are using the extract, stir it into the sauce and let it cool.
- Store: Lastly, if you have any leftovers, store them in the refrigerator for three days in an airtight container.
- Freeze: Also, this mixture is very easy to freeze. Actually to freeze it, first, just let it fully cool. After that add it to a freezer-safe Ziploc bag or sealed container and after that freeze for up to 3 months.
- Defrost: Now, in order to defrost it, just leave it in the refrigerator overnight. Stir before using.
Recipe variations:
- Use a different extract: Try orange or peach extract for a slightly sour flavor.
- Add another fruit: Toss in some blueberries, blackberries, apples, or peaches for added flavor.
- Make it sour: Use tart cherries or sour cherries or add more lemon zest to the mix for a sour twist. In this case add more sugar.
- Spices: Also, you can always use different spices like cinnamon, brown sugar, or other seasonings.

Cherry Pie Filling Canning Instructions:
- Make the mixture: First, follow the steps and prepare the recipe and after that let the mixture cool to room temperature.
- Water bath: In the meantime, after selecting the jars you will be using, fill a large pot with enough water to cover them by 1-inch.
- Prepare the jar: Next, remove the rings and take the lids from the jars. Prepare a medium bowl to have on hand and also place another medium pot with water over medium-high heat. Once the water is boiling, place the jars into it, cover, and boil for 10 minutes. Also, take some of the boiling water and pour it on top of the lids. Next, let them stand in the hot water for 5 minutes. After that remove the jars and the lids and place them on a clean kitchen towel to dry out.
- Add the mixture: Afterwards, distribute the mixture into the prepared jars, and after that add the lids and rings.
- Boil: Next, add the closed jars to the prepared water bath and boil for 5-6 minutes.
- Cool and Store: Once done, remove from the water bath and arrange them on a dry kitchen towel. Also, remember to let the jars rest undisturbed for 12 hours. In the meantime, listen for the jars to pop. If they pop, it means everything is good and you can store it in your pantry, it has been canned! But in case it doesn’t pop, it means the filling will stay good in the jars in the fridge for up to 2 weeks.
How to serve:
- Make a cherry pie! For that, just follow this Blueberry Pie Recipe, make a homemade pie crust, and use the cherry pie filling. A homemade lattice pie crust will be amazing with this recipe.
- Making a cobbler is another great idea, just follow the recipe for this Strawberry Cobbler and replace the fruit layer.
- Another delicious way to serve it is by making a cherry crisp, just follow this Blueberry Crisp Recipe and substitute the filling.
- Add it to the top of these grilled peaches.
- Mix it into peach jam.
- Spread it on cupcakes instead of frosting.
- Make tarts for breakfast or snacks.
- Add this to yogurt or smoothies for a cherry flavor boost.
- Fill or glaze these air fryer donuts.
- Add it on top of waffles, french toast, or pancakes.
- Keep in mind that it also makes a great topping for cheesecakes! We love adding it to our Cheesecake Factory Original Cheesecake!
- Don’t miss out and make this Black Forest Cake with the homemade filling.
- Use it on this 5 Ingredients Chocolate Cake or on this Instant Pot Chocolate Cake.

Frequently asked questions
Why do you add vinegar to pie crust?
Adding vinegar to your pie crust can make the dough more tender and flakier. The vinegar mutes the gluten development in the crust to it is flakier and easier to work with. You can use white or apple cider vinegar for this, but the apple cider vinegar will add a touch of flavor to the crust.
How do I make my bottom pie crust crispy?
To make sure the bottom of your pie is crispy instead of soggy, try using a glass pie plate or a metal pie dish with a dull finish. It will also help if you cook it on the bottom rack in the lower third of your oven. This keeps the bottom crust from getting soggy without worrying about the top getting too brown. It may also help to brush the bottom of the crust with egg white.
Is tart crust the same as a pie crust?
The main difference between a pie crust and tart crust is that tarts have just a bottom crust and it is much thicker than a pie crust. You want your tart crust to be tender, buttery with just a bit of sweetness and has a texture similar to shortbread.
Pie crust is flakier and tart crust is more like a cookie. Hence, the tart is baked in a tart pan that has a removable bottom with either straight or fluted sides.
Does canned cherry pie filling need to be cooked?
The store-bought one does not need to be cooked. However, to make it taste better and more homemade, we recommend you cook it for 5-10 minutes. Also, while cooking it, mix in some lemon zest, juice, and almond extract. The cherry almond flavor combo always tastes fancier.

More Summer Recipes:


Recipe tips:
- If the filling is too thin, add more cornstarch and whisk it until it is smooth.
- Conversely, if the filling is too thick, add a bit more water.
- Always use dark sweet cherries in this great recipe if you are looking for a sweeter taste.
- The cornstarch is a thickening agent here, if you want to skip it, you will have to add way more sugar and simmer the mixture until thickened.
- Store cherry pie filling similar to canning fruit by spooning it into glass jars with tight lids. Let it cool before putting it in the freezer, where it will stay good for three months.
- You can use frozen cherries if you do not have any fresh ones.
Cherry Pie Filling
Ingredients
- 6 cups fresh pitted cherries about 3 pounds - or frozen cherries
- 1/2 cup water
- 2 tablespoons freshly squeezed lemon juice
- 1 teaspoon lemon zest
- 1 cup granulated sugar
- 4 tablespoons cornstarch
- 1/4 teaspoon almond extract
Follow me on Instagram
FollowInstructions
Prepare the fruit:
- If using fresh cherries, remove the pits using a cherry pitter.
Combine:
- Place a medium to large saucepan over medium heat. Add to it the cherries, water, lemon juice, zest, sugar and cornstarch. Stir very well.
Bring to a boil:
- Bring the mixture to a boil and after that reduce the heat to low and cook, stirring frequently, for about 10 minutes.
Flavoring:
- If using, stir in the almond extract.
Serve or use:
- Cool slightly before using in a recipee or as a topping.
Nutrition Facts


Enjoy weekly hand picked recipes and recommendations


Comments
(11)Tasheena
Everything Enchanting
Jasmine Hewitt
MELANIE EDJOURIAN